Also, using the Change Palette with issues has some special considerations that are covered in Working with the Issue Change Palette.
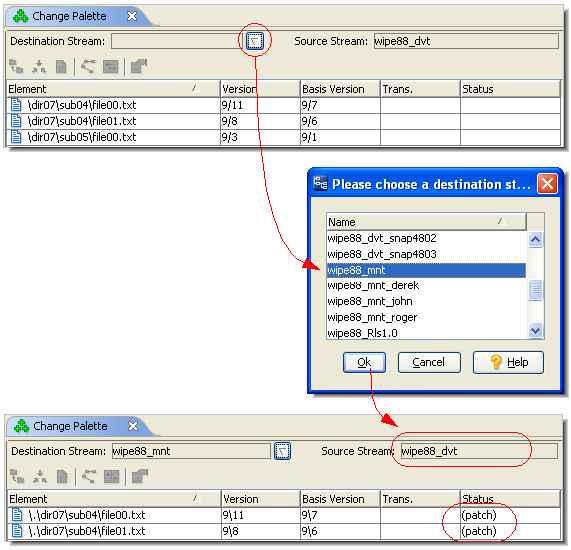
If you've loaded versions into the Change Palette using Send to Change Palette, you've already indicated the source stream, but need to specify the destination stream or workspace. (The drag-and-drop operation indicates both the source and destination.)
A dialog appears, listing all of the depot's streams and workspaces. Select one to be the destination for subsequent commands (Send to Workspace, Promote, Merge, and/or Patch) on the versions in the Specified Versions pane.
As the example shows, AccuRev determines a status for each element, describing the relationship between the source-stream version and the destination-stream version. Entries with (overlap) status are highlighted in yellow.
|
•
|
If the destination is a stream, you can immediately Promote the versions that do not have (overlap) status.
|
|
•
|
If the destination is a workspace, you can immediately Send to Workspace any or all versions, whether or not they have (overlap) status.
|
Select one or more eligible versions, then click the  button in the pane's toolbar or choose Promote (or Send to Workspace) from the selection's context menu. When the command completes, the entry(s) for the version(s) are cleared from the Change Palette.
In the Merged Versions pane, you can Promote versions at any time. The versions are active in the workspace listed in the Merged in Workspace column; Promote sends them to this workspace's backing stream.
In each Promote invocation, the set of versions must all be in the same workspace.
If an entry in the Specified Versions pane has (overlap) status, you cannot immediately promote the version to the destination stream. First, you must create a new version by merging the source and destination versions.
The merge operation must take place in a workspace that belongs to you and is based on either the source or destination stream. If you have not already selected a merge workspace, you must do so before performing any merges. (See Merging the Source and Destination Versions.)
Select one or more versions with (overlap) status, and click the  button in the pane's toolbar or choose Merge from the selection's context menu.
Note: If the merge workspace was not up-to-date, it's possible that the element will continue to have (overlap) status after the merge. In this case, perform a standard Merge in the workspace before promoting the element.