Creating a Query
You can use the procedure described in this section to create a query from either the New Query tab or the Query Editor. The query building tools are the same in both of these interfaces.
-
Click the
New Query button
 on the main toolbar.
The
New Query tab appears. Alternative: In the
Query Browser, click the
New Query button
on the main toolbar.
The
New Query tab appears. Alternative: In the
Query Browser, click the
New Query button
 . The
Query Editor appears.
. The
Query Editor appears.
-
Use the query builder to create new clauses for the query:
-
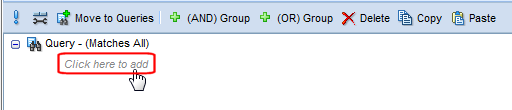
Click the
Click here to add link.
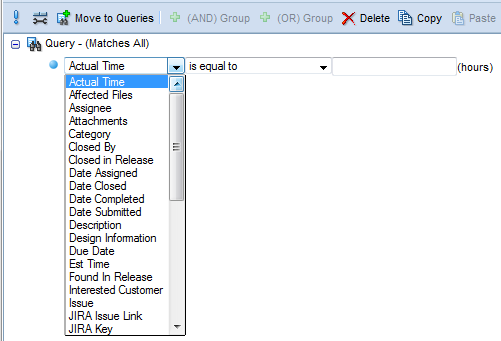
AccuWork displays a template for the clause. Use the list to choose the issue field you want to use to construct your first clause:
 Tip: Each time you click Click here to add, a new Click here to add link is added so that one is always available at each level of the query.
 -
Use the template to create the simple and compound clauses you want for your query. See
Working with the Query Builder.
Note: Simple clauses at the top level of the query use AND together by default. Meaning: an issue in the depot must satisfy all of the clauses you specify in order to be returned by the query.
-
When the query is complete:
- If you created the query in the
New Query tab, click the
Run button
 . Results are displayed in the
Results pane.
. Results are displayed in the
Results pane.
- If you created the query in the Query Editor, click the Ok button to save your work. The query runs automatically and displays its results in the Query Browser.
- If you created the query in the
New Query tab, click the
Run button
- Review the query results. If necessary, modify the query and run it again. See Query List Pane to learn about sorting, filtering, and graphing query results.
-
If you created the query in the
New Query tab and want to use it in another session, click the
Move to Queries button
 .
.
The query is moved to the Query Browser. It is selected by default.
-
Click
Save
 .
.