Specifying a Time Period
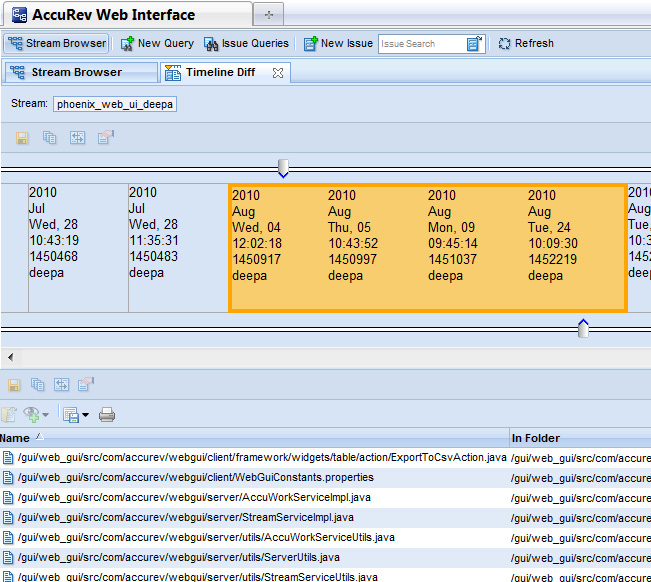
When you select a stream or workspace from the StreamBrowser for the Timeline Diff operation, AccuRev displays the Timeline Diff tab. The top of the Timeline Diff tab displays a table listing all the transactions associated with that stream or workspace. Transactions are listed in chronological order (oldest to most recent). Information about each transaction includes a timestamp, transaction number, and username. By default, AccuRev highlights only the most recent transaction.
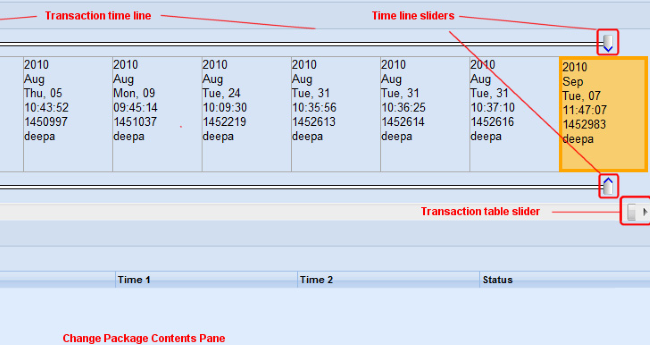
The Change Package Contents pane is empty because no time period has been specified. To specify a time period, you need to select two transactions. AccuRev bases the start and end times for the time period on the timestamp associated with the transactions you select.
There are several ways to select a transaction in the Timeline Diff tab:
- Click the transaction
- This implicitly starts (or ends) the time period with the time associated with the transaction. Note that all the transactions between it and the currently selected transaction are selected automatically. AccuRev searches all selected transactions for changed files.
- Click a time line slider rail
- AccuRev selects the transaction above (or below) the place on the time line slider rail you clicked.
- Drag and drop the time line sliders
- AccuRev selects the transaction above (or below) the time line slider when you release the mouse button.
As soon as you select the second transaction, AccuRev searches all transactions in the time period between the first and last selected transaction, inclusive. Any changed files are displayed in the Change Package Contents pane, as shown in the following illustration: