Create a Repository for GitCentric
A common task you will perform as a GitCentric administrator is creating a new Git repository for use with GitCentric, and optionally, mapping its branches to AccuRev streams. (If you have an existing repo that you wish to register with GitCentric, proceed to
Import an Existing Git Repo on page 31.)
The following procedures assume that:
• You have installed GitCentric as described in the AccuRev GitCentric Installation and Release Notes.
• The AccuRev server that was added to GitCentric during the initial login process is the server that contains a stream that you want to map to a Git branch. If you need to make another AccuRev server known to GitCentric before mapping a Git branch, proceed to
Add an AccuRev Server on page 46, and then return here when done.
To create a new repo:
2. When the GitCentric GUI appears, click the
Administration button, then click the
Repositories menu to display the Repositories page. (See
Chapter 5 Administration for reference information.)
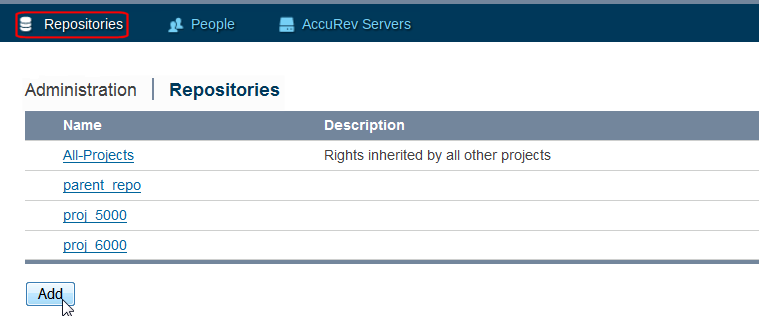
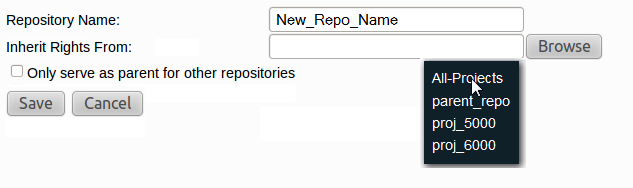
3. Click the Add button and populate the fields in the resulting panel.
• Repository Name: Do not specify a ".git" extension for the repository name. GitCentric adds them on creation.
• Inherit Rights From: By default, new repos inherit their rights from the system-defined “All Projects”.
• Only serve as parent for other projects: Creating a parent-only project means that you can set ACLs on it and they get inherited by all its children. This also makes it easier to change the configuration of a number of repos at one time using the
--children-of option to the
gitcentric config-repo and
config-branch CLI commands (see
Appendix C Command-Line Reference).
4. Click Save when done.
Once a repository is created, you can set general attributes on it, create branches, configure access rights, and map its branches to AccuRev streams, as described in the following sections.