JIRA Users
AccuWork fields are automatically added to JIRA when you install the JIRA plugin. They appear on the
JIRA View Custom Fields page only after AccuSync has performed a synchronization task. You need to ensure that these fields are not editable. There are a number of ways to accomplish this, including making the fields read-only, hiding the fields, or creating an edit screen that does not display them. This last approach is described here. Refer to your JIRA documentation for more information.To remove AccuWork fields from the edit screen in JIRA, you need to:
- Create a custom screen that does not include AccuWork fields.
- Associate that screen with the JIRA Edit operation.
To create a custom screen in JIRA:
- Log in to JIRA as the JIRA administrator.
- Click the Administration tab in the top navigation bar, then choose from the left navigation bar. The View Screens page appears.
-
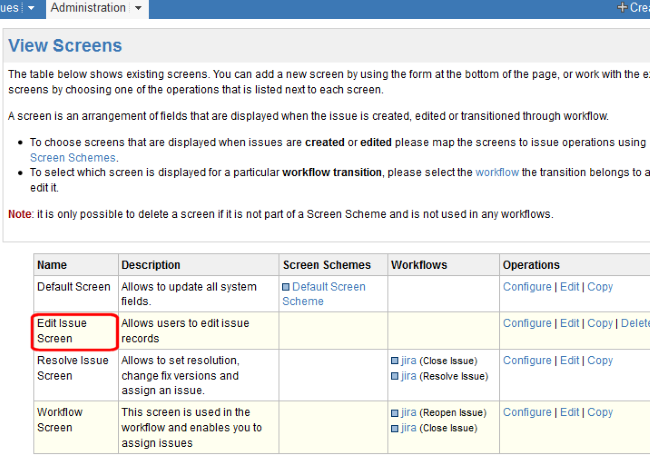
Make a copy of the
Default Screen:
- Locate the Default Screen and click Copy in the Operations column.
- On the Copy Screen page, enter a name for the new screen. (Edit Issue Screen, for example.) You can enter an optional description.
-
Click
Copy to create the new screen.
-
Locate the new
Edit Issue Screen and click
Configure in the
Operations column.
The
Configure Screen page appears.
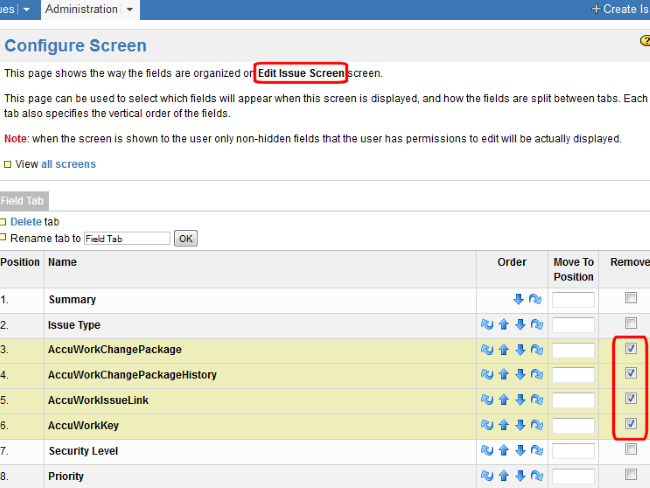
- Locate the AccuWork fields, select the Remove check box for those fields, and click the Remove button at the bottom of the form.
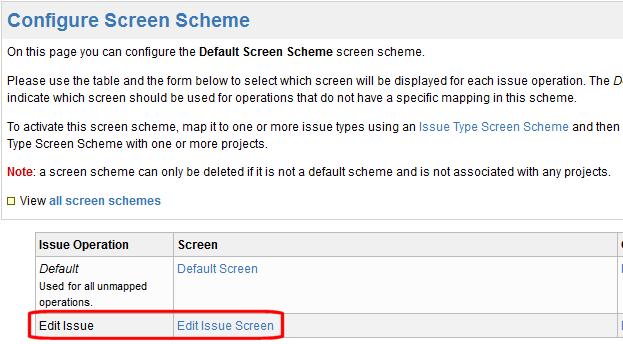
- Now you are ready to associate the new Edit Issue Screen with the JIRA Edit operation. Click the Administration tab in the top navigation bar, then choose from the left navigation bar. The View Screen Schemes page appears.
- Locate the Default Screen Scheme and click Configure in the Operations column. The Configure Screen Scheme page appears.
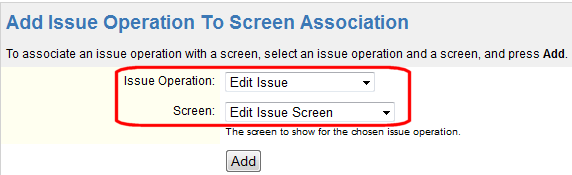
-
Complete the fields in the
Add Issue Operation To Screen Association section as follows:
- For the Issue Operation field, choose Edit Issue.
- For the Screen field, choose the Edit Issue Screen you created in the previous procedure.
-
Click
Add.
The new screen appears in the
Configure Screen Scheme table: