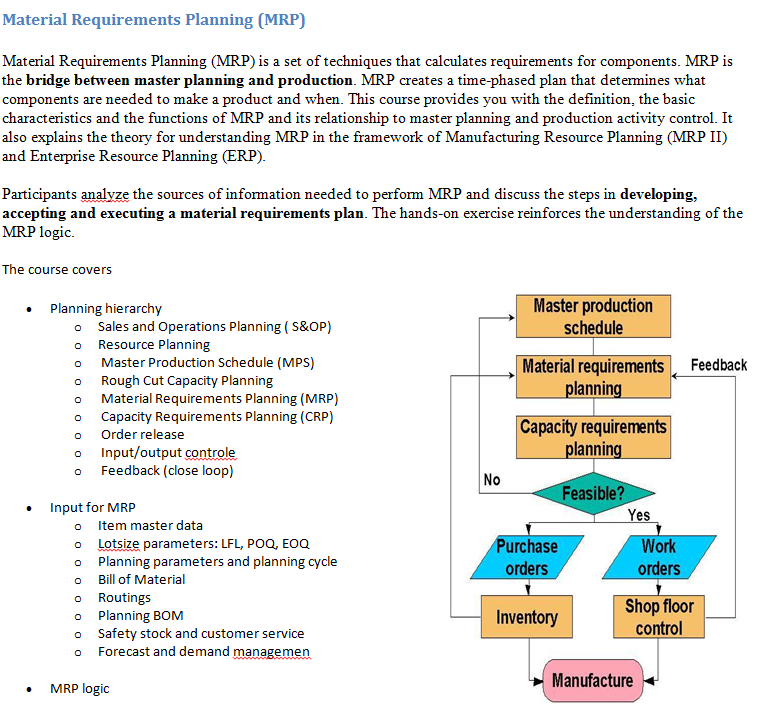
Importing a Word Document to Create Requirements
Atlas reads a DOCX file and creates Requirement names from the file. The DOCX file has to be properly formatted for Atlas to parse the information correctly.
- Heading 2 becomes the Requirement name.
- URLs are carried into the Requirement and are fully functional.
- Bullets, multiple columns, bold, italics, and indenting are flattened in the description of the Requirement.
Word documents do not map to other fields like a CSV file does. Import from Word reads headers and uses them as titles for Requirements. Everything else is placed in the Requirement description. The fields in the Requirement are set to their defaults.
- Click DEFINE.
-
Click
 (Tools) and select
Import.
The
Import Requirements dialog box appears.
(Tools) and select
Import.
The
Import Requirements dialog box appears.
- Click Select and navigate to the file to import.
- Click Import. The information from the file is converted into Requirements and listed in the Requirements Tree. A report appears if there are any import errors or if the import failed due to the errors.
Below is an example of a well-formed Word document:
|
When imported into Atlas, the Requirement is created as follows:

Note that the bold text is now in a standard font. Additionally, the graphic is dropped below the paragraph instead of aligned in a second column next to the text. If you were to scroll further down, the bulleted text will appear on one level with no bullet points in front of the text items, as follows:
|