Editing A Deployment Project
This topic describes the editing interface, and how to edit Azure deployment configuration.
Not all fields will be described in this topic because context-sensitive help is available on all the configuration screens. For the context sensitive help, select the page to edit and click the blue Help button.
- Open the
Enterprise Server for .NET Administration tool.
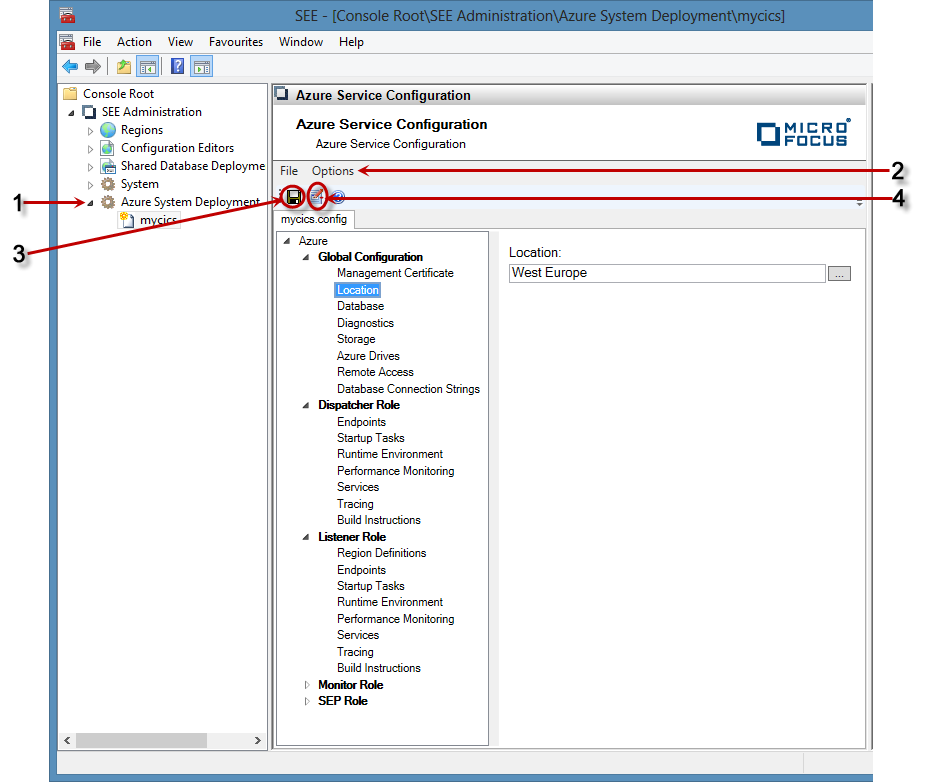
- Expand the Azure System Deployment node in the left pane (1 above). You will be presented with a list of configured deployments
to select from. Select a deployment to work on.
When a deployment is selected, the configuration editor is displayed in the middle panel.
By default, the editor is used in simple mode. Most advanced configuration that normally need not be changed is hidden.
- To activate advanced mode, click the
Options menu item (2 above) and select
Advance Edit Mode.
There is a configuration group for each of the worker roles, and a global configuration group that pertains to all roles.
You can expand each of the nodes, and navigate to the configuration elements that need to be modified.
- If you want to invoke the wizard to take you through the basic configuration process, click
Wizard (4 above).
Changes do not persist until you either click Save (3 above), or use the File > Save menu.