Defining an Azure CICS Region
- If you have not already done so, deploy your region startup file to the cross-region database for your Azure deployment. See Adding Configuration Files to the Cross-Region Database. In the following example, we will use the region name ESDEMO and the region startup file name region_esdemo.config.
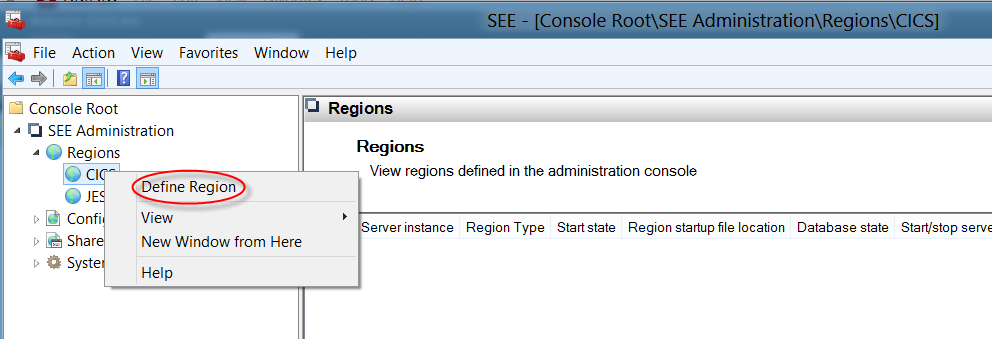
- From the Windows Start menu, click the option to open the Microsoft Management Console (MMC).
- Right-click the SEE Administration > Regions > CICS node in the left-hand tree pane and select Define Region to display the Define Region dialog box.
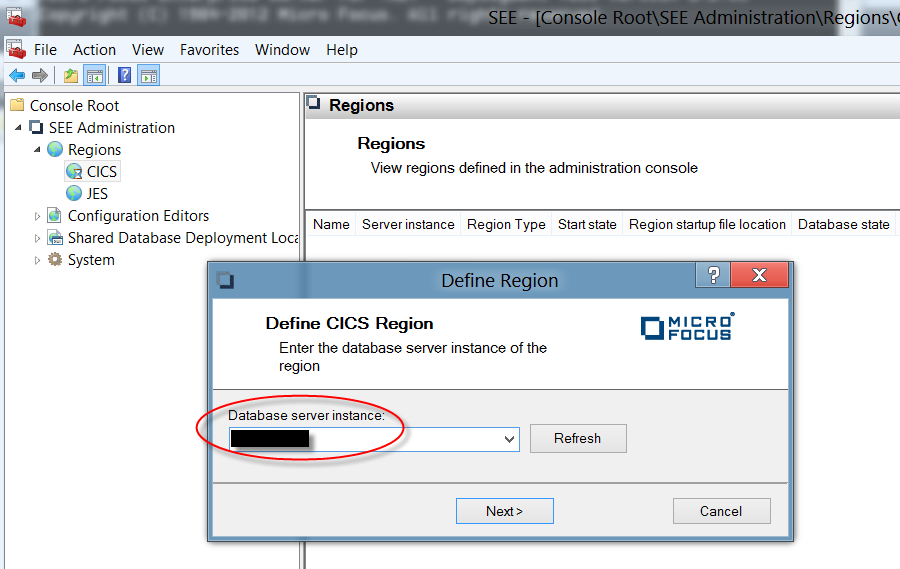
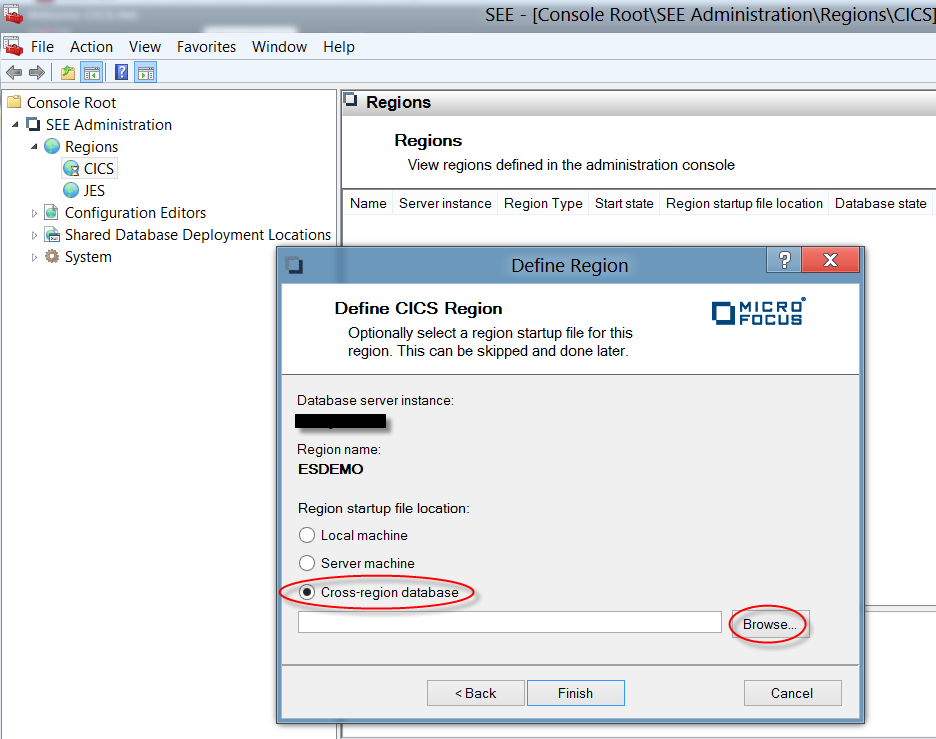
- In the Database server instance field of the Define Region dialog box, type the name of your SQL Azure database instance. Click Next.
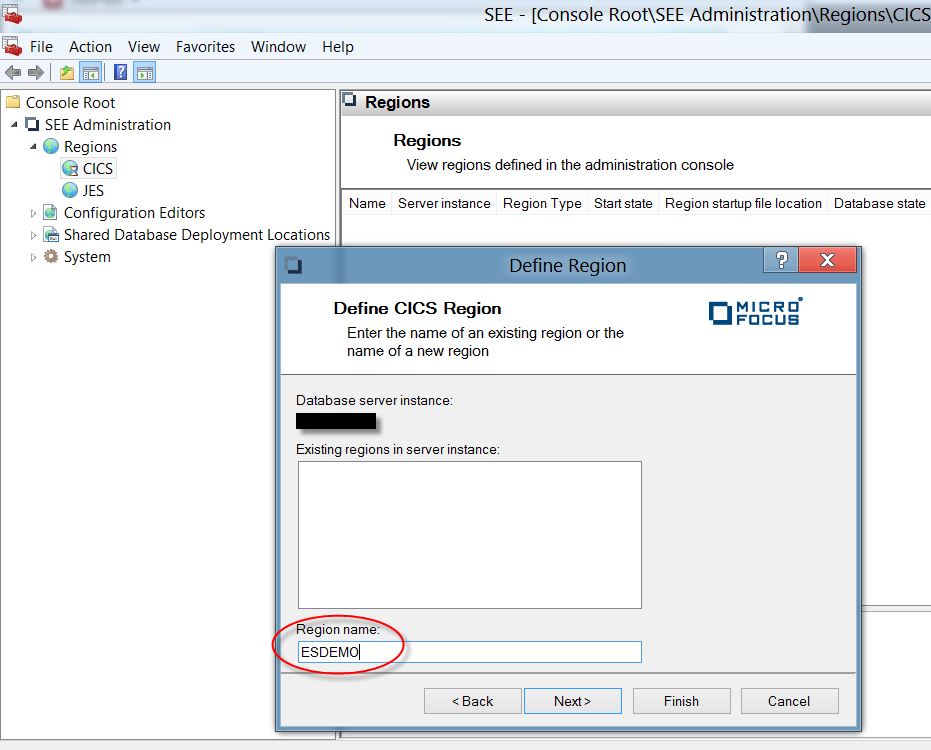
- In the Region name field of the Define Region dialog box, type ESDEMO. Click Next.
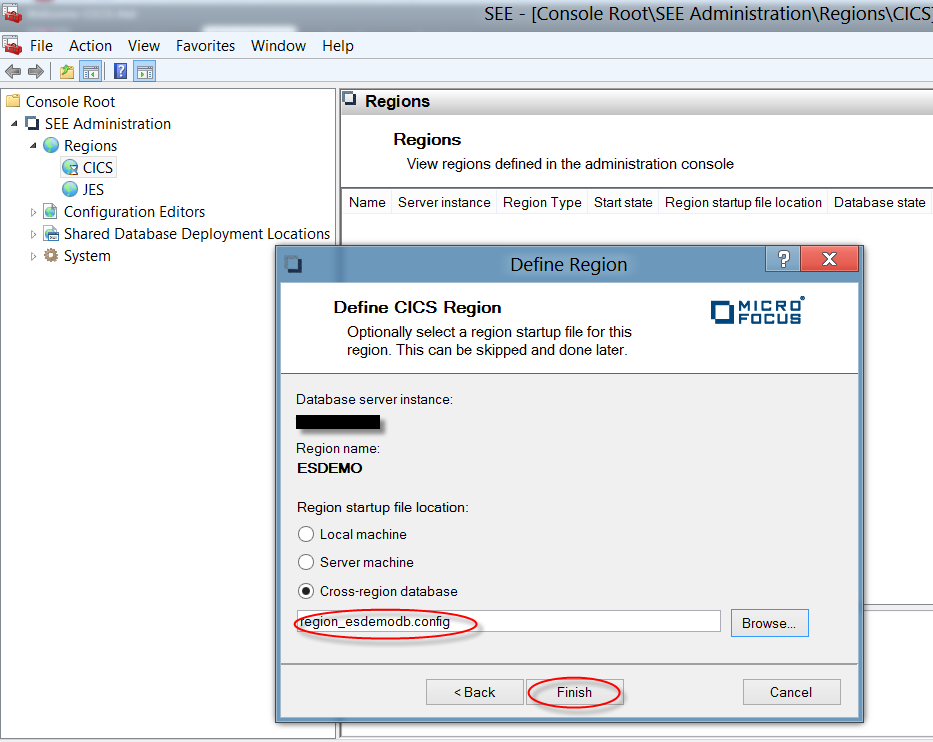
- Click the Cross-region database radio button and click Browse.
The Select Region Startup File dialog box appears.
- Select region_esdemodb.config from the Available region startup files list. This is the name of the region startup file deployed by seedeploy.cmd. Click OK to return to the Define Region dialog box.
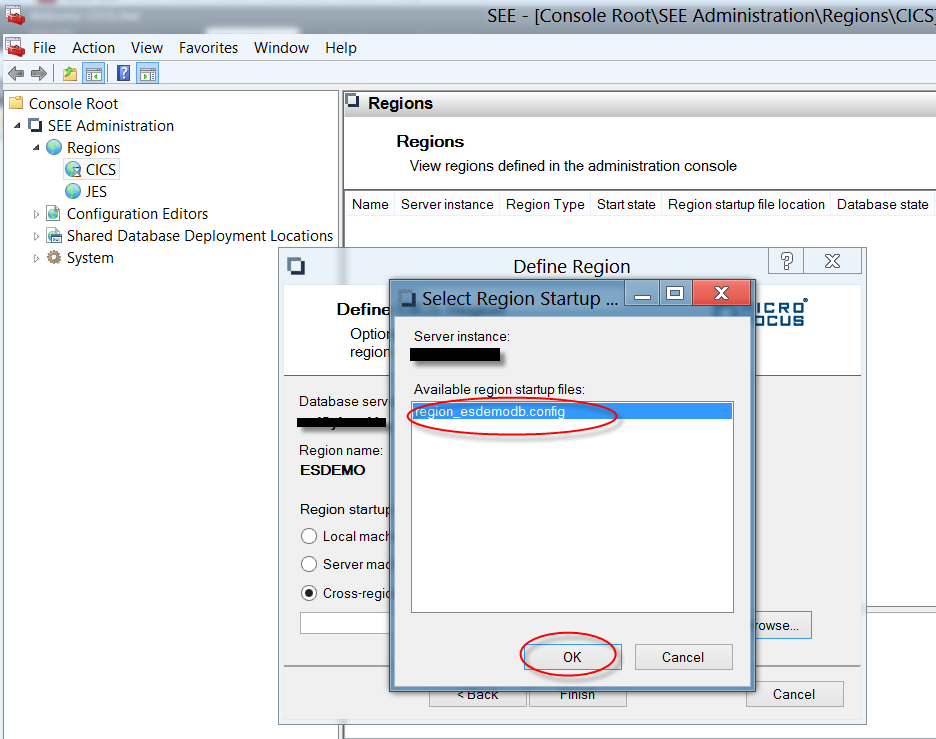
The Region startup file location is set to region_esdemodb.config.
- Click Finish to close the Define Region dialog box.