To Configure Printers in a Running JES Region
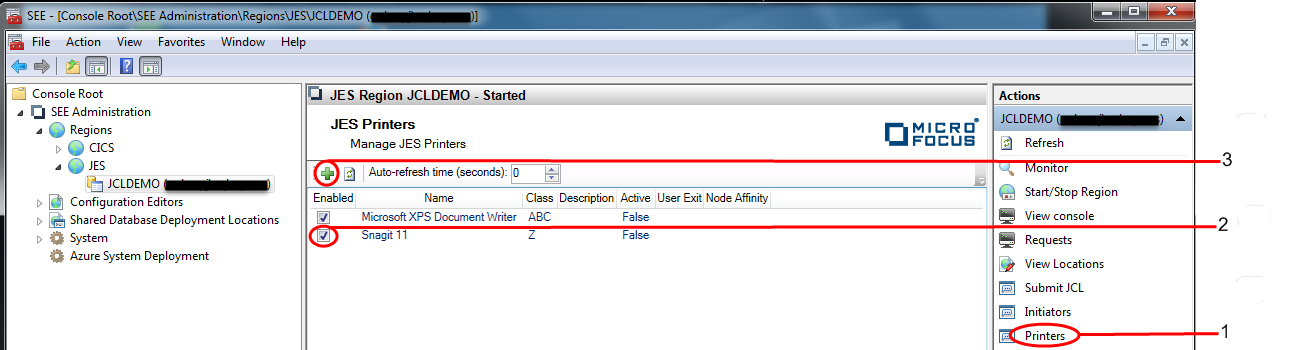
- Select the running JES region from the Tree pane under , and click Printers in the Actions pane. See 1 in the diagram below. The Printers view is displayed in the Results pane, showing each of the printers currently configured.
- A printer may be enabled or disabled by selecting it in the list and checking Enabled. See 2 in the diagram below. If the printer being disabled is currently being spooled to, the print operation is allowed to complete, but no further spooling to it will be allowed until it is enabled again.
-
To create a new printer, click the
Add Printer icon in the toolbar. See
3 in the diagram below.
 The
Add JES Printer dialog is displayed.
The
Add JES Printer dialog is displayed.
-
Enter the name of the new printer, the job classes associated with the printer and a description of the printer in the
Printer name,
Classes and
Description entry fields respectively. The browse button at the end of the
Printer name entry field can be used to browse and select an installed printer as an alternative to you entering the name by hand (see
4 in the diagram below). Select
Enabled if you want the printer to be enabled to print job output when the region starts. If not selected, the printer will be unavailable
to print job output until it is enabled using the
seeout command-line utility or from the
Printers view of the
Enterprise Server for .NET Administration UI.
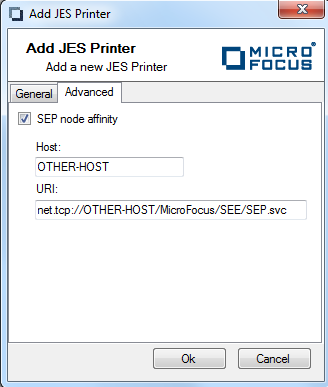
If you do not require output associated with this printer to be processed on a specific machine, or a network load-balanced set of machines, click OK to dismiss the dialog and move to step 5. Otherwise click the Advanced tab. See 5 in the diagram below.
 The
Advanced tab is displayed.
The
Advanced tab is displayed.
-
By selecting
SEP node affinity, you can specify the URI of a machine, or a network load balanced set of machines, on which outputs associated with this
printer are to be printed. Enter the name of the machine/ node in the
Host entry field. The full URI is displayed in the
URI entry field. The full URI only needs to be entered if a non-standard URI is being used in the scale-out.
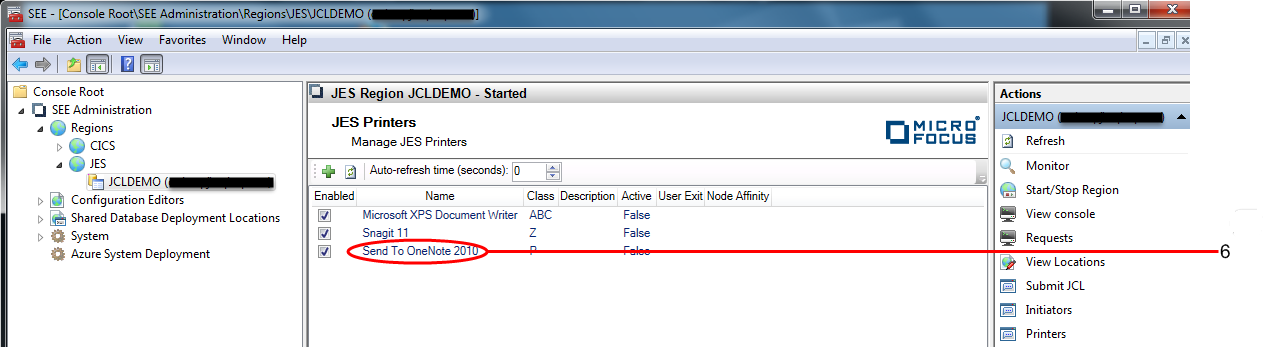
 Reasons to restrict the printing of outputs to a specific machine, or set of machines, include:Click OK to dismiss the dialog and create the printer. The newly created printer now appears in the list of printers in the Results pane. See 6 in the diagram below :
- The associated physical printer may not be available to all machines
- The outputs need to be printed from machines in specific geographic areas
Note that any changes made in this view will be lost at the next cold-start of the region unless the corresponding changes are made to the printer configuration in the region startup file. However, changes made in this view will be retained across subsequent warm-starts of the region.