To Run the JES Installation Verification Procedure
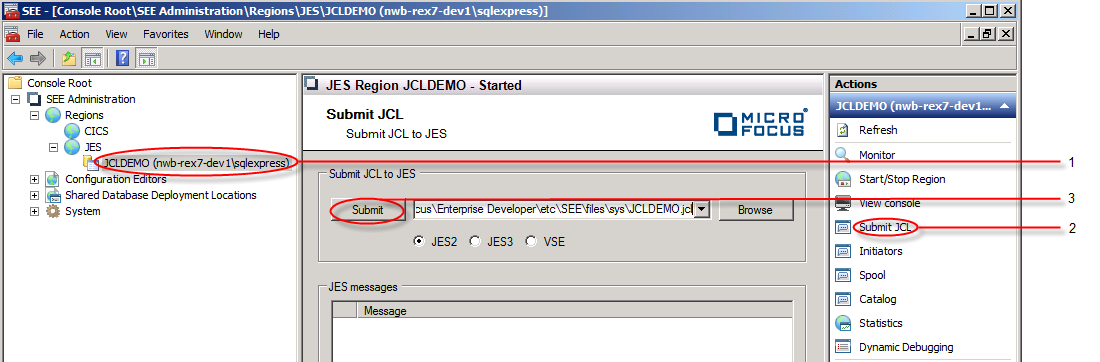
- In the Tree pane under JES->Regions, select the JCLDEMO region. See 1 in the diagram below.
-
In the
Actions pane, click
Submit JCL. See
2 in the diagram below.
The Submit JCL view appears in the Results pane.
-
In the
Submit JCL to JES entry field, enter the fully-qualified name of the sample
JCLDEMO.JCL file that will have been installed with the product. You may want to use the
Browse button to navigate to this file in the file system.
- For 32-bit systems, this file is in %ProgramFiles%\Micro Focus\Enterprise Developer\etc\SEE\files\sys
- For 64-bit systems, this file is in %ProgramFiles(x86)%\Micro Focus\Enterprise Developer\etc\SEE\files\sys
-
Ensure that JES2 is selected as the JCL submission type and then click on
Submit. See
3 in the diagram below.
The selected JCL file is submitted to the JCLDEMO region. Messages are now displayed to show the progress of the job submission. A final confirmation message is displayed to indicate that the job has been successfully submitted and is ready for execution. See 4 in the diagram below.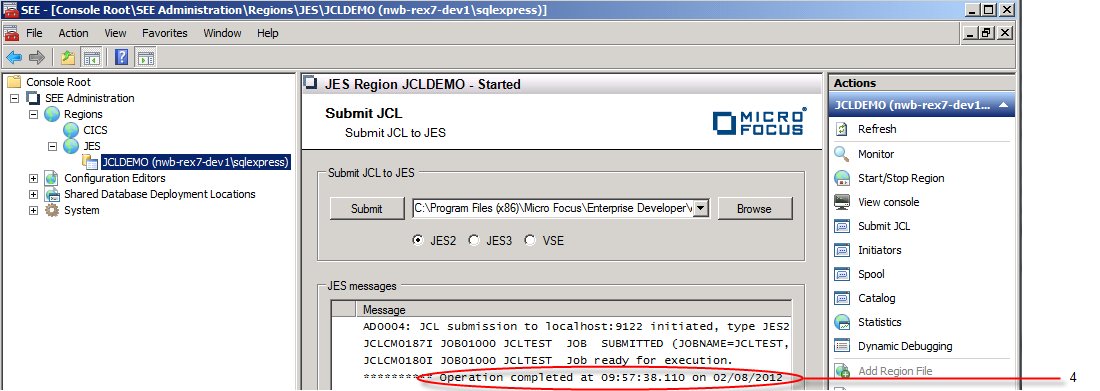
-
In the
Actions pane, click
View console. See
5 in the diagram below.
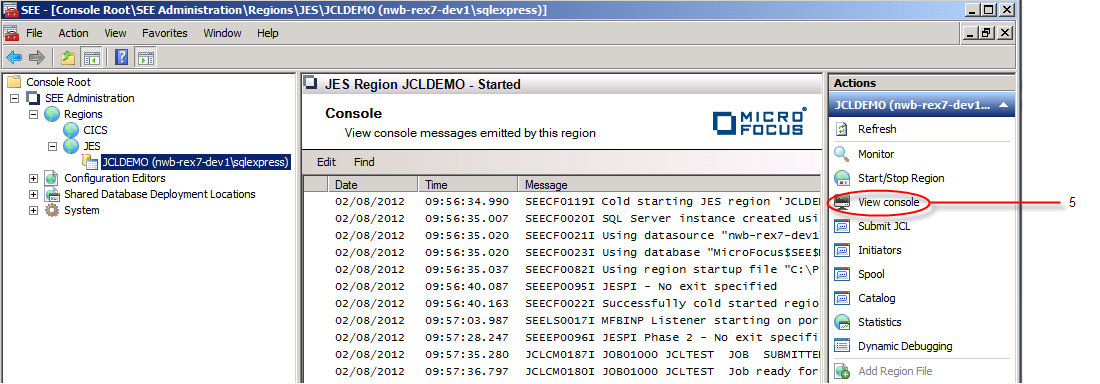
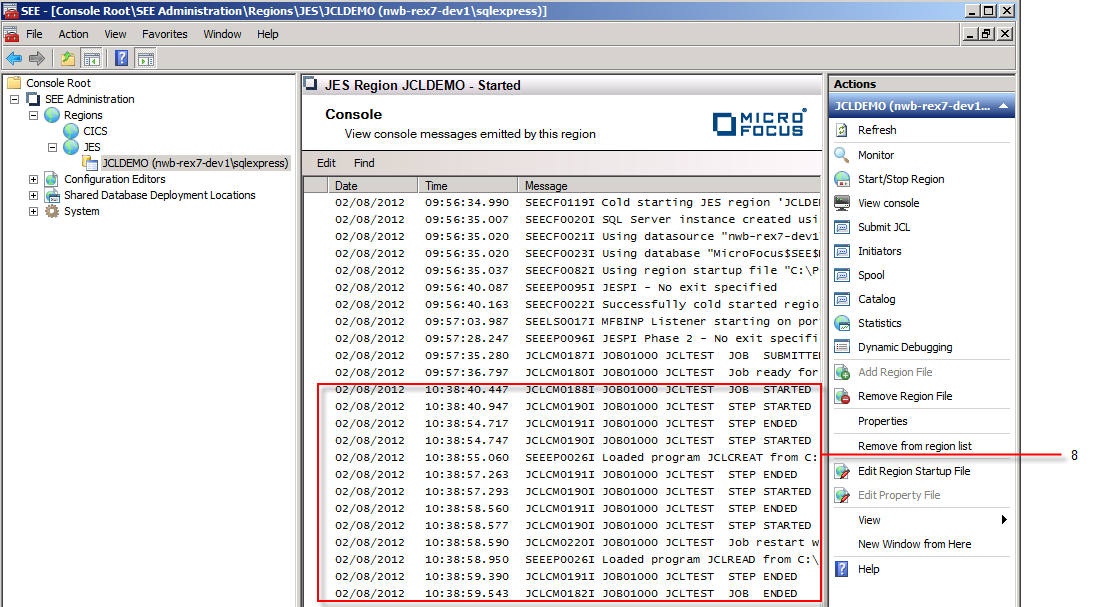
The Console view is displayed. The last two messages displayed in the view indicate that the job was successfully submitted. There are no messages indicating that the job has gone into execution.
The reason there are no messages indicating that the job has gone into execution is that the job that was submitted in the previous step was for class B and there are no class B initiators available to run it. There are 3 initiators configured in the JCLDEMO region startup file: 2 class A and 1 class ABC. However, the class ABC initiator is not enabled. The next step explains how to enable the class ABC initiator.
-
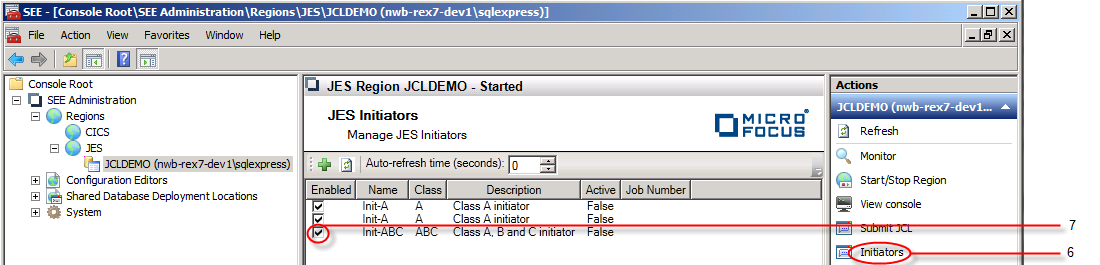
In the
Actions pane, click
Initiators. See
6 in the diagram below.
The Initiators view is displayed. Click on the check box next to the initiator named Init-ABC to enable it. See 7 in the diagram below.
-
In the
Actions pane, click
View console to display the region's console again. Messages will now be displayed indicating that the job submitted earlier is now running.
See
8 in the diagram below.
-
In the
Actions pane, click
Spool to display the job log and sysout datasets. See
9 in the diagram below.

The Spool view is displayed in the Results pane. The left-hand window in this pane lists the jobs that have been submitted to the region and indicates their state. When a job is selected in the left-hand window, its associated job log and sysout datasets are listed in the right-hand window. Double-click any of these to display their contents.
-
In the
Actions pane, click
Catalog to display the datasets cataloged for the region. See
10 in the diagram below.

The Catalog view is displayed in the Results pane. The view lists the datasets that have been cataloged for the region. When a dataset is selected, its attributes are displayed in the Properties window. Double-click a dataset to display its contents.