Unit Testing the Batch Application
To execute the JCL, you need to run the application in an instance of the Micro Focus Enterprise Server (sometimes abbreviated to Enterprise Server). This demonstration includes a pre-configured enterprise server instance called Bankdemo which you need to import in Enterprise Server and start before you execute the Bankdemo application.
Importing the Bankdemo server
To import the definition of the Bankdemo logical server (LSER):
- Click the Server Explorer tab in the upper left pane of the IDE.
If the tab is not visible, click . Select Micro Focus > Server Explorer and then click OK.
- In Server Explorer, right-click
Local [localhost:10086], and click
Open Administration Page.
This opens the Enterprise Server Common Web Administration (ESCWA) page in a browser outside of the IDE.
- In Server Explorer, right-click
Local [localhost:10086], and click
Open Administration Page.
- In the ESCWA UI, on the Default page under Directory Servers, click IMPORT as you are going to import the supplied definition of the BANKDEMO server.
- On the Step 1: Import Type page, click Legacy, and click Next.
- Enter the following path in the Repository Location field: C:\ProgramData\Micro Focus\Enterprise Developer\MFDS\BANKDEMO.
- Click SUMMARY to load the summary information about the BANKDEMO server, then click Next.
- Click Next on the Regions page.
- Click Next on the Region Options page.
- Click IMPORT on the Import page, then click FINISH.
- The system returns to the main ESCWA page.
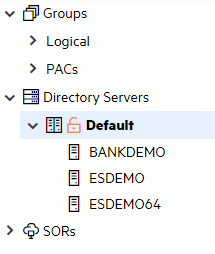
You can see that the BANKDEMO server appears in the list of Directory Servers. You need to start it before you can execute the online Bankdemo application.
Associate the BANKDEMO Enterprise Server with your project
Ensure your application is associated with the BANKDEMO server:
- In Server Explorer, right-click Local, and click Refresh to show the BANKDEMO server.
- Right-click the BANKDEMO server, point to
Associate with project, then select
Bankdemo.

Configure the IDE settings for Enterprise Server
Configure the IDE to start the associated BANKDEMO server automatically as follows:
- Click .
- Expand Micro Focus Tools, and click Enterprise Server.
-
Set
the following options on this page to
Always in order to enable the IDE to start or stop the associated server, and to enable dynamic debugging, for when it is not enabled in
the server:
- Automatically start the associated server - this ensures the IDE will start the server if it is not running when you execute the application.
- Automatically stop servers started by Eclipse when closing Eclipse - this enables the IDE to stop servers when you close Eclipse.
- Automatically enable dynamic debugging - this ensures the IDE will check whether the server has dynamic debugging enabled and, if it is not, will enable it when you start debugging.
- Click Apply and Close.
Starting the BANKDEMO Enterprise Server and Showing the Server Log
These are the steps to start the server manually, and are included for completeness. You do not have to start the server manually, as you have configured the IDE to start the server automatically.
- In Server Explorer, right-click
BANKDEMO, then click
Start.
Note: You might receive an Enterprise Server Sign On dialog prompting you to provide connection details for the BANKDEMO server. This is a standard security dialog. Click OK without specifying any sign on details. Also, you may skip enabling password recovery.
You may receive a Windows Security Alert blocking the MF Communications process. Click Allow access.
You can check the Console view to ensure that the BANKDEMO server has started successfully.
- Right-click the BANKDEMO server in Server Explorer, and click
Show Console Log.
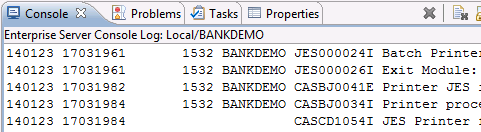
Check the Console view as it now shows the messages from the server log:
- Right-click the BANKDEMO server again, and then click Refresh to see that the server has started.
- In ESCWA, click the refresh button on the
REGIONS AND SERVERS LIST page. The BANKDEMO region is now shown as
Started.
You are now ready to execute the JCL.
Executing JCL
The JCL provided in your demo causes the COBOL application to read a file, sort the data and produce a report. The .jcl file, ZBNKSTMT.jcl, is in the Sources > jcl folder of the project. To submit this job:
- In the Application Explorer view, expand the jcl folder.
- Right-click the
.jcl file and select
Submit JCL to associated Server.
Note: If you have not started the Bankdemo server yet, since you configured the IDE to start the server automatically, you receive a notification that the server will be started. Click Yes to confirm this.
Check the Console view in the Eclipse IDE to see that this job has been submitted.
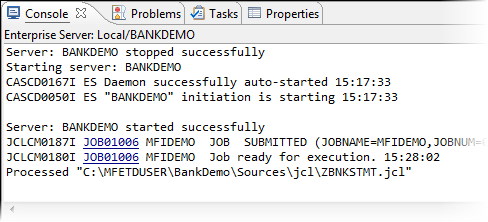
- Click one of the links to show the spool details for the job.
Viewing the Catalog and the Spool
You can open the catalog and the spool directly from Server Explorer.
To view the catalog:
- In Server Explorer, right-click the BANKDEMO server and click
Show Catalog.
This opens the catalog:
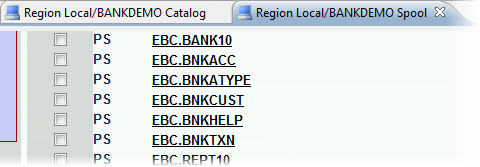
- Double-click a file name (for example, EBC.BNKACC) in the list. This displays the DCB information for this catalog item.
- Expand the Display section to preview the contents of the file.
To view the spool:
- In Server Explorer, right-click the BANKDEMO server, and click
Show Spool.
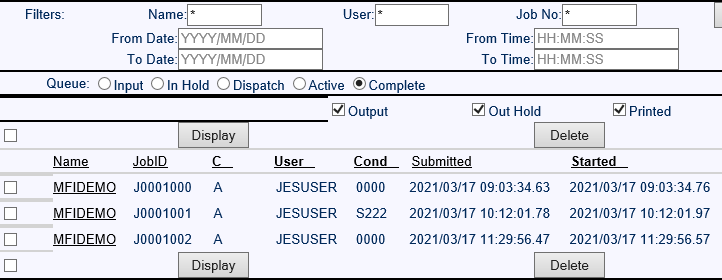
- Click on the name of one of the jobs in the list to see its details. At the end of the job, you can see the following:

There are two SYSOUT results (one for the EXTRACT and one for the SORT). Click on the names for these to see their details.
- The
PRINTOUT is the final printed results created by your job. Click
PRINTOUT to view its details:
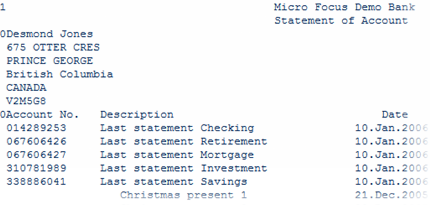
You can now start to look at how to run the online application.