Create a Standalone COBOL Unit Test
By default, this project is not linked to any existing source code from another project (see Create a Native COBOL Test Fixture that Directly Calls into Existing Source Code); it does not use the MFUPP pre-processor either (see Create a Self-Contained Native COBOL Test Fixture). This type of test fixture is primarily for you to directly populate with your own test code.
- While in the COBOL perspective, select the unit test project in the COBOL Explorer pane.
-
Right-click the project, point to
New, and select
COBOL Unit Test.
The New COBOL Unit Test dialog box appears.
- Select Program Unit Test, and then click Next.
- In the Containing project field, ensure it states the name of your unit test project.
-
In the
New file name field, type the name of your test fixture program.
Restriction: Do not use the file name mfunit, as this will not run within the Micro Focus Unit Testing Framework.
-
To create a standalone fixture file, select
Create Unit Test from Template, then select
Micro Focus template.
You may have also configured your own templates; in which case, choose an appropriate template.
-
Click
Finish.
The test fixture program is created within the unit test project.
- The two copybooks required by the
Micro Focus Unit Testing Framework are copied into the project.
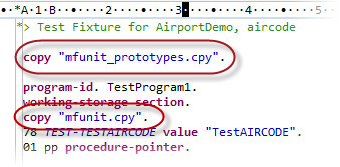
- The test fixture elements (test setup, test case, etc...) have been created using the name of the test fixture file in the
entry point names.
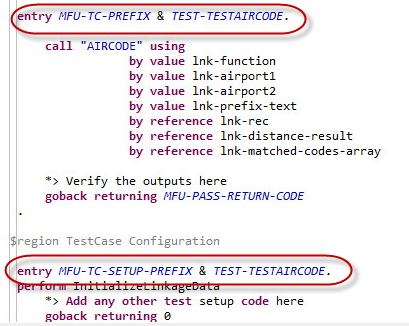
You can now start writing your test code; see Writing Tests.