Modifying Editor Appearance
The appearance of the Code Editor window, including the appearance of the text in the window, is configured in the Code Editor > Format section of the Tools > Options interface. This interface allows you to specify two sets of appearance options: one for files opened in terminal format and one for files opened in ANSI format. Note that this interface determines only display characteristics for the different file formats; it doesn't affect the format of any file.
As you make changes, a small window near the bottom of the Tools > Options interface shows your changes. Use the scroll bar at the bottom of the window to see changes to the Identification Area.
To begin editing Code Editor appearance settings, open the Source format drop-down list at the top of the screen and select either ANSI Format or Terminal Format. Note that the remaining options on the page change depending on which format you have selected.
Modify Code Option
If you are configuring the ANSI format settings, you can elect to have the Code Editor insert a specified character string in columns 73–80 when a line of code is added or modified.
Note that inserting the specified string is the only task performed by the Modify Code function. Once the string has been placed in columns 73–80, the Code Editor does not maintain the string. This means that if the length of the source line changes, for example, the original modification marker may slip out of the identification area.
Preserve contents of Identification Area
If you are configuring the ANSI format settings, you can elect to preserve the contents of the Identification area. When the Preserve contents of the Identification Area check box is checked, existing text in this area is unaffected by editing in other areas.
Color Options
By default, when an ANSI format file is opened in the Code Editor, the Indicator Area, Area A, and the Identification Area are each assigned a different background color. In addition, comments are shown in green text, reserved words are shown in blue, literal strings are shown in red, and all other text is shown in black. You can disable all color functions or you can change the default color settings.
To disable all color functions, clear the Enable foreground and background color settings check box.
To change the default color settings, do the following:
- Select an ANSI code area (Sequence Number Area, Indicator Area, Area A, Area B, or Identification Area) or text type (Comment, Keyword, String, Number, or Text) from the list box.
- The
Background
field displays the current background color associated with the selected item. To change this color, expand the drop-down
list and select a color from the list.
To select a color not on the list, select User-defined. This opens a color palette dialog window. You can either select a color in the default palette or click Define Custom Colors. When you have made your selection, click OK.
- If it is possible to associate a foreground color with the selected item, the Foreground list is enabled. Repeat the process used in the previous step to select a foreground color.
- If you have selected an ANSI code area, you can change the column width of any area in the Column fields. Note that if you change a column setting, you are simply redefining the size of the background color display. You are not redefining any particular area (for example, area A) for the compiler. Columns may not overlap.
Font Options
By default, text displayed in the Code Editor appears in the Courier New typeface, with a size of 10 points. To change the display font, click the Font button. The Font dialog box appears.
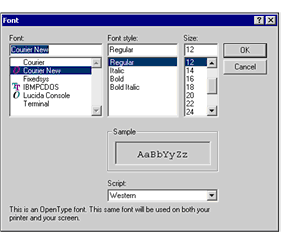
Select the font, style, and size that you want, then click OK. Once you have clicked OK again to close the Options dialog, your text appears in the Code Editor in the new font.