Adding an Existing Source File
When you add COBOL source files to the project, you have the option of directing AcuBench to automatically search for and add all COPY files named in the source code. To do this, enable the Automatically parse program for COPY files check box for each source file being added that you want parsed. After you click OK, AcuBench parses the program, identifying COPY files and searching the directories specified in the COPYPATH environment variable to locate them on disk. AcuBench then adds these COPY files to the project, listing the file names in the project’s File view Copylib folder. The physical files remain in their original location on disk.
You can add a source file to a project as follows:
- Select the desired project and click the Add/Remove Files button on the Project toolbar, or select the Add/Remove Files option on the Project menu. You can also right-click the project’s Source folder in the File view and select Add/Remove Files.
This opens the Add/Remove Files dialog with the Source tab selected.
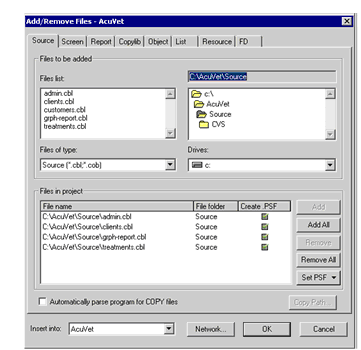
- Verify that the Files of type field, at the bottom of the uppermost frame in the dialog, shows the correct type of file to be added. Because you are adding a source file, the default extensions are .cbl and .cob (unless you have established custom settings for the project).
- From the Drives drop-down list, select the drive on which the file is located.
You can also use the Network button to map a network drive on which your source files are located.
- In the tree view (above the Drives list, top right), navigate the file system until you open the folder that contains the file to be added.
- Select the file to be added in the Files list. The file must be highlighted.
To select multiple, non-consecutive files, hold down the Ctrl key and click each of the files that you want to select.
- To add the selected file or files, click Add. To add all of the files in the specified directory, click Add all. The added files now appear in the Files in project list box.
- To have AcuBench parse the file to automatically add all referenced COPY files to the project, mark the Automatically parse
program for COPY files check box and modify the COPYPATH environment variable, if necessary. See Adding COPY Files for more information.
Parsing is performed after you finish adding files and click OK to close the dialog.
- When you have finished adding files, click OK to close the Add/Remove Files dialog.
The new source file(s) and their associated COPY files (if applicable) are now visible in the File view, and you can use the compiler and runtime settings that you have established for the project to compile and execute the programs. You can also use the Code Editor to view and make changes to your code.