Scan Policies
Creating a Scan Policy
A scan policy establishes the following parameters:
-
Type of scan (File System, Permissions, or Volume Free Space)
-
Scan target(s)
-
Scan retry settings
-
Scan schedule
IMPORTANT: The scan policy requires a unique name. If you attempt to use an existing name, File Reporter OES generates an error.
-
Select Scan Policies in the File Systems menu.
-
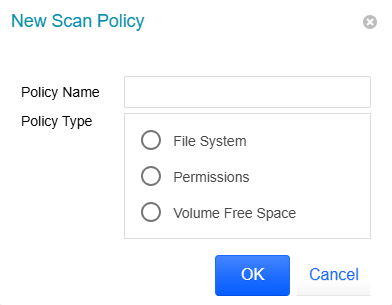
Click Add to open the New Scan Policy dialog.
-
Enter a Policy Name for the new scan policy.
-
Select the type of scan to conduct in the Policy Type field.
-
File System: Scans the files stored currently on the network share to identify the size of the files, when they were last accessed, the locations of duplicate versions, etc.
-
Permissions: Scans the permissions of the folders stored on the shares.
-
Volume Free Space: Scans the availability of free space on the shares.
-
-
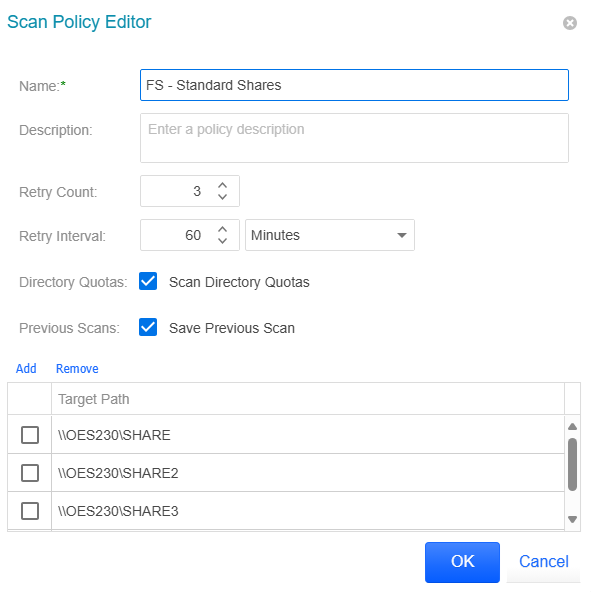
Click OK to open the Scan Policy Editor dialog, which displays the name of the new scan policy.

-
Enter a Description of the new scan policy.
-
Specify the Retry Count, which is the number of times File Reporter OES will attempt to scan the storage resource targets listed in the scan policy in response to a failure.
-
Specify the Retry Interval, which is the length of time that passes after a failure before File Reporter OES retries a scan of the storage resource targets listed in the scan policy.
-
Leave the Directory Quotas box unchecked unless you plan to generate a Directory Quota Report.
-
Check the Previous Scans box to keep the prior scan generated through this policy whenever a new scan is performed.
-
When a new scan is complete, the results become the Current Scan and the prior version becomes the Previous Scan.
-
If an earlier Previous Scan exists, it is deleted.
-
If you later uncheck the box in preparation for a new scan, the existing Previous Scan will not be removed until a new scan is processed.
-
You can use the Previous Scan to generate an Historic Comparison Report with either a Baseline Scan or a Current Scan — see Historic Comparison Reports for details.
NOTE: To maintain a scan indefinitely, specify it as a Baseline Scan — see Establishing a Baseline Scan for more information.
-
-
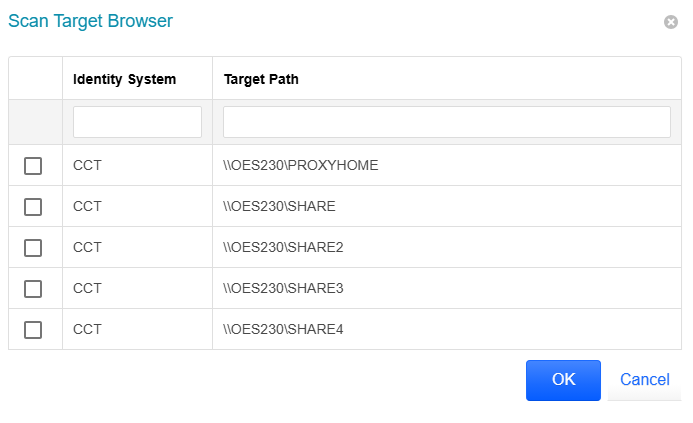
Click Add to open the Scan Target Browser dialog and specify storage resource scan targets for the scan policy.

IMPORTANT: After adding a target to a scan policy, the same target cannot be added to another scan policy of the same type.
-
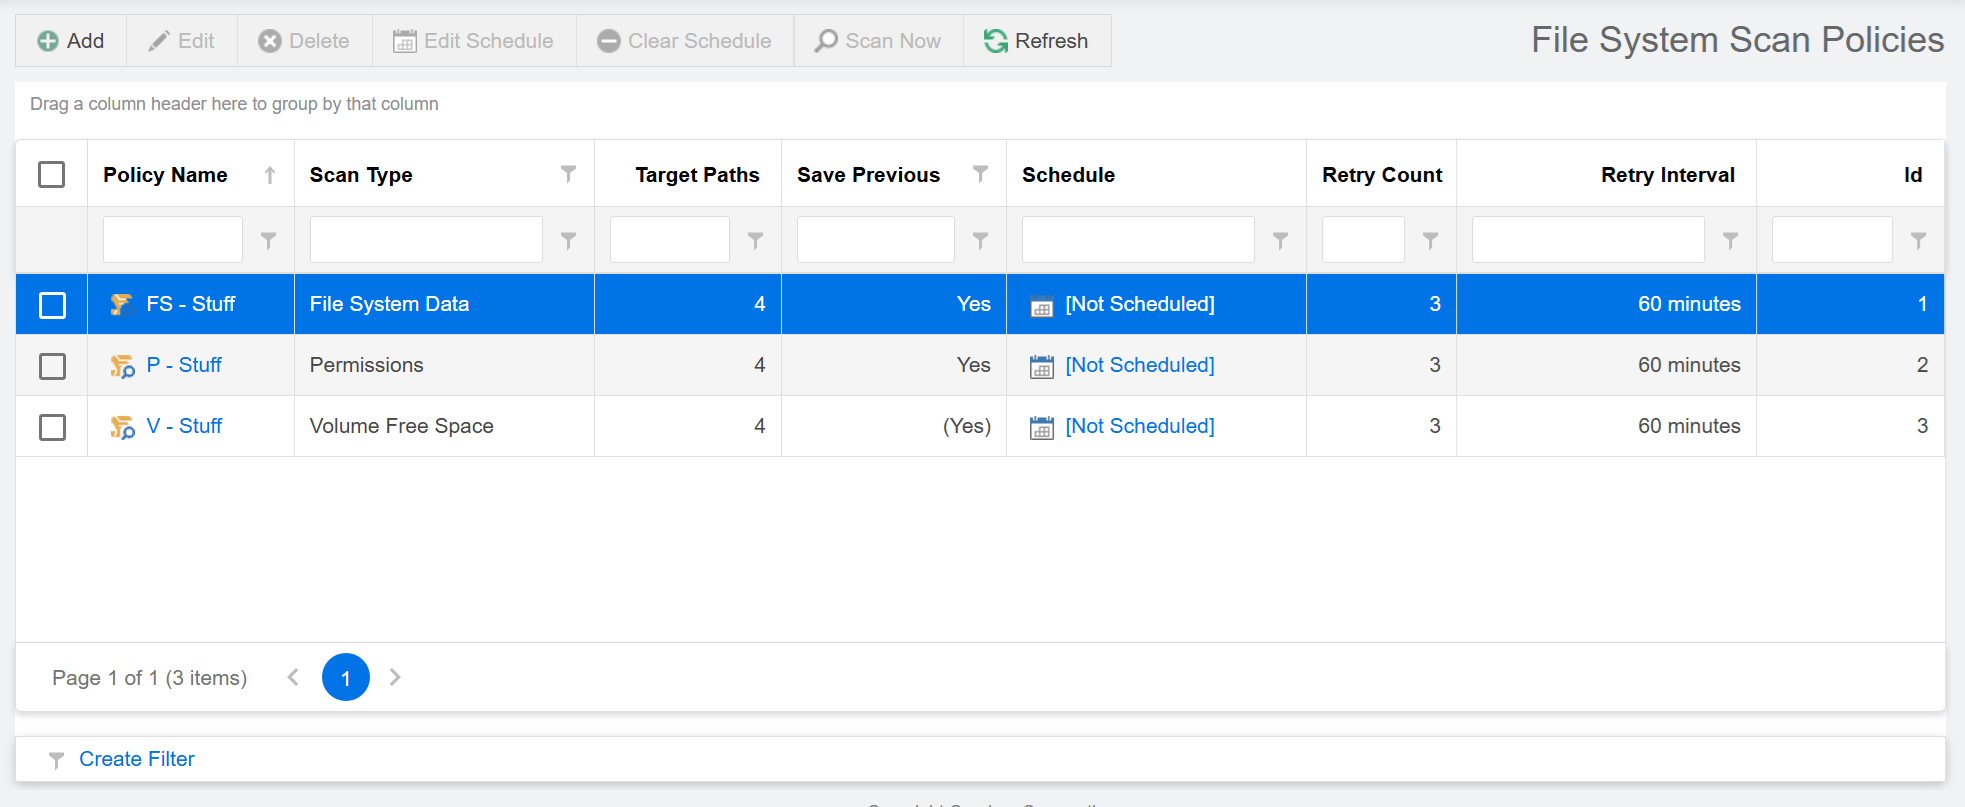
Click OK to save the scan policy, which is now displayed on the Scan Policies page. The scan policy still needs to be scheduled — see Scan Scheduling for details.


Editing a Scan Policy
-
Select Scan Policies in the File Systems menu.
-
Check the box for the scan policy you want to edit.
-
Click Edit.
-
Change the desired settings.
-
Click OK.
Deleting a Scan Policy
-
Select Scan Policies in the File Systems menu.
-
Check the box for the scan policy you want to delete.
-
Read the warning and click Yes.