Configuring the Database
-
If not already running, select File Reporter OES Config Dashboard in the Start menu.
-
Click Configure Database.
-
Review what is to be configured and click Next.
-
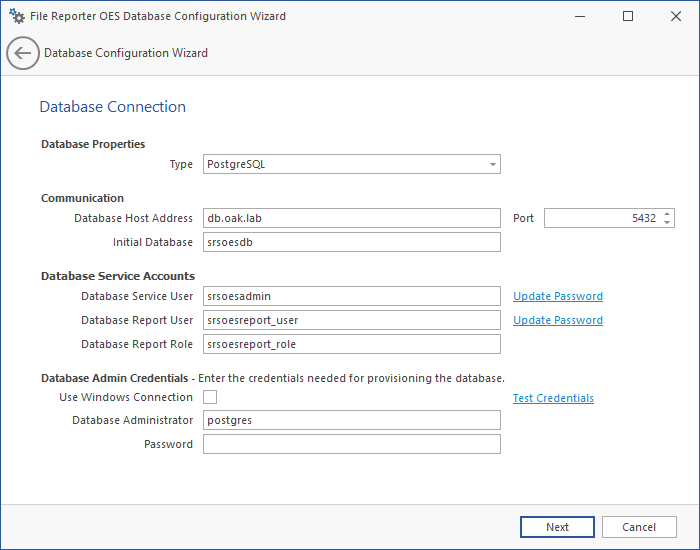
Establish the settings required to communicate with the database.
-
Database Properties: Displays the database name and version.
-
Type: Select either PostgreSQL or SQL Server.
-
Communication: Specifies the database address, port number, and name.
-
Database Host Address: Specify the host address of the server on which the database is installed.
-
Port: Enter the database port. The default setting is either 5432 (for PostgreSQL) or 1433 (for SQL Server).
-
Initial Database: The default name of the File Reporter OES database.
-
Database Service User: Specify the database account name used by File Reporter OES to manage data in the database. This account has both read and write access to the database.
-
Set Password: Establish the password for the Database Service User.
NOTE: Retain the user and password information as it will be required during component configuration.
-
Database Report User: Specify the database account name used by File Reporter OES to read data in the database while reporting.
-
Set Password: Establish the password for the Database Report User.
-
Database Report Role: Specify the account name of the role used to manage access for Report Users.
-
Database Administrator: Specify either the superuser name (for PostgreSQL), or the administrator name (for SQL Server).
-
Password: Specify either the superuser password (for PostgreSQL), or the administrator password (for SQL Server).
-
Test Credentials: Click to confirm that the entries in the Database Service Accounts region are accurate before advancing in the wizard.
-
Complete the fields and click Next.
-
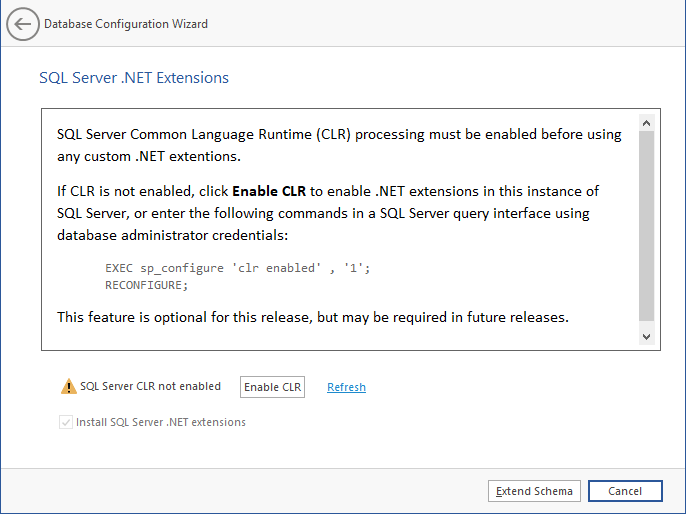
(Optional) Click Enable CLR.
The following page appears if you use a Microsoft SQL Server database, indicating that File Reporter OES will add custom extensions for SQL Server that help File Reporter OES with advanced reporting queries.
-
Click Extend Schema.
-
Review the configuration log and click Finish.
-
(Conditional) See Installing or Updating the License for next steps.