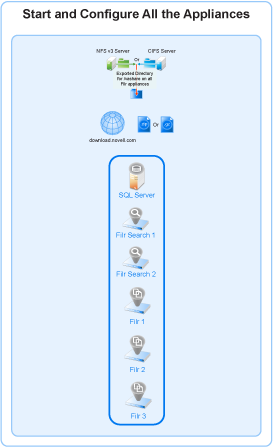
7.0 Starting and Configuring the Filr Appliances
Access Manager (NAM) and Filr Integration: You can configure NetIQ Access Manager (NAM) to act as Proxy service for a Filr site. To integrate Filr with NAM, you must configure the NetIQ Access Manager Identity Server, the Access Gateway, and configure protected resources for a Filr server. For more information, see Section A.0, Access Manager (NAM) and Filr Integration.
After the VMs are deployed with the necessary disks added and other settings adjusted according to your plans, it is time to start and configure the appliance software on each appliance. When this step is completed, all of the appliances will be running and ready to be deployed as an integrated Filr infrastructure.
Figure 7-1 Starting and Configuring the Appliances

Table 7-1 Starting and Configuring the Appliances
|
Page, Dialog, or Option |
Do This |
|---|---|
|
NOTE:For Xen, after you have completed the instructions in Deploying a Xen VM, skip to 1 - Before you deploy the first VM. |
|
|
|
2 - Select an appliance. |
|
|
|
3 - Start the appliance. |
|
|
|
4 - Accept the license and specify the keyboard layout. |
|
|
|
License Agreement |
|
|
Passwords and Time Zone |
|
|
Network Settings |
|
|
Additional LAN Card Configuration |
|
|
Data Store Location |
|
|
Data Log Location |
|
|
Shared Storage NFS Location |
Referring to the work you did in Exporting an NFS Directory for the /vashare Mount Point, do the following:
|
|
Shared Storage CIFS Location |
Referring to the work you did in Creating a CIFS Share for the /vashare Mount Point, do the following:
|
|
Configuring Password, Time, and Network Settings |
|