5.0 Downloading and Preparing the Filr Software
After planning your deployment and making sure you have the necessary system requirements in place, you are ready to download and prepare the Filr software that applies to your virtualization platform.
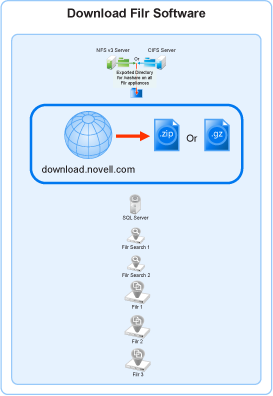
Figure 5-1 Download the Filr Software for your VM platform
VMWare
-
Download the Filr software shown below to the location where you plan to host your VMs.
IMPORTANT:Registration with OpenText is required to receive an email with a download link.
Appliance Type
Filename
Filr
Filr.x86_64-version.ova
Search
Filrsearch.x86_64-version.ova
PostgreSQL
PostgreSQL-version.ova
-
Continue with Deploying a VMware VM.
Hyper-V
-
Log in to the Hyper-V host server either locally or from a remote workstation using Remote Desktop.
-
Download the Filr software shown below to the location where you plan to host your VMs.
IMPORTANT:Registration with OpenText is required to receive an email with a download link.
Appliance Type
Filename
Filr
Filr.x86_64-version.vhdx
Search
Filrsearch.x86_64-version.vhdx
PostgreSQL
PostgreSQL-version.vhdx
-
Move the Filr.x86_64-version.vhdx archive file to the first Filr appliance-type folder and then copy the archive file to the remaining Filr appliance type folders.
-
Move the Filrsearch.x86_64-version.vhdx archive file to the first Filrsearch appliance-type folder and then copy the archive file to the second Filrsearch folder.
-
Continue with Deploying a Hyper-V VM.
Xen
-
Log in to the Xen VM host server either locally or from a remote workstation.
If you are connecting from a remote Linux workstation, use the following command:
ssh -X root@host_ip_address
The -X in the command in required for the GUI installation program upon which the steps in this section are based.
-
Download the Filr software shown below to the Xen VM host server in the location where you plan to host your VMs.
IMPORTANT:Registration with OpenText is required to receive an email with a download link.
Appliance Type
Filename
Filr
Filr.x86_64-version.qcow2
Search
Filrsearch.x86_64-version.qcow2
PostgreSQL
PostgreSQL-version.qcow2
-
Create two hard disks - In the ApplianceType-version directory, execute the following commands:
qemu-img create -f raw storage1.qcow2 20G
qemu-img create -f raw storage2.qcow2 20G
Two hard disks with names storage1 and storage2 are created with 20 GB space.
-
Copy and rename the ApplianceType directories until you have one directory for each appliance that you have planned to deploy.
Consider including information in the name that easily identifies the appliance, such as the IP address. For example:
-
Rename the Filr-version directory to Filr-30-192.168.1.61.
-
Copy the Filr-30-192.168.1.61 directory and rename it to Filr-30-192.168.1.62, and so on until you have the number of Filr appliances you have planned for.
-
In a similar manner, copy and rename the Filrsearch-version directory until you have two Filrsearch appliances.
-
If you need a PostgreSQL appliance, follow the same methodology.
IMPORTANT:Do not change the names of the .qcow2 or.xenconfig files within the directories that you have copied and renamed.
-
-
Continue with Deploying a Xen VM.
Citrix Xen
-
On a workstation with Citrix XenCenter installed, download the Filr software shown below.
IMPORTANT:Registration with OpenText is required to receive an email with a download link.
Appliance Type
Filename
Filr
Filr.x86_64-version.xva
Search
Filrsearch.x86_64-version.xva
PostgreSQL
PostgreSQL-version.xva
-
Continue with Deploying a Citrix Xen VM.