6.0 Content Editor
The Content Editor (CE) appliance enables collaborative editing feature for Filr users. The functionalities are:
-
Secure edits of the documents
-
Multiple files that can be concurrently edited by multiple users
-
Supports collaborative edits for all major file types like documents, spreadsheet, and so on
-
Edits are done by using the Browser, no Native application is required
-
Policies to block copy, print, and download of the content
-
By default, this functionality is available for all files under My Files, Shared With Me, Shared By Me and Net Folder areas.
A separate appliance is required as the collaborative editing is a resource intensive task. Around 100 files can be concurrently edited by using this functionality.
Content Editor Dialog
NOTE:This functionality is only available on Filr Advanced Edition. This feature is available with Filr Web UI, desktop clients and mobile apps.
IMPORTANT:CE ships with a self-signed certificate. Ensure to change the self-signed certificate to a valid trusted certificate, so all the clients can use this functionality.
Table 6-1 Edit Online Feature Availability
|
Apps / Clients |
Edit Online Feature Availability |
Require Valid Trusted Certificate |
|---|---|---|
|
iOS Filr Mobile App |
Yes |
Yes |
|
Android Filr Mobile App |
Yes |
No |
|
Windows Filr Mobile App |
No |
Not Applicable |
|
Mac Desktop Client |
Yes |
Yes |
|
Windows Desktop Client |
Yes |
No |
|
Linux Desktop Client |
No |
Not Applicable |
Before you configure the Content Editor options, you must do the following:
-
Deploy a Content Editor appliance.
-
Configure the Content Editor appliance with the DNS hostnames of each Filr appliance that you want to be able to connect to it.
While installing CE, ensure that it is installed in the same domain where Filr is installed. For both Filr and CE, at each level, domain names should be the same. For example, top-level domains (such as “.com”), second-level domains (such as “abc.com”), and lower-level domains, also called sub-domains (such as “support.a.com”).
For more information, see Content Editor.
Table 6-2 Using the Content Editor Configuration dialog
|
Field, Option, or Button |
Information and/or Action |
|---|---|
|
|
|
|
|
|
|
|
|
Content Editor Policies: |
Set the policies that will be applicable to the user when performing collaborative edit. When a user is editing the file and if changes are made to the policy, then the file has to be reloaded for the changes to take effect. |
|
|
|
|
|
|
|
|
|
Adding Fonts
You can upload new fonts and use them in the Content Editor. You can either upload a font file (.tff or .otf) or upload a .zip file having multiple font files. If the user is already editing a file, then reload the Content Editor page for the newly added fonts to appear in the drop-down menu.
Figure 6-1 Upload Custom Fonts
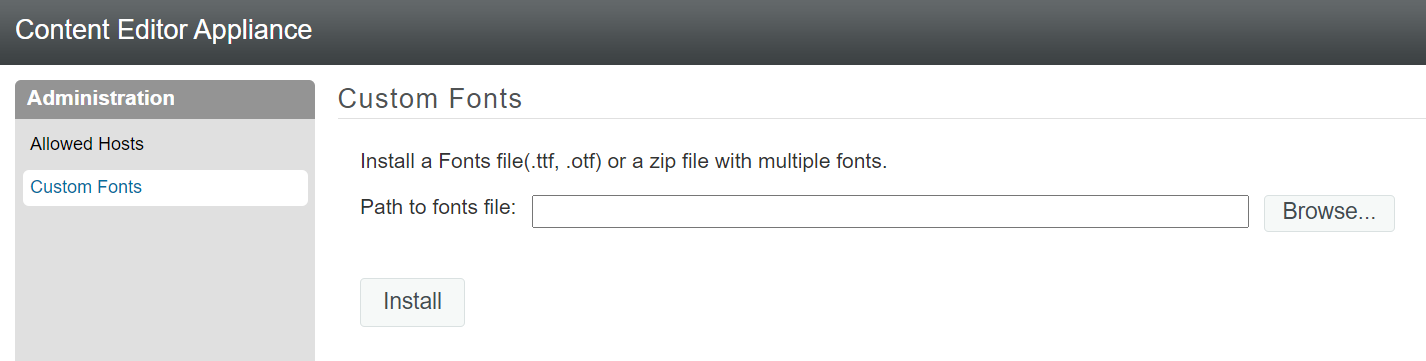
Table 6-3 Uploading Custom Fonts
|
Field, Option, or Button |
Information and/or Action |
|---|---|
|
|
|
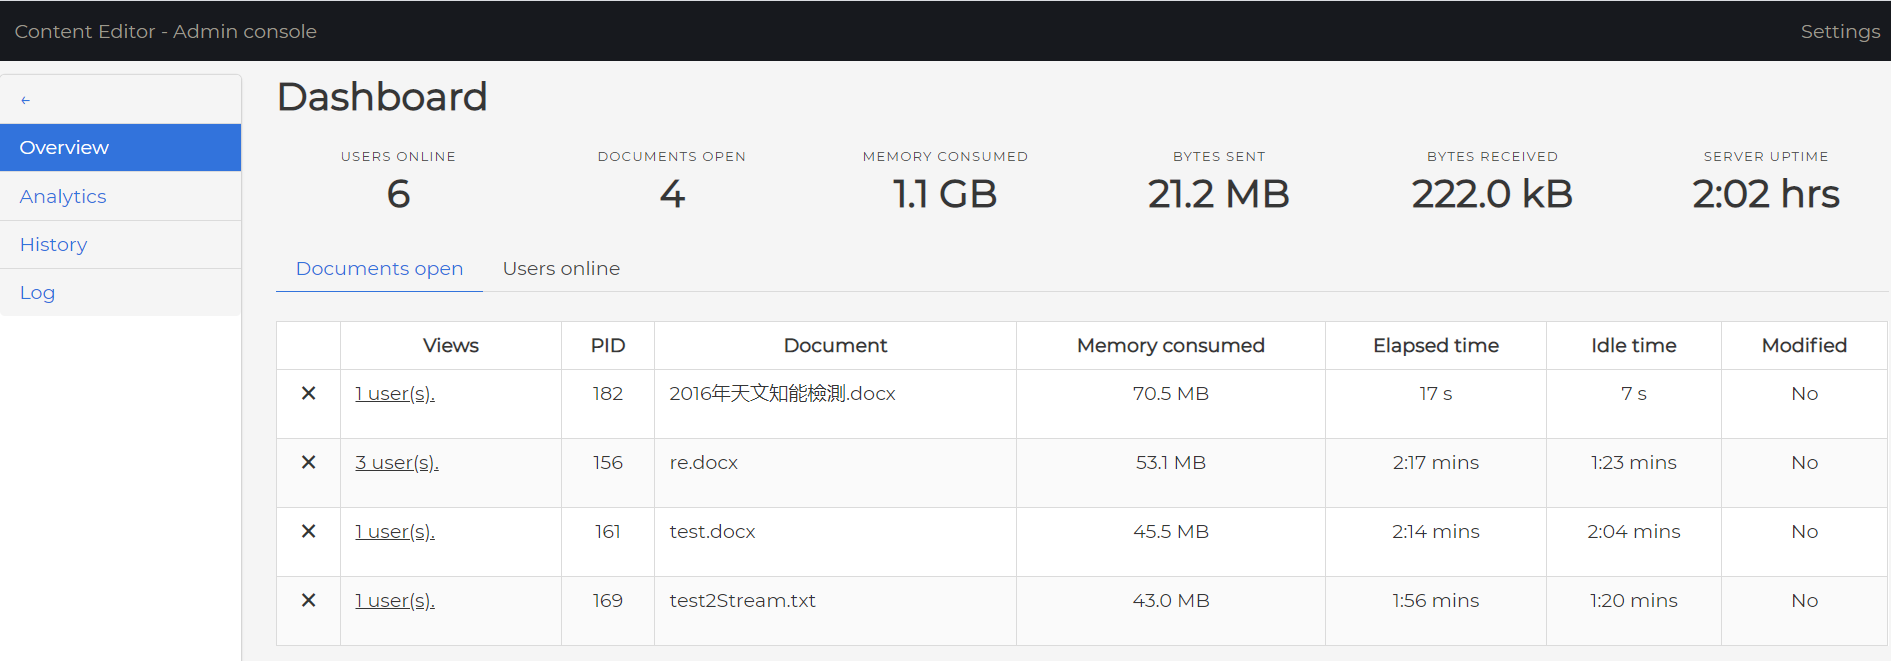
Dashboard
The Dashboard is used for monitoring system utilization and performance of Content Editor. You can do live monitoring of all the user sessions running on Content Editor.
Perform the following steps, to view the dashboard:
-
Path: Port 9443 Appliance Console >
-
Specify the credentials.
After entering the correct password, you can view the list of live documents opened, total users, memory consumption, document URLs with the number of users viewing that document. You can also end the sessions directly from the panel which results in closing the socket connection to the respective document.
Figure 6-2 Dashboard Monitor