4.2 Branding Mobile Apps (Advanced-Edition License Only)
As the built-in Port 8443 administrator, you can brand your Filr mobile apps to match your organization’s brand.
IMPORTANT:Direct Port 8443 administrators do not have rights to administer branding.
4.2.1 Android UI Branding
To custom brand the Android Filr app, you must first create a folder on your system that will be used to hold the resources used for custom branding. We will refer to this as the android-branding folder in the rest of this document.
You can customize the colors and the images that Android uses to customize the filr app. Let’s deal with the images first and then the colors.
Customizing Images for Android Branding
About Image Density
Because Android runs on devices with a wide variety of screen densities, you should always provide bitmap resources tailored to each of the generalized density buckets: low, medium, high and extra-high density. This will help in achieving good graphical quality and performance on all screen densities. If for some reason, you can’t provide images for all of the density buckets, then you must provide at least one image matching the XXXHDPI/XXHDPI/XHDPI scale factor. The higher resolution image, the better the display quality.
First start with a base image and then generate the images for each density using the following scale table. Remember in Android, 1dp (device independent) is equal to 160 pixels.
|
Density Bucket Name |
Scale Factor |
Pixels |
|---|---|---|
|
LDPI |
0.75 |
160 x 0.75 = 120 pixels |
|
MDPI |
1.0 |
160 x 1 = 160 pixels |
|
HDPI |
1.5 |
160 x 1.5 = 240 pixels |
|
XHDPI |
2.0 |
160 x 2 = 320 pixels |
|
XXHDPI |
3.0 |
160 x 3 = 480 pixels |
|
XXXHDPI |
4.0 |
160 x 4 = 640 pixels |
For example, if you create a 75x75 image for LDPI then you need to create the following images to match other densities.
|
Density Bucket Name |
Density Scale |
Create Image |
|---|---|---|
|
LDPI |
0.75 – Base Image |
0.75 x 0.75 |
|
MDPI |
1.0 - 100 |
100 x 100 |
|
HDPI |
1.5 – (100 x 1.5) - 150 |
150 x 150 |
|
XHDPI |
2.0 – (150 x 2) - 200 |
200 x 200 |
|
XXHDPI |
4.0 – (200 x 3) - 600 |
600 x 600 |
|
XXXHDPI |
HDPI6.0 – (600 x 4) - 2400 |
2400 x 2400 |
Creating and Naming the Images
Filr Android-app customizing involves the following branding images.
Table 4-2 Android Image Names and Default Sizes
|
Image Name |
Location Where Displayed |
Recommended Dimension Ratio* |
|---|---|---|
|
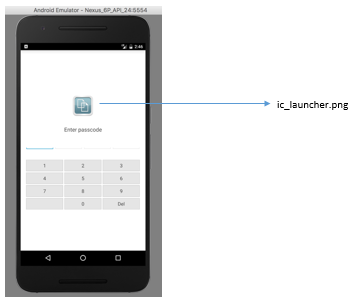
ic_launcher.png |
This image is shown on the passcode lock screen. |
144 x 144 pixels |
|
login_header.png |
This image is shown on the login screen. |
775 x 144 pixels |
|
main_page_logo.png |
This image is shown next to the up button. |
475 x 96 pixels |
|
* Images that conform with the ratios shown will render without distortion in the locations indicated. For example, an ic_launcher.png image that is 288 X 288 pixels will render without distortion. |
||
Create the following folder/folders in the android-branding folder that you created on your system. You don’t have to create all folders matching different scaling factors. You can create one generic folder called “drawable” and place higher resolution images in this folder. This higher resolution image will be scaled dynamically by Android to make it look good on different Android devices. Providing a lower resolution image will not yield satisfactory results.
Table 4-3
|
Folder Name |
Description |
|---|---|
|
drawable-ldpi |
Place all lower resolution images here |
|
drawable-mdpi |
Place all base resolution images here |
|
drawable-hdpi |
Place all high resolution images here |
|
drawable-xhdpi |
Place all extra high resolution images here |
|
drawable-xxhdpi |
Place all extra extra high resolution images here |
|
drawable-xxxhdpi |
Place all extra extra extra high resolution images here |
|
drawable |
Place the highest possible resolution images here. Images placed here may not be required to be placed in other folders. Images placed in this folder are dynamically scaled by Android to make them look good on various devices. |
Customizing Colors for Android Branding
To customize the colors in Filr’s Android mobile app, create a file called colors.xml in the android-branding folder and add the colors with your chosen values. Filr’s Android app supports customizing the following colors.
Table 4-4 Android Color Tags
|
Color Name |
Where it is shown |
|---|---|
|
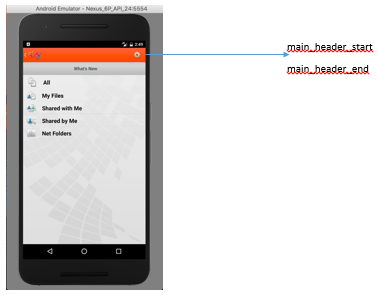
main_header_start main_header_end |
These two colors are used for creating a gradient shade that is applied to the header bar. This change is visible only in the section. |
|
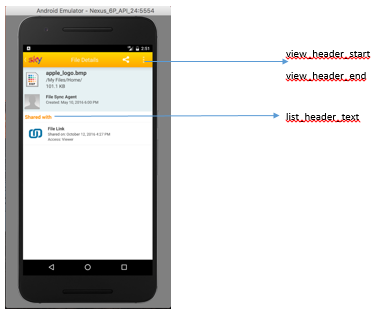
view_header_start view_header_end |
These two colors are used for creating a gradient shade that is applied to the header bar. This change is visible throughout the UI, except in the section and on the main page where the tabs are shown. |
|
list_header_text |
This color is used for list-header text. It is visible in the Share-action dialogs. |
|
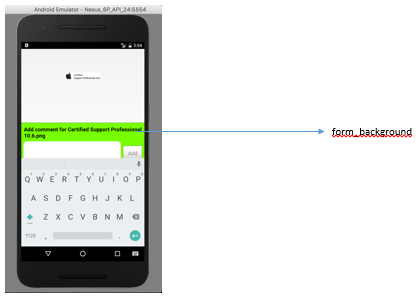
form_background |
This color is used in the Add Comments dialog. |
|
property_value_text |
This color is used to display links and text. |
Example content of the colors.xml file:
<branding>
  <main_header_start>#75717c</main_header_start>
  <main_header_end>#4D2525</main_header_end>
  <view_header_start>#9CCCDC</view_header_start>
  <view_header_end>#519217</view_header_end>
  <list_header_text>#7EB5C1</list_header_text>
  <form_background>#F7G2G4</form_background>
  <property_value_text>#246d9g</property_value_text>
</branding>
NOTE:The custom-branding-resource subsystem is very stringent in interpreting hex codes. You must specify the fully valid color hex code including the pound sign (#). If you miss specifying this sign, then the color value is ignored and default color hex code is used. The supported formats are #FFFFFF and #FFFFFFFF
Select the colors.xml file and the drawable... folders in your android-branding equivalent folder and create a zip archive. Store the zip archive somewhere on your system for use when configuring the branding on the Android client.
To apply the branding you have created, see Using the Mobile App Branding dialog
in the Filr 4.3: Administrative UI Reference.
Android Image Examples

Android Color Examples

Downloading Example Files
You can download an example set of Android Branding Files here.
4.2.2 iOS UI Branding
To brand your iOS mobile devices, you create a .zip file that includes branding images and color specifications, as described in the following sections.
Tips and Caveats
The following points apply to iOS branding files:
-
Inclusion of any of the customized branding files is optional.
The iOS app will work fine whether or not they are found in the .zip file.
-
If a file is in the zip file it will be used.
Otherwise, the default Micro Focus branding displays.
-
Files must be named exactly as specified or iOS applications will not find them.
-
All image files should be set to 72 PPI (pixels per inch). Increasing the resolution beyond this can negatively affect app performance.
Downloading iOS Example Files
You can download an example set of iOS Branding Files here.
iOS Branding File Details
Overview of iOS Branding Files
Table 4-5 iOS Branding File Summary
|
Image Names |
Where Used |
Dimensions in Pixels |
|---|---|---|
|
PIN/Passcode and Document Picker dialogs |
|
|
Account Settings dialogs and Login dialog for iPhone |
|
|
iPad Login dialog |
|
|
Home Selection View |
|
|
* The files named ...@2x and ...@3x support optimal image scaling on multiple devices. Although it is not required that you create scaled images, Micro Focus recommends that you follow the image guidelines in the iOS Human Interface Guidelines published by Apple. The iOS sample files include examples of each file in the sizes indicated. |
||
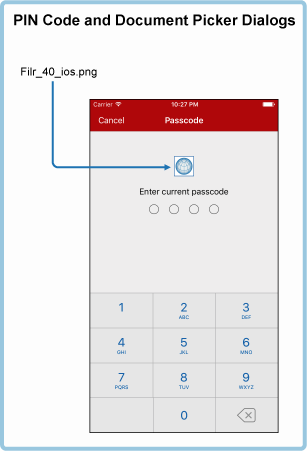
Example: PIN Code and Document Picker Extension
To brand the PIN Code and Document Picker Extension dialogs, create a Filr_40_ios.png file and include it in the .zip file.
Figure 4-1 Filr_40_ios.png Example
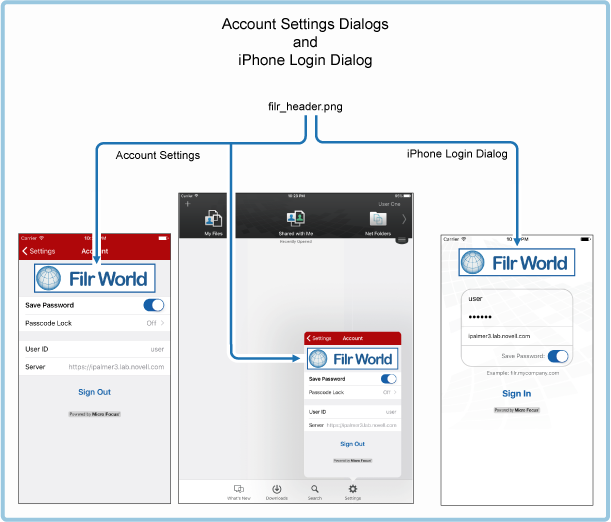
Example: Account Settings Dialogs and the Login Dialog for iPhone
To brand the account settings dialog and the login dialog for iPhone devices, create a filr_header.png and include it in the zip file.
Figure 4-2 filr_header.png Example
Example: iPad Login Dialog
To brand the login dialog on iPad devices, create a Filr_icon_login.png file and include it in the .zip file.
Figure 4-3 Filr_icon_login.png Example
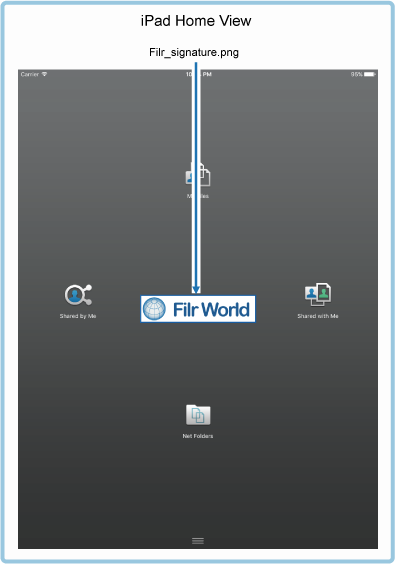
Example: Home Selection View
For branding the Home Selection View, create a Filr_signature.png file and include it in the .zip file.
Figure 4-4 Filr_signature.png Example
iOS Color Customization Details
The FilrBranding.xml file defines the colors displayed. Examples are included after the XML sample below.
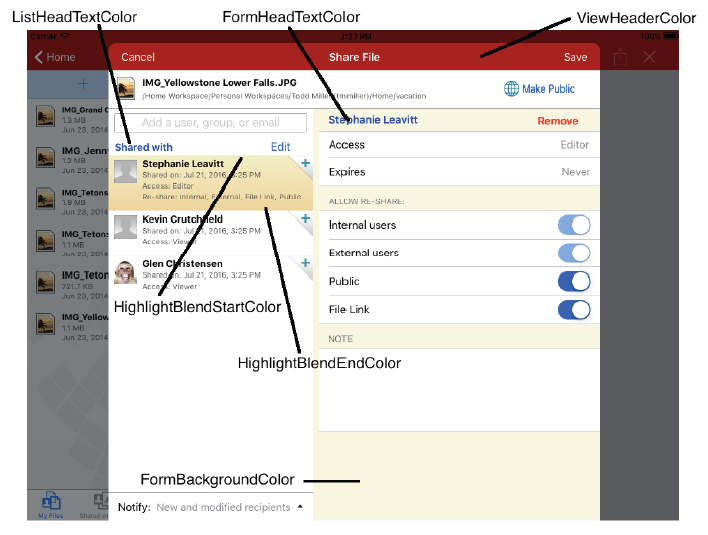
<?xml version="1.0"?>
<FilrBranding>
   <ViewHeaderColor>#0d467f</ViewHeaderColor>
   <SubheadColor>#c1d7ec</SubheadColor>
   <ListHeadTextColor>#0d467f</ListHeadTextColor>
   <FormHeadTextColor>#0d467f</FormHeadTextColor>
   <FormBackgroundColor>#d7e6f5</FormBackgroundColor>
   <HighlightBlendStartColor>#afd4fa</HighlightBlendStartColor>
   <HighlightBlendEndColor>#3d86ce</HighlightBlendEndColor>
   <StatusBarTextColor>light</StatusBarTextColor>
</FilrBranding>
Hex values are valid as well as the colors defined in the iOS UIColor class such as red, blue, yellow, etc. They can be defined in upper, lower or mixed case.
An example would be <ViewHeaderColor>green</ViewHeaderColor>.
There are two valid values for StatusBarTextColor: “dark” and “light”.
The following are examples.
Figure 4-5 Example 1
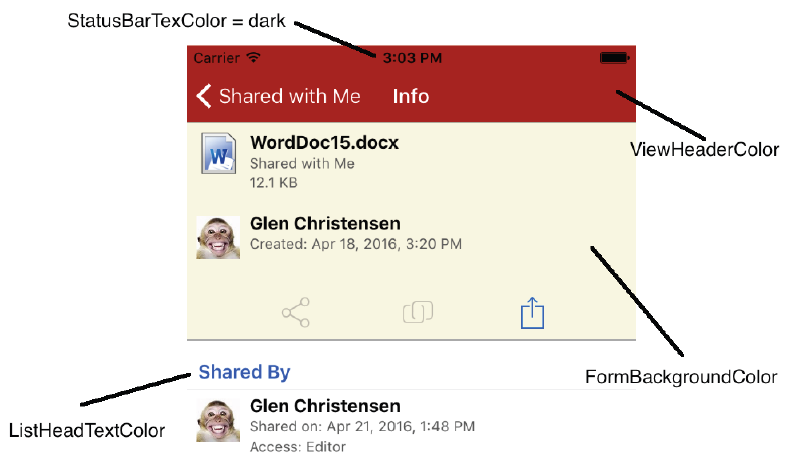
Figure 4-6 Example 2
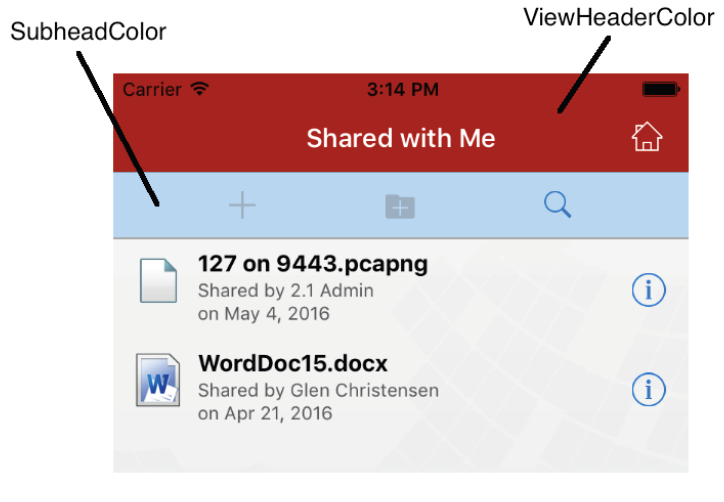
Figure 4-7 Example 3
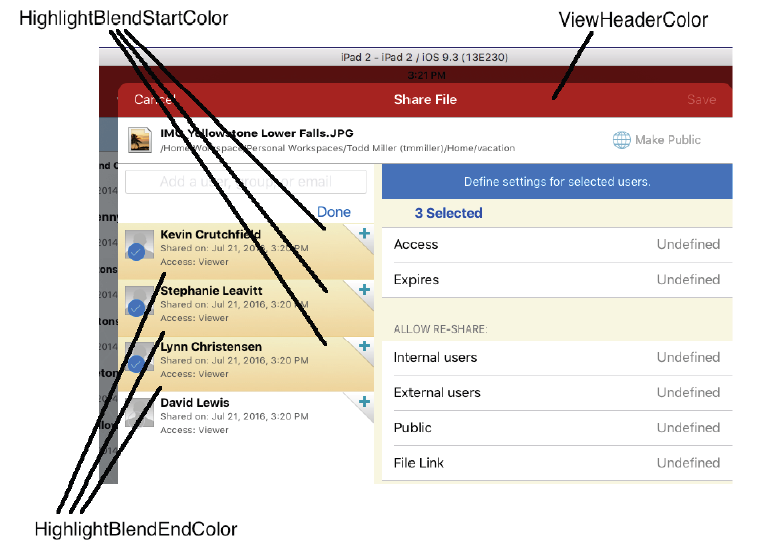
Figure 4-8 Example 4
Creating an iOS Branding .zip File
To apply custom branding to the iOS client, you create the image files for the dialogs you want to brand and define banner and other colors, as follows:
-
Create .png files for the dialogs that you want to brand.
Example files are contained in the downloadable iOS-branding-sample.zip file.
To support optimal image scaling on multiple devices, Micro Focus recommends that you follow the imaging naming conventions outlined in the iOS Human Interface Guidelines published by Apple.
-
Define the colors you want to use in banners and so on, by creating a FilrBranding.xml file.
-
Compress the files that you have created into an arbitrarily named .zip file.
-
Upload the .zip file using the instructions in
Branding the Mobile Apps (Advanced-Edition License Only)
in the Filr 4.3: Administrative UI Reference.