Editing Local User Accounts
To edit a local user account:
-
On the Fortify header, select ADMINISTRATION.
-
In the left panel of the ADMINISTRATION view, select Users, and then click Local.
-
Locate the user account you want to edit, and then click the row to expand it and view account details.
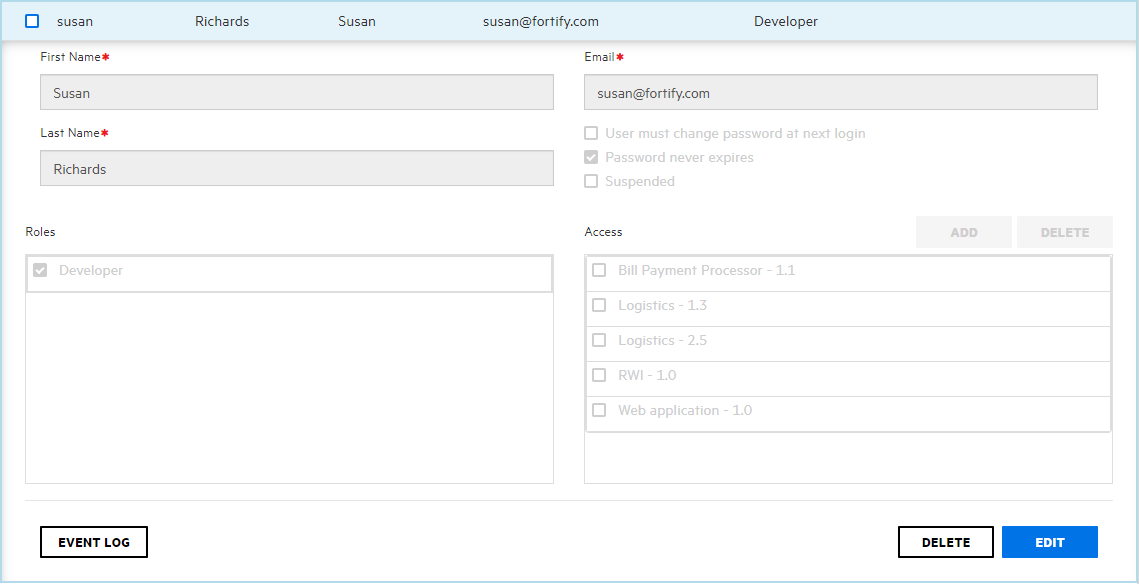
The user details displayed include the user name, email address, the email address password expiration policy
 A collection of audit engines and attack agents that Fortify WebInspect and Fortify WebInspect Enterprise use when auditing or crawling a Web application. Each component has a specific task, such as testing for susceptibility to cross-site scripting, building the site tree, probing for known server vulnerabilities, etc. These components are organized into the following groups: Audit Engines, General Application Testing, General Text Searching, Third-Party Web Applications, Web Frameworks/Languages, Web Servers, Web Site Discovery, and Custom Checks, and the roles and applicationA customer codebase evaluated by Fortify software. The top-level container for one or more application versions. When you work with a new codebase, the application and first application version are automatically created. An application includes one or more application versions that users create and configure. versions to which the user is assigned.
 -
Click EDIT.
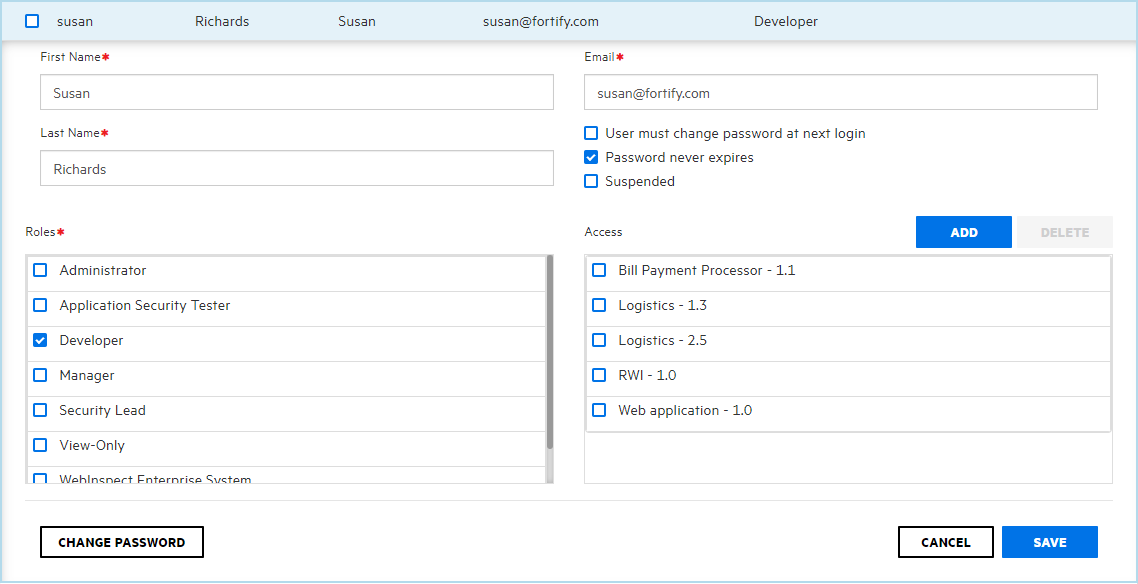
- Make any required changes to values in the First Name, Last Name, and Email boxes.
- The change the the email address password expiration policy, select or clear the check boxes below the Email box, as needed.
- To change the roles assigned to the user. in the Roles section, select or clear the check boxes for available roles.
- To remove the user from application versions, in the Access section, select the check boxes for the application versions, and then click DELETE. To assign the user to different application versions, click ADD, and then use the SELECT APPLICATION VERSION dialog box to specify the application versions the user is to work on. (For details, see Creating Local User Accounts.)
- To change the password for the user, click CHANGE PASSWORD, and then use the CHANGE PASSWORD dialog box to specify a new password.
See Also