Auditing multiple issues
You can evaluate and assign audit information to a group of issues. To audit a single issue on the Audit tab, see Auditing Analysis Results. To see any updates to the audit information made in Application Security, click the Refresh button  .
.
To audit multiple issues:
In the Fortify Remediation window, select multiple issues (by selecting the check box for each issue) to which you want to add the same audit information.
You can select one or more issues in the selected folder (tab). Switching to a different folder (tab) clears any previous selected issues. When you select multiple issues, Fortify Extension for Visual Studio displays the Bulk Audit tab.

Right-click an issue to clear all the selected issues or to select all issues in the current folder (tab).
To assign a user to the selected issues, do one of the following:
Click the Assign Issue to User button
 , select a user name from the Select User dialog box, and then click OK.
Click Claim to assign the issues to yourself.
To remove an assigned user, click the Unassign Issue button
 .
.From the Analysis list, select a value that reflects your assessment of this issue.
This is the primary tag defined in Application Security. The default name of this tag is Analysis, but it might be different for your organization.
If the priority override capability is enabled on Application Security, you can override the issue priority value by doing the following:
From the Priority Override list, select the preferred priority value.
In the box that appears below the list, type a comment to explain why you changed the value.
The issues are only visible in the newly assigned priority folder after the application metrics are refreshed on Application Security.
If additional custom tags are associated with the application version, specify values for those tags.
The Fortify Extension for Visual Studio displays all custom tags assigned to the application; however, you can only provide values for tags that your Application Security user account has permission to edit.
Use the following instructions to provide values for custom tags:
For text- and decimal-type custom tags, type the value in the box.
Text-type custom tags accept up to 500 characters (HTML/XML tags and newlines are not allowed).
For date-type custom tags, type a date or click the Select Date button
 to select a date from a calendar.
For an extensible list-type custom tag, you can add a new value to the tag by clicking Add Value. You can then assign this new value to the custom tag by selecting it from the list.
If any tag requires a comment, then after you provide a value for the tag, you must type a comment in the comment box that appears below the tag box.
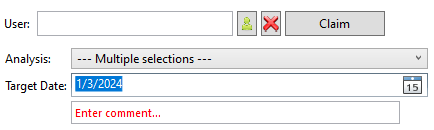
To add a comment for the audit of these issues, type the content in the Comment box.
Click Save.
The Fortify Extension for Visual Studio makes the updates to the application version in Application Security.
See Also