Upgrading and Decoupling Fortify WebInspect Enterprise from Fortify Software Security Center
After setting up Micro Focus Fortify WebInspect Enterprise Manager and database users, the Set Up SSC Connection Information window appears. This section describes how to decouple an existing Fortify WebInspect Enterprise installation from Micro Focus Fortify Software Security Center.
![]()
Important! Decoupling Fortify WebInspect Enterprise from Fortify Software Security Center is permanent. Reconnecting to Fortify Software Security Center is not supported. You can choose to map existing Fortify Software Security Center users to Windows accounts, allowing mapped user accounts to continue using Fortify WebInspect Enterprise.
Decoupled Fortify WebInspect Enterprise installations use Windows Authentication. Before decoupling Fortify WebInspect Enterprise from Fortify Software Security Center, enable Windows Authentication as described in Installing IIS, ASP.NET, and .NET Framework.
To decouple an existing Fortify WebInspect Enterprise installation from Fortify Software Security Center:
-
Clear the Integrate with SSC check box.
-
Click Next.
A warning appears advising that decoupling from the SSC server will require remapping all the existing SSC user accounts to Windows accounts.
-
Click Yes.
After confirming your selection to decouple, the Initialization Wizard checks for the items described in the following table. If no configuration errors are detected, skip ahead to Initializing Fortify WebInspect Enterprise.
Item Checked
Corrective Action
The Initialization Wizard determines whether your Fortify WebInspect Enterprise server is part of your domain. If the server is not part of the domain, the following message appears:
The Fortify WebInspect Enterprise server is not joined to a domain or the domain cannot be contacted. If you continue, Windows authentication for the server will be restricted to local accounts. For access to domain accounts, you can cancel the initialization, add the server to your domain (which will require a reboot), and rerun the Initialization Wizard. Press "Yes" if you would like to continue and use only local accounts.
Do one of the following:
-
To continue with authentication restricted to local accounts, click Yes.
-
To cancel the initialization and add the server to your domain, click No.
The Initialization Wizard determines whether Fortify Software Security Center is running. If it is not running, the following message appears:
SSC is currently not running or cannot be accessed to deregister Fortify WebInspect Enterprise. If you decouple without deregistering, SSC will continue to run as if connected to Fortify WebInspect Enterprise. Do you wish to continue?
Do one of the following:
-
To continue without deregistering Fortify WebInspect Enterprise, click Yes.
-
To cancel the initialization and ensure that Fortify Software Security Center is running, click No.
-
Initializing Fortify WebInspect Enterprise
After configuring the decouple from Fortify Software Security Center, the Ready to Start window appears.

Verify your previous choices and begin initializing Fortify WebInspect Enterprise.
-
Do one of the following:
-
To change settings, click Back.
-
To begin initializing Fortify WebInspect Enterprise using the values you have specified, click Next.
The Initialization Wizard:
-
Creates a new database if you chose to do so in Configuring the Database.
-
Configures various system components.
-
In the displayed, cumulative Status list in the Ready to Start window, adds the next step when it begins, with a flashing blue information icon while that step is running, and changes that icon to a green check mark when that step completes successfully (except for the first step, which is Initializing Database).
When the initialization completes successfully, a window displays a list of initialization steps and the final initialization step is “Web Service Initialization Succeeded...”

-
-
-
Click Next.
If a system administrator exists in WebInspect Enterprise, but the current user is not a system administrator, the Administrator Role Page appears.

Otherwise, the current user is added as the first Fortify WebInspect Enterprise system administrator and the procedure continues with the Decoupling from SSC window after Step 3.
-
On the Administrator Role Page, select the Add Current User to System Administrator Role check box to make the current user a Fortify WebInspect Enterprise system administrator.
Important! If you do not select this option, then the current user cannot map Fortify Software Security Center users to Windows accounts.
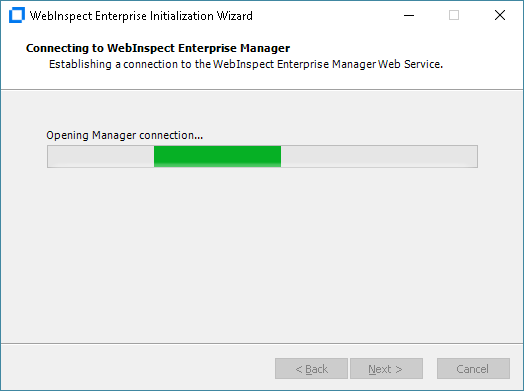
The Connecting to WebInspect Enterprise Manager screen appears until the connection is made.
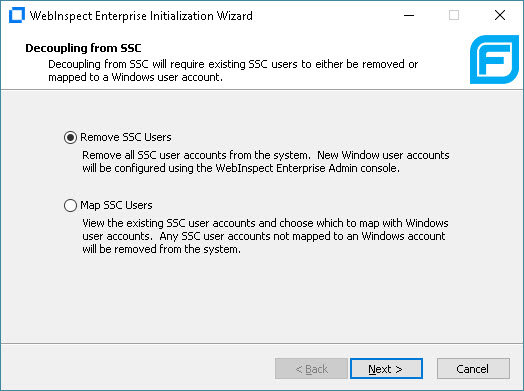
The Decoupling from SSC window appears.
-
Do one of the following:
-
To remove all Fortify Software Security Center user accounts from the system:
- Select Remove SSC Users.
- Click Next.
-
To view the list of existing Fortify Software Security Center user accounts and choose the accounts to map to Windows user accounts:
-
Select Map SSC Users.
-
Click Next.
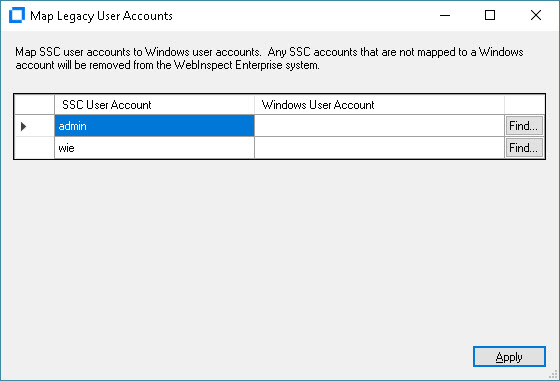
The Map Legacy User Accounts window appears.
-
In the Windows User Account column, type the user account that you want to map to each SSC User Account.
Note: You can click Find... to search for NT users to map.
-
Click Apply.
-
If you do not map all Fortify Software Security Center users, a message appears asking if you want the unmapped users to be removed from WebInspect Enterprise. Do one of the following:
-
Click Yes to remove the unmapped users.
-
Click No and map the remaining users.
-
-
-
Adding Sensor Users
After Fortify WebInspect Enterprise is initialized, the Sensor Users window appears.
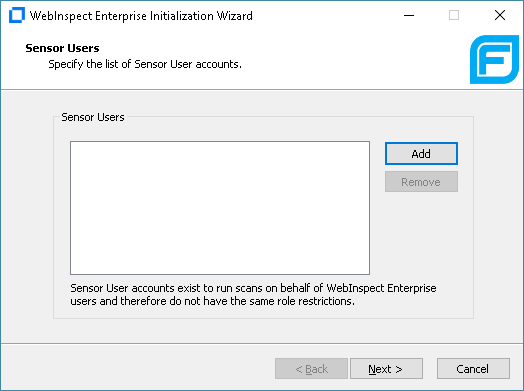
Optionally add at least one sensor user for Fortify WebInspect Enterprise to use to run scans. Sensor users must not be general console users and they must have been previously created as Windows users as described in Preparing to Install Fortify WebInspect Enterprise.
You do not have to add any sensor users to Fortify WebInspect Enterprise at this point, but you will need to specify at least one sensor user before you can run any scans. Post‑installation configuration procedures in this document also describe how to add sensor users.
To add a sensor user to Fortify WebInspect Enterprise now:
-
Click Add.
-
In the Select Users or Groups dialog box, type the name of an existing user to add (see Preparing to Install Fortify WebInspect Enterprise), in the format localhost\user or domain\user. If you specify only the user, you can click Check Names to help identify the localhost or domain.
-
Click OK.
-
Verify that the sensor user you specified has been added to the list of Sensor Users in the window.
Completing Initialization
To complete the initialization process:
-
Click Next.
The Initialization Wizard completes.

-
Click Finish.
The Initialization Wizard closes.
Important Information about Upgrading WebInspect
After decoupling from Fortify Software Security Center, you must upgrade Micro Focus Fortify WebInspect to 21.1.0 if you plan to connect it to Fortify WebInspect Enterprise. Connecting a previous version of Fortify WebInspect, such as version 20.2.0, with a decoupled Fortify WebInspect Enterprise can cause known issues with certain functionality.
What's Next?
Continue with Configuring Services.