Scan Info Panel
The Scan Info panel has the following choices:
Dashboard
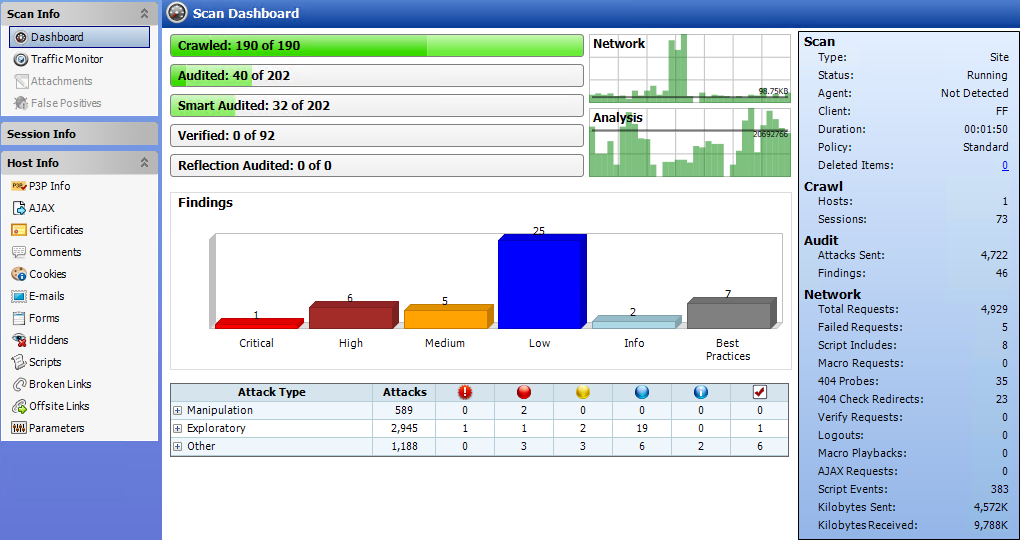
The Dashboard selection displays a real-time summary of the scan results and a graphic representation of the scan progress. This section is displayed only if you select this option from the Default or Current settings. For additional information, see Dashboard.
Traffic Monitor
Fortify WebInspect normally displays in the
The Traffic Monitor or Traffic Viewer is available only if Traffic Monitor Logging was enabled prior to conducting the scan.
For more information, see Traffic Monitor (Traffic Viewer).
Attachments
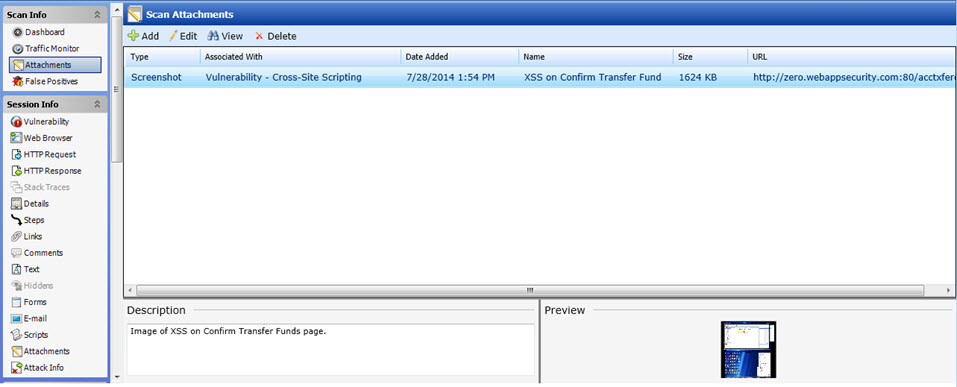
The Attachments selection displays a list of all session notes, vulnerability notes, flags for follow-up, and vulnerability screenshots that have been added to the scan. Each attachment is associated with a specific session. This form also lists scan notes (that is, notes that apply to the entire scan rather than to a specific session).
You can create a scan note, or you can edit or delete an existing attachment.
To create a scan note, click the Add menu (in the information display area).
To edit an attachment, select the attachment and click Edit.
To create attachments in other areas of the Fortify WebInspect user interface, you can do one of the following:
-
Right-click a session in the navigation pane and select Attachments from the shortcut menu.
-
Right-click a URL on the Findings tab of the summary pane and select Attachments from the shortcut menu.
Fortify WebInspect automatically adds a note to the session whenever you send a defect to Micro Focus Application Lifecycle Management (ALM).
For more information, see Attachments - Scan Info.
False Positives
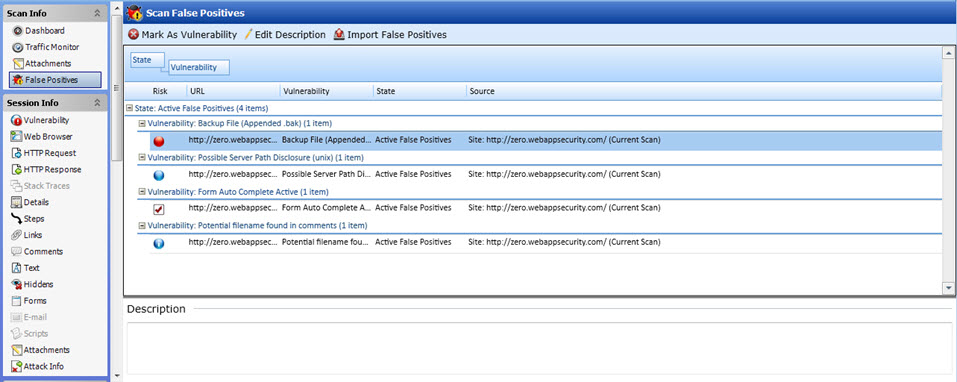
This feature lists all URLs that Fortify WebInspect originally flagged as containing a vulnerability, but which a user later determined were false positives. Note that this option is not displayed until someone actually designates a vulnerability as a false positive.
Click the URL associated with a false positive to view a note that may have been entered when the user removed the vulnerability.
To reassign the vulnerability and remove the URL from the False Positive list, select a URL and click Mark as Vulnerability.
You can import from a previous scan a list of vulnerabilities that were identified as being false positives. Fortify WebInspect then correlates these false positives from a previous scan with vulnerabilities detected in the current scan and flags the new occurrences as false positives.
For more information, see False Positives.
See Also