2.8 Work with Screen Data

2.8.1 Capture Incoming Screen Data (VT)

You can use the Capture Incoming Data action to capture data received from the host and save it to a file. This allows you to save a report (or other data) on the host screen and distribute it as a text file. It is also useful for logging data received from the host.

Using the Capture Incoming Screen Data action has advantages over printing or tracing data. Unlike when you print data to a file or create a trace file, captured lines are not wrapped, and you can choose whether to capture all of the data (including control sequences) or text data only.

Capture incoming data in Classic mode

If you are using a Classic interface mode, you’ll need to make sure your session compatibility is set for Extra! as follows.

To capture incoming data in Classic mode

  1. From the File menu, select New Session to create a new session document.

  2. In the Create New Document dialog box, select VT Terminal and then in the Compatibility list (at the bottom of this dialog box), select Extra!.

  3. To capture data from the host, on the Tools menu, select Capture Incoming Data.

  4. In the Capture Incoming Data dialog box, browse to the file you want to save the data in and select whether to append the data you capture to an existing file or overwrite the file each time you start capturing data.

  5. If you want to omit control sequences from the captured data, select Save As Text.

    All of the data sent by the host is saved to the file you specified.

  6. When you want to stop capturing data, on the Tools menu, select End Capture.

Capture incoming data in Ribbon mode

If you are using the Ribbon mode interface, you’ll need to map the Capture Incoming Data action to a button on the Ribbon interface as follows.

To capture incoming data in Ribbon mode

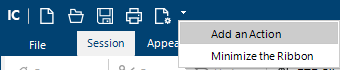
  1. Click the Quick Access Toolbar menu, and then select Add an Action.

  2. In the Select Action dialog box, in the Action list, select Capture Incoming Data.

  3. In the Capture Incoming Data dialog box, browse to the file you want to save the data in and select whether to append the data you capture to an existing file or overwrite the file each time you start capturing data.

  4. If you want to omit control sequences from the captured data, select Save As Text.

  5. To capture data from the host, select on the Quick Access Toolbar.

    All of the data sent by the host is saved to the file you specified.

  6. When you want to stop capturing data, select on the Quick Access Toolbar.

2.8.2 Copy and paste from the host screen

You can copy entire host screens or selected data to the clipboard, then print the data, paste it to other host screens, Microsoft Office products installed on your computer, or other types of files.

When you copy data from the screen and paste it into an application that accepts tabular data (for example, a spreadsheet), table columns are set by analyzing vertical space alignment. Optionally, you can configure InfoConnect so that columns are set by replacing multiple spaces or tabs with a single tab. (See Configure Clipboard Settings.)

To send host screens or data directly to Microsoft Office products, see Integrate host data with Office applications.

To copy selected data from the current screen

  1. Navigate to the host data you want to copy.

  2. Select specific data to copy. To copy it to the clipboard, do one of the following:

    Keyboard shortcut

    CTRL+C

    NOTE:This standard Windows keyboard shortcut is not available by default for some session types.

    Browser

    From the InfoConnect menu, point to Edit, then click Copy.

    Ribbon

    On the Session ribbon, from the Clipboard group, click Copy.

    TouchUX

    Under Edit, tap Copy.

    Classic MDI

    From the Edit menu, click Copy.

    NOTE:You can select a word in a field by double-clicking the word or select all of the words in a field by triple-clicking the field.

  3. Navigate to the location where you want to paste the data. This can be on the same host screen, another host screen, or even in another application.

  4. Press CTRL+V or use the Paste command for your user interface.

2.8.3 Using a Paste Range

A paste range defines a region in which you can paste text across multiple screens. After you cut, copy, or append a selection on the Clipboard, you can set the paste range before inserting the selection within the host application. You can also use the Paste Next command to paste text across multiple screens.

NOTE:

The changes you make in the Paste Range dialog box are retained only while your session is open and are not saved when you close your session. If you close and reopen your session, you’ll need to adjust these settings again. You cannot save these settings. If you need to define a paste range that you can reuse after you close and reopen your session, you can create a VBA macro that pastes text into a custom paste range (see the PasteRange method in the VBA Help).

Paste Range is supported for IBM 3270 and IBM 5250 terminals.

To paste Clipboard information over multiple screens within a host application

  1. In a host application or another Windows application, cut, copy, or append a selection on the Clipboard.

  2. Open the Paste Range Dialog Box.

    The steps depend on your user interface mode.

    User Interface Mode

    Steps

    Ribbon

    On the Session tab, on the Paste drop down menu, select Paste Range.

    Classic IBM

    On the Edit menu, select Paste Range.

  3. Edit the paste range for the First screen and Remaining screens as needed to fit the paste area.

  4. If you need to specify a different page down key to send, select it from the Page Down list.

    This terminal key is used to scroll automatically to the second and remaining screens of the paste range when the pasted text exceeds the end of the screen.

  5. Click OK to paste the data into the paste range you specified.

NOTE:For more about Paste Range settings, see Paste Range Dialog Box

2.8.4 Copy data into separate buffers

The InfoConnect Classic MDI interface allows you to access four buffers that you can use to store and retrieve screen data. If you are using the Classic MDI user interface mode, you can copy screen text to one of these buffers. When you need to paste the text, you can choose to paste it from that buffer. This allows you to store and retrieve different values in separate buffers.

To copy data into separate buffers

  1. If you are using the Ribbon interface, switch to the Classic MDI interface mode.

    1. On the File menu, select InfoConnect Workspace Settings and then select Configure User Interface.

    2. In the User interface mode list, select Classic MDI.

    3. Restart the workspace.

  2. In an InfoConnect session, select some data to copy.

  3. On the Edit menu, choose Copy to Buffer and then select one of the four buffers to copy the data to.

  4. Navigate to the location where you want to paste the data.

  5. On the Edit menu choose Paste from Buffer and then select the buffer you copied the data to.

2.8.5 Copy screens using the Screen History feature

Screen History automatically creates recordings of 3270, 5250, ALC, T27, and UTS host screens as you navigate to them. VT screens can be recorded using manual capture. You can view the information from those screens, and send multiple host screens to Microsoft Word, PowerPoint, and Outlook (Email Message and Note only), if they are installed on your computer.

To copy host screens from Screen History to another location

  1. Navigate through the host screens you want to capture. The screens will be displayed in the Screen History area.

    NOTE:If you are working in a VT session, click Manual Capture to copy screen content to Screen History.

  2. Select the screen that you want to copy.

    NOTE:Only text areas of the host screen are included in the recorded image; host graphics images are not included.

  3. From the toolbar in the Screen History task pane, click the button option appropriate for your task. For example, to copy the content, click Copy and then choose Copy as Text or Copy as Bitmap.

2.8.6 Print the terminal screen display

InfoConnect supports printing the contents of the current terminal screen display from any terminal session.

To print a terminal screen using default settings

  1. Open a terminal session.

  2. Navigate to the screen you want to print. To print the content do one of the following.

    The steps depend on your user interface mode.

    User Interface Mode

    Steps

    Ribbon or InfoConnect Browser

    From the Quick Access Toolbar, click .

    TouchUX

    Tap the Folder icon and then under Print, select Print

    Classic MDI

    From the File menu, select Print.