8.2 CIS Client for Mac
The CIS client on Mac allows users to preview the files uploaded to the cloud instead of the earlier issue of downloading them to the local storage.
8.2.2 Installing CIS Client
The following are the steps to install the CIS client on a Mac workstation. We have used macOS Ventura to explain the procedure.
-
Open the
CISClient.pkg
installer to launch the package. -
Read the introduction, then click .
-
Click , then to accept the end-user license agreement.
-
Click . It prompts for administrator credentials; enter the password and click > to begin the installation.
In a few seconds, the client is successfully installed.
-
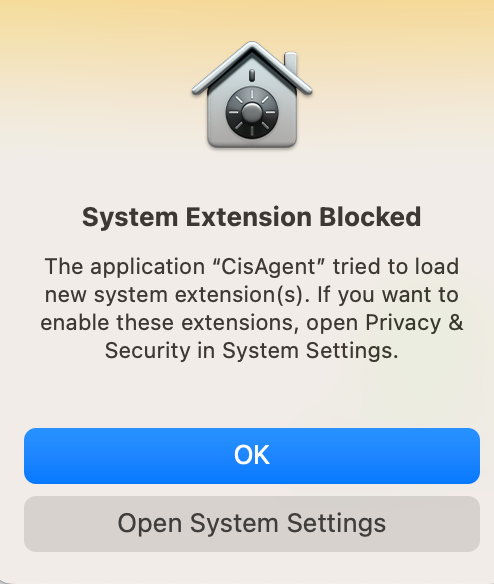
You are prompted with a “System Extension Blocked” message. Click on the button.
-
In macOS Ventura, click the tab and click .

or
In macOS Monterey, click on the lock button, which prompts for the system password. Specify the password and click .


-
In macOS Ventura, Specify the password and click .

or
In macOS Monterey, click .

or
In Big Sur, click .

or
In Catalina, click .

-
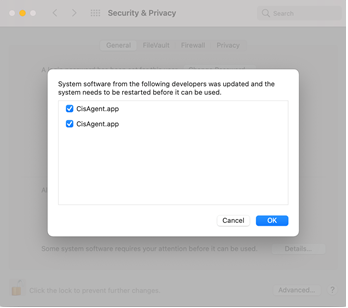
In macOS Ventura, select both the CisAgent and click .

or
In macOS Monterey, select both the CisAgent.app.

or
In Big Sur, select both the CisAgent.app.
or
In Catalina, select the Placeholder Developer and click .

-
Click to enable network filtering.

-
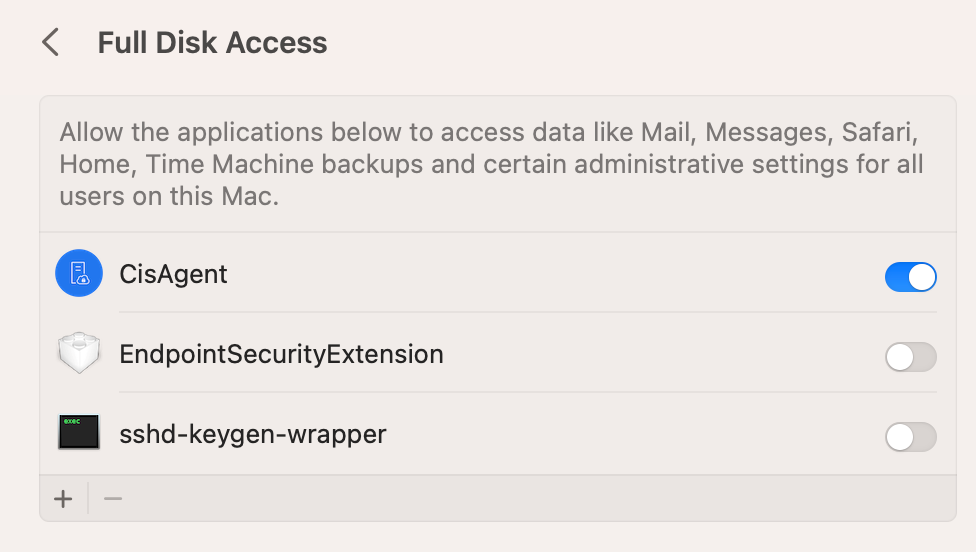
In the tab, click .

-
Select and . If CisAgent is not listed, then click the button to add it.
-
Specify the password and click .
-
-
For the configuration changes made to the CIS client to take effect, click .
8.2.3 Uninstalling CIS Client
The steps to uninstall the CIS client on a Mac workstation are as follows:
-
Run the command:
sudo sh /Applications/CisAgent.app/Contents/Resources/Uninstall.sh
-
Restart the Mac workstation.
-
On restarting the machine, go to > right-click on > . This prompts for a password. On specifying the password, a confirmation message to remove the system extensions is displayed, click . This cleans up the workstation and uninstalls the CIS client.

-
After uninstalling the CIS client, ensure to restart the Mac workstation. Otherwise, the workstation would still behave as a managed CIS client (accessing and previewing the files uploaded to the cloud).