3.12 Specifying the Installation Settings

3.12.1 Customizing the Software Selections

IMPORTANT:To install any of the OES patterns, you must customize the software selections. If you don’t make any selections, only the base OES packages are installed. However, you can install any of the patterns after the base OES installation is complete. See Installing or Configuring OES Services on an Existing OES 2018 SP3 Server.

To customize which software packages are installed on the server:

  1. On the Installation Settings page, click Software.

    None of the OES Services is selected by default. This lets you fully customize your OES server.

  2. You can do the following to customize your software selections:

    • Select OES Services: You can select any number of the OES Services patterns as long as you avoid unsupported service combinations.

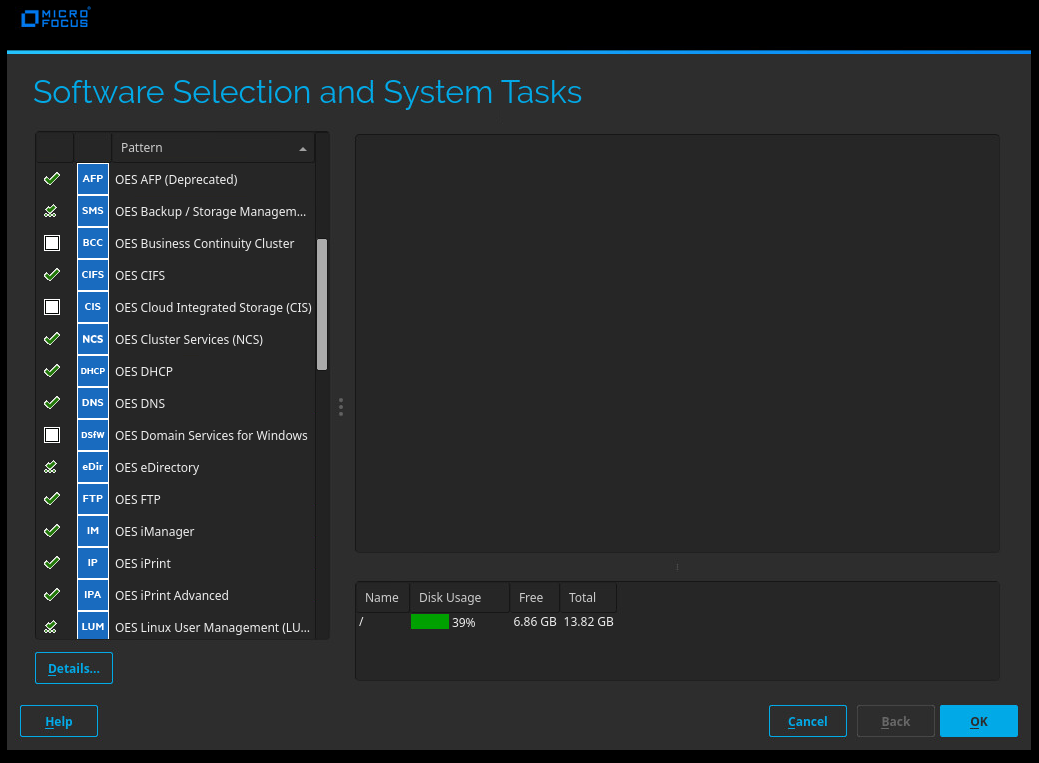
      A description of each pattern displays to the right of the pattern when it is selected. For a description of OES Services patterns and the components selected with each pattern, see Table 2-4.

      IMPORTANT:If you deselect a pattern after selecting it, you are instructing the installation program to not install that pattern and all of it dependent patterns. Rather than deselecting a pattern, click Cancel to cancel your software selections, then click the Software heading again to choose your selections again.

      Selecting only the patterns that you want to install ensures that the patterns and their dependent patterns and packages are installed.

      If you click Accept and then return to software pattern selection page, the selections that you made become your base selections and must be deselected if you want to remove them from the installation proposal.

      Selecting a pattern automatically selects the other patterns that it depends on to complete the installation.

    • Customize Your Selections: You can view the details of your selection and add or remove specific packages for the installation by clicking Details.

  3. When you have selected the software components that you want to install, click Accept.

  4. (Conditional) If the prompt for Automatic Changes displays, click Continue.

  5. (Conditional) If prompted, resolve any dependency conflicts.

3.12.2 Configuring the Firewall Settings

For security reasons, a firewall is started automatically on each configured interface. The configuration proposal for the firewall is updated automatically every time the configuration of the interfaces or services is modified.

Many of the OES services require an open port in the firewall. Table 3-2 shows the ports that are automatically opened when each listed OES service is configured.

Table 3-2 Open Enterprise Server Services and Ports

Service

Default Ports

Domain Services for Windows

  • 1636 (LDAPS)

  • 1389 (LDAP)

  • 88 (Kerberos TCP and UDP)

  • 135 (RPC Endpoint Manager TCP and UDP)

  • 1024 - 65535 (RPC Dynamic Assignments TCP)

  • 3268 (Global Catalog LDAP TCP)

  • 3269 (Global Catalog LDAP over SSL TCP)

  • 123 (Network Time Protocol UDP)

  • 137 (NetBIOS Name Service TCP and UDP)

  • 138 (NetBIOS Datagram Service TCP and UDP)

  • 139 (NetBIOS Session Service TCP and UDP)

  • 8025 (Domain Service Daemon TCP)

  • 445 (Microsoft-DS traffic TCP and UDP)

NetIQ eDirectory

  • 389 (LDAP)

  • 636 (secure LDAP)

    IMPORTANT:The scripts that manage the common proxy user require port 636 for secure LDAP communications.

  • 8028 (HTTP for iMonitor)

  • 8030 (secure HTTP for iMonitor)

  • 524 (NCP)

iManager

  • 80 (HTTP)

  • 443 (secure HTTP)

iPrint

  • 80 (HTTP)

  • 443 (secure HTTP)

  • 631 (IPP)

Novell Identity Translator

  • 3268

  • 389

OES AFP

  • 548

OES CIFS

  • 139 (Netbios)

  • 445 (Microsoft-ds)

Cloud Integrated Storage (CIS)

Infrastructure services:

  • 2181 (ZooKeeper)

  • 2282 (secure ZooKeeper)

  • 9092 (Kafka)

  • 9094 (secure Kafka)

  • 9400 (Elasticsearch)

  • 2377, 7946 (Docker Swarm)

  • 2888, 3888 (Communication between ZooKeeper servers and leader election)

CIS core services:

  • 3306 (MariaDB)

  • 8000 (Agent)

  • 8105 (CIS configuration)

  • 8343 (secure Gateway)

  • 8344 (CIS management))

  • 8346 (secure Datascale Gateway)

  • 8347 (secure Datascale Data service)

  • 24224 (Fluentbit)

OES Cluster Service

  • 7023

OES DHCP

  • 67

OES DNS

  • 953 (secure HTTP)

  • 53 (TCP)

  • 53 (UDP)

OES FTP

  • 21

Novell Information Portal

  • 80 (HTTP)

  • 443 (secure HTTP)

OES NetWare Core Protocol (NCP)

  • 524

OES Remote Manager

  • 8008 (HTTP)

  • 8009 (secure HTTP)

NURM

  • 80

  • 443

SFCB

  • 5988 (HTTP)

  • 5989 (secure HTTP)

Secure Shell

  • 22

Storage Management Services (Backup)

  • 40193 (smdr daemon)

Time Synchronization

  • 123 (Network Time Protocol UDP)

To adapt the automatic settings to your own preferences:

  1. On the Installation and Settings page, click Firewall and SSH.

  2. On the Basic Firewall and SSH Configuration page, select the required option and click OK.

To disable the firewall:

  1. On the Installation Settings page, under Firewall and SSH, click disable on the Firewall will be enabled status line.

    or

    On the Installation Settings page, click Firewall and SSH; deselect Enable Firewall on the Basic Firewall and SSH Configuration page and click OK.

    When the firewall is disabled, the status for Firewall should read Firewall will be disabled.

  2. Verify that the settings on the Installation Settings page are set as desired, then click Install. Continue with Section 3.12.4, Accepting the Installation Settings.

3.12.3 Setting Systemd Target

If you are installing OES in text mode, you must set the systemd target before continuing with the installation.

  1. On the Installation Settings page, click Default Systemd Target.

  2. On the Set Default Systemd Target page, select Text mode and click OK.

  3. Continue with Section 3.12.4, Accepting the Installation Settings.

3.12.4 Accepting the Installation Settings

  1. Review the final Installation Summary page to ensure that you have all the Installation settings you desire.

  2. After you have changed all the Installation Settings as desired, click Install.

  3. On the Confirm Installation page, click Install.

    The base installation settings are applied and the packages are installed.

  4. After the server reboot, proceed with Configuring Open Enterprise Server.