5.4 Upgrading to OES 2018 SP3
Use the following instructions to complete the upgrade applicable to the installation source you are using:
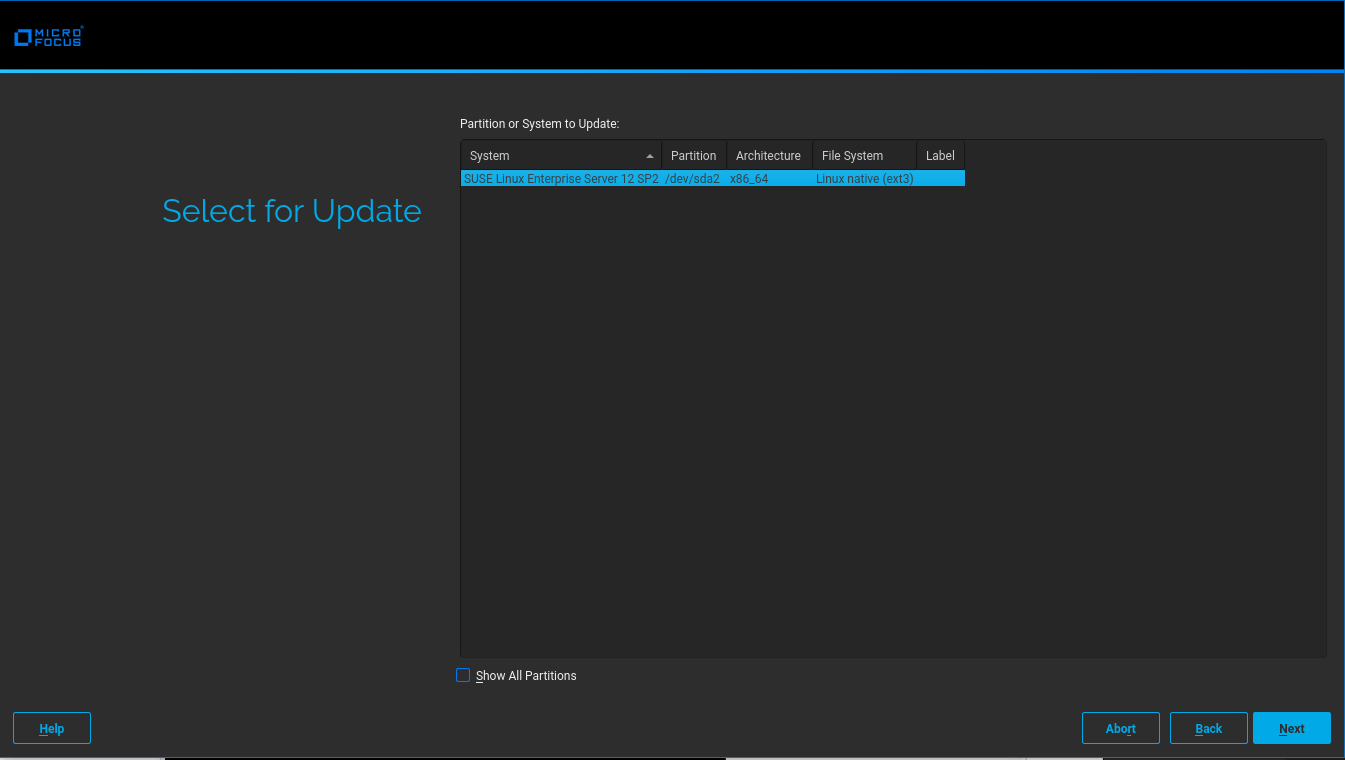
5.4.2 Specifying the Partition to Update
YaST tries to determine the correct root (/) partition. If there are several possibilities, or if YaST can’t definitely determine the correct root partition, the Select for Update page displays.
-
If there is only one partition listed, click .
-
If there are several partitions, select the root partition you want to upgrade.
-
Click .
YaST mounts the selected partition and displays all repositories that have been found on the partition that you want to upgrade.
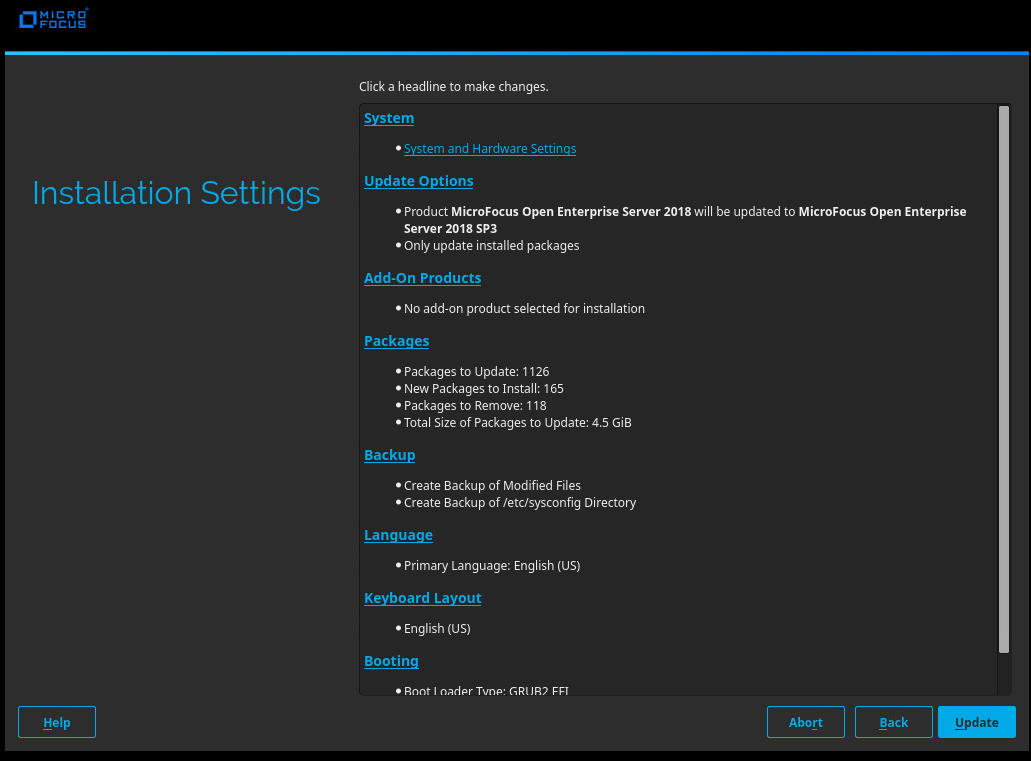
5.4.6 Verifying and Customizing the Update Options in Installation Settings
IMPORTANT:To verify that previously installed services are selected for installation and to install any additional OES services during the upgrade, you must customize the Update Options on the Installation Settings page.
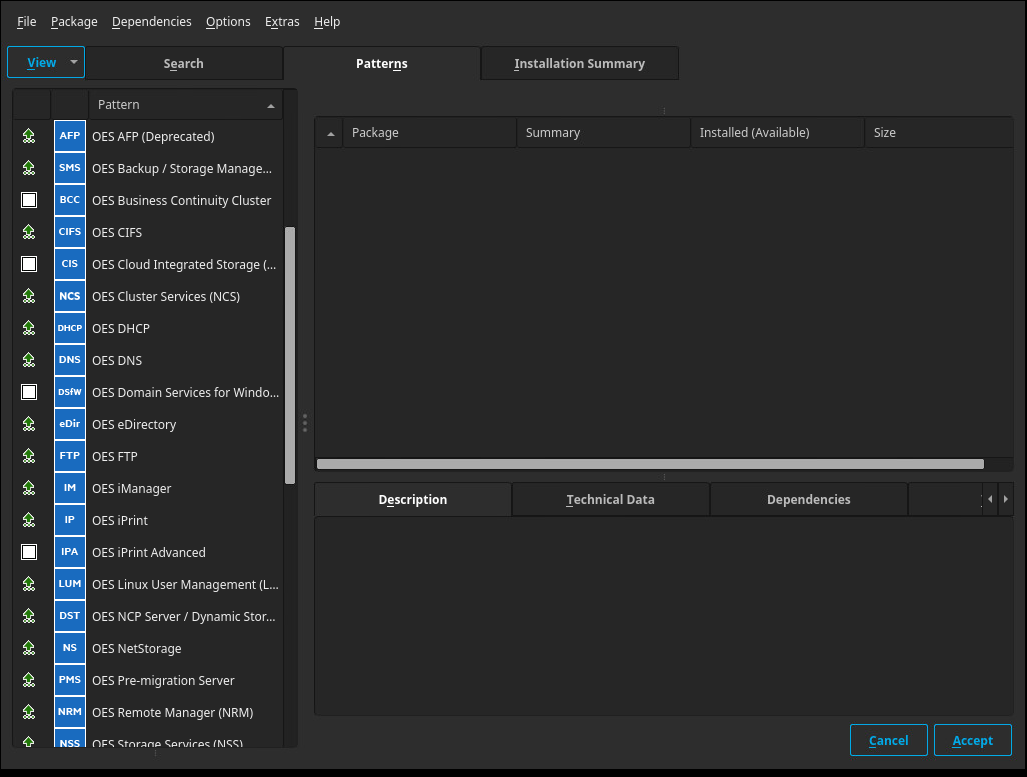
To verify or customize the software packages that are installed on the server:
-
On the Installation Settings page, click .
-
In the Update Options page, click >
-
All of the OES Services patterns that were previously installed are selected by default.
Ensure that the patterns for the services you are upgrading are selected, then select the patterns for any new OES Services that you might want to also install.
A description displays to the right of a pattern when the pattern is selected. For a description of OES Services patterns and the components selected with each pattern, see Table 2-4.
IMPORTANT:If you deselect a pattern after selecting it, you are instructing the installation program to not install that pattern and all of its dependent patterns. Rather than deselecting a pattern, click to cancel your software selections, then click the heading again to choose your selections again.
Selecting only the patterns that you want to install ensures that the patterns and their dependent patterns and packages are installed.
If you click and then return to software pattern selection page, the selections that you made become your base selections and must be deselected if you want to remove them from the installation proposal.
Attempting to uninstall a service by deselecting its pattern is not recommended. For more information, see Section 13.0, Disabling OES 2018 SP3 Services.
Selecting a pattern automatically selects the other patterns that it depends on to complete the installation.
-
If you want to see the details of your selections, click .
-
When you have the software components selected that you want to install, click .
-
When the notification about deleting unmaintained packages appears, click .
-
(Conditional) If the prompt for displays, click .
-
(Conditional) If you are prompted to resolve any dependency conflicts, resolve them.
-
If the Update Options page displays again, click .
-
On the Installation Settings page, ensure the following are listed under the :
Product Micro Focus Open Enterprise Server <earlier version number> will be updated to Micro Focus Open Enterprise Server 2018 SP3
Proceed with Section 5.4.7, Accepting the Installation Settings.
-
If you see package conflict errors (red text under the link), refer to the OES 2018 SP3: Release Notes for resolution instructions.
-
Continue with Accepting the Installation Settings.
5.4.8 Specifying Configuration Information
When the server reboots, you are required to complete the following configuration information:
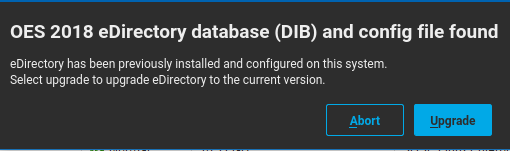
Upgrading eDirectory
OES 2018 SP3 includes eDirectory 9.2.4.
-
When the following dialog box appears, click .
NOTE:
-
If you are upgrading from OES 2015 SP1, this dialog will show that the OES 2015 eDirectory database (DIB) and config file were found.
-
-
On the eDirectory Upgrade - Existing Server Information page, type the , then click .
-
On the Novell Modular Authentication Service page, click .
-
Continue with Specifying LDAP Configuration Settings.
Specifying LDAP Configuration Settings
Many of the OES services require eDirectory. If eDirectory was not selected as a product to upgrade or install but other OES services that do require LDAP services were installed, the LDAP Configuration service displays so that you can complete the required information.
-
In the field, specify the name for the existing eDirectory tree that you are installing this server into.
-
In the field, specify the name and context for user Admin on the existing tree.
-
In the field, specify a password for user Admin on the existing tree.
-
Add the LDAP servers that you want the services on this server to use. The servers that you add should hold the master or a read/write replica of eDirectory. Do the following for each server you want to add:
-
When all the LDAP servers that you want to specify are listed, click .
-
Continue with Configuring Open Enterprise Server Services.
Configuring Open Enterprise Server Services
After you complete the LDAP configuration or eDirectory configuration, the summary page is displayed, showing all the OES components you updated and installed and their configuration settings.
-
Review the setting for each component and click the component heading to change any settings.
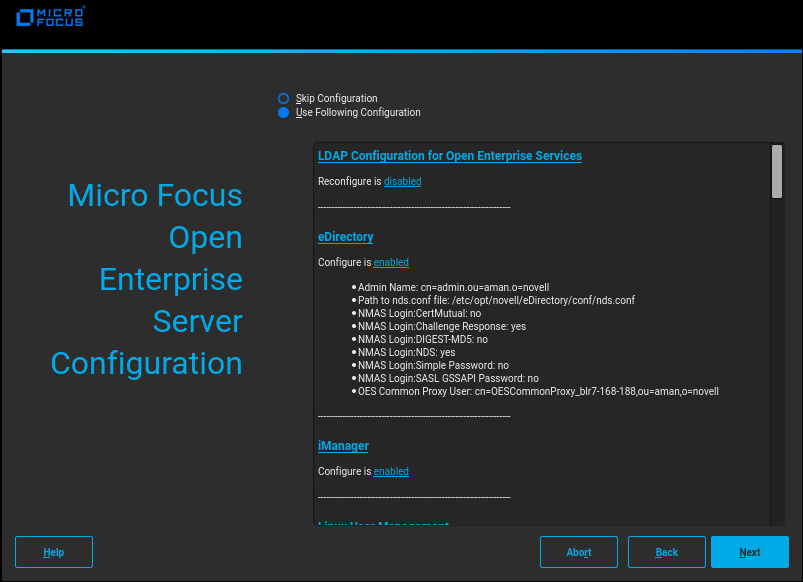
When you specify the configuration information for OES services, see the information in Configuration Guidelines for OES Services, or click a link below:
-
When you are satisfied with the settings for each component, click .
-
When you confirm the OES component configurations, you might receive the following error:
The proposal contains an error that must be resolved before continuing.
If this error is displayed, check the summary list of configured products for any messages immediately below each product heading. These messages indicate products or services that need to be configured. If you are running the YaST graphical interface, the messages are red text. If you are using the YaST text-based interface, they are not red.
For example, if you selected Linux User Management in connection with other OES products or services, you might see a message similar to the following:
Linux User Management needs to be configured before you can continue or disable the configuration.
If you see a message like this, do the following:
-
On the summary page, click the heading for the component.
-
Supply the missing information in each configuration page.
When you specify the configuration information for OES services during the upgrade, see the information in Configuration Guidelines for OES Services.
When you have finished the configuration of that component, you are returned to the Novell Open Enterprise Server Configuration summary page.
-
If you want to skip the configuration of a specific component and configure it later, click d in the status to change the status to .
If you change the status to , you must configure the OES components after the installation is complete. See Installing or Configuring OES Services on an Existing OES 2018 SP3 Server.
-
-
After resolving all product configuration problems, click to proceed with the configuration of all services and installation of iManager plug-ins.
-
When the Readme page displays, click and continue with Section 5.4.10, Finishing the Upgrade.
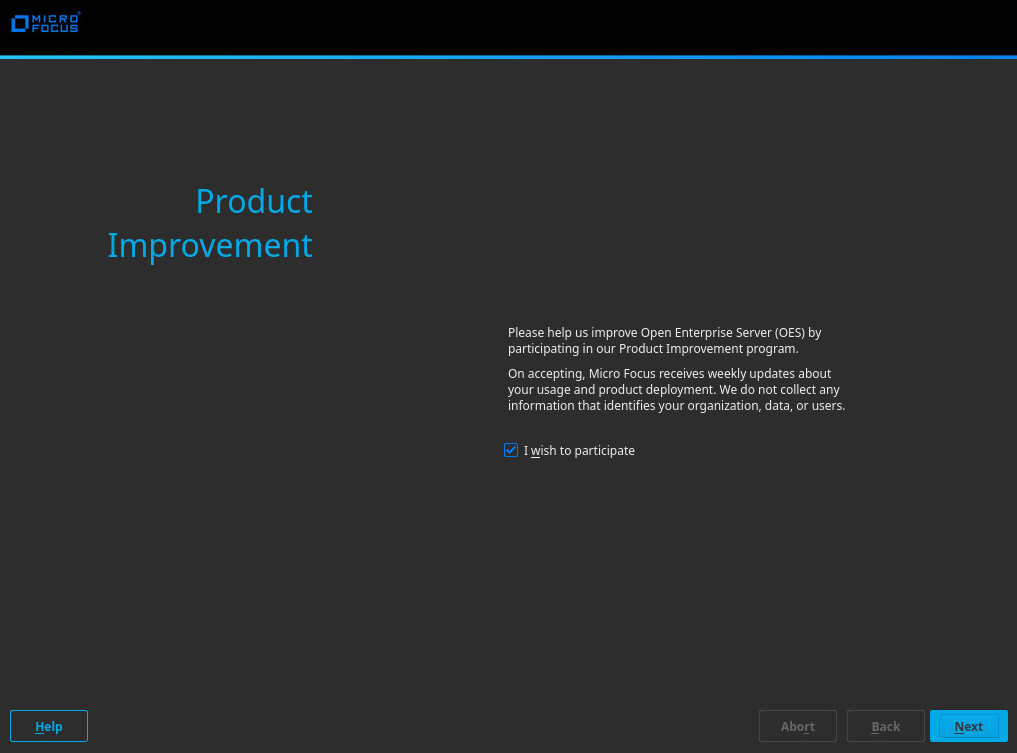
5.4.9 Participating in Product Improvement Consent Screen
Telemetry enables Micro Focus to collect statistical data about your usage of services on the OES server. This data enables us to ensure that you have the best possible experience with OES services. Weekly once the data is sent to the Micro Focus server.
Select the checkbox to participate in the program. All the servers in the same context as this server are automatically enabled for telemetry and this screen is not displayed to other servers in that context.
Figure 5-1 Product Improvement
How the Micro Focus Server Receives the Data
After the weekly collection, the data is stored at /var/opt/novell/telemetry/data/ on the OES server that was configured with this program. The OES server transfers the data to the Micro Focus server. If the transfer is unsuccessful, the system attempts to send it again during the next weekly cycle. No attempts to send the data is made outside of the weekly cycles.
The data is not encrypted because no sensitive or identifying information is included.