3.3 Setting Up iPrint
After you install the Open Enterprise Server components on your server (including iPrint), you need to start and configure iPrint. For complete management, including uploading printer drivers and PPD files, you need to access iManager from a workstation with the iPrint Client installed. For a review of supported browsers and iPrint operations, see Section A.0, Supported Browsers for iPrint.
-
Run iManager from the operating system in which you want to upload the print driver. For example, to upload a Windows 7 print driver, you must run Internet Explorer from a Windows 7 workstation. For more information, see the iManager Web site.
-
Create a Driver Store: A Driver Store is a repository where administrators add printer drivers and PPD files used for their print system.
-
Add printer drivers and PPD files: To save the extra step of associating driver files when you create printers, you should add printer drivers to the Driver Store before you create printers.
-
Create a Print Manager: The Print Manager communicates print job information between users and printers while also providing print job management, security, and spooling.
For more information, see Creating Additional Print Managers.
-
Create Printers: This task helps you create printers for your system and associate printer drivers.
For more information, see Creating Additional Printers.
3.3.2 Creating a Driver Store
You need only one Driver Store for your print system; however, depending on your network setup, you can add additional Driver Stores. You must create a Driver Store in order to create a Print Manager. For more information about placing Driver Stores on your network, see Creating Additional Driver Stores.
-
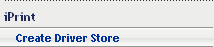
In iManager, click > .
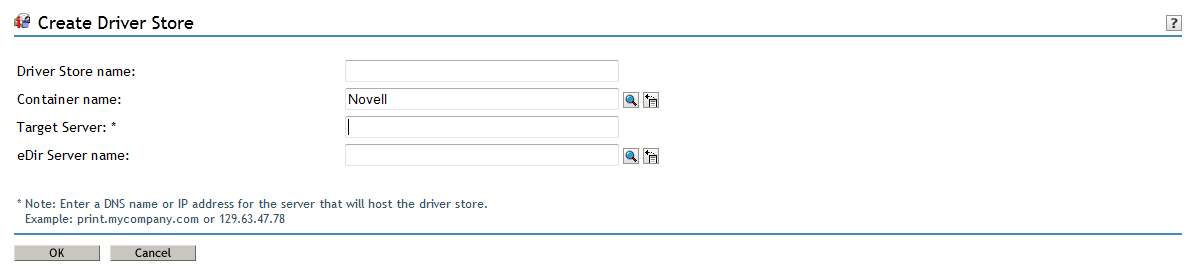
The Create Driver Store dialog box is displayed.
-
In the field, specify the name of the Driver Store object.
-
In the field, specify the name of the container where you want the Driver Store object to reside.
HINT:Use the Object Selector
 to choose the container object from an object list. For more information on using the Object Selector,
Using the Object Selector
in the NetIQ® iManager Administration Guide.Use the History Browser to browse through the list of objects you used recently.
 -
In the field, specify the DNS name or the IP address of the server where you want the iPrint Driver Store to reside.
If you have set up the cluster, specify the DNS name or IP address of the iPrint resource.
-
In the field, specify an eDirectory server that you want the Driver Store to communicate with.
For fault tolerance, you can specify more than one eDirectory server from the same tree. For more information, see Changing the eDirectory Server Assignment.
-
Click to exit without saving any of your changes.
or
Click to save your changes.
IMPORTANT:When you try creating a Driver Store for the first time, you might receive a certificate error. You should accept the certificate in order to proceed with creating the Driver Store.
After the Driver Store is created, the Driver Store daemon is loaded on the server, and you can start uploading drivers.
NOTE:To check the status of the Driver Store, use the systemctl status novell-idsd.service command.
3.3.4 Managing Printer Drivers
A printer driver or PostScript Printer Description (PPD) file is software that directly supports a physical printer, enabling it to carry out its functions.
Hardware vendors develop printer drivers and PPD files, which are specific to each printer. Most printers require different printer drivers for each operating system they interact with. You can use iManager to view a list of printer drivers and PPD files you have uploaded to the Driver Store. On Windows Vista, Windows 7, Windows 8, Windows 8.1, and Windows 10 platforms, you can also upload printer drivers by using a command line option. For more information, see Implementing iPrint by Using the Command Line.You can add printer drivers and PPD files from diskettes, CDs, and the workstation operating system.
The Driver Store daemon must be running in order to add printer drivers, and the iPrint Client must be installed on a Linux or Windows workstation. To install the client, go to http://dns_name or IP_address/ipp and click the link. For more information on installing the client, see Section 5.0, Installing and Setting Up iPrint on Client Workstations. For a review of supported browsers and driver upload operations, see Supported Browsers for the iPrint Plug-In and iManager.
To add printer drivers to the Driver Store:
-
In iManager, click > .
-
Specify the name of the iPrint Driver Store to which you want to add printer drivers.
-
Select the tab.
-
Use the drop-down list to select the client platform for which you want to upload the printer driver.
-
Do one of the following:
-
Click to add printer resources from a printer driver .inf file or PPD file.
Mac: The standard file format is PPD (Postscript Printer Description) file.
Windows: The standard file format is .inf file.
-
Click to add drivers from the workstation where you are running iManager.
The drivers installed on your workstation are made available to be uploaded to the Driver Store. You can upload only drivers for the platforms installed on your workstation.
-
-
Select a driver, then click .
-
(Conditional) If the client platform is Mac, new options are available as follows:.

Associated Driver Package: Displays the driver package, if any, associated with the selected drivers. This is the dependent package for the driver and is installed with the printer. This option is available only on a Mac machine.
-
Perform one of the following actions:
-
Click to add printer driver package to the list from a .pkg or .dmg file that you obtain from the printer vendor.
-
Select the driver from the list, then select the package from the list and click . This associates the selected driver to the package. When a user installs the printer, the driver and its associated files from this package are installed on the workstation. If the dependent files are missing, the printer installation fails.
-
To disassociate a driver from the package, select the driver and select None from the Driver Packages list and click Associate. The driver is no longer associated to any package.
-
-
-
-
Click to save your changes.
or
Click to exit without saving your changes.
-
Click to refresh the screen and display the changes you just made.
If you need to install an iPrint printer but cannot use a web browser, you can use the iprntcmd.exe command at a DOS prompt. For more information, see Using iprntcmd.exe to Install iPrint Printers. You can also install driver files from a Linux console prompt by using the iprntcmd command. For more information, see Using iprntcmd on Linux and Macintosh.
To delete printer drivers from the Driver Store:
-
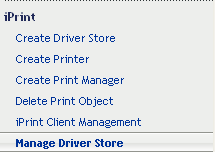
In iManager, click > .
-
Select the tab.
-
Read the list of existing printer drivers displayed in the panel.
-
Select a driver, then click .
-
Click to save your changes
or
Click to exit without saving your changes.
-
Click to refresh the screen and display the changes you just made.
3.3.5 Managing Driver Stores
To look at the information on the existing driver stores:
-
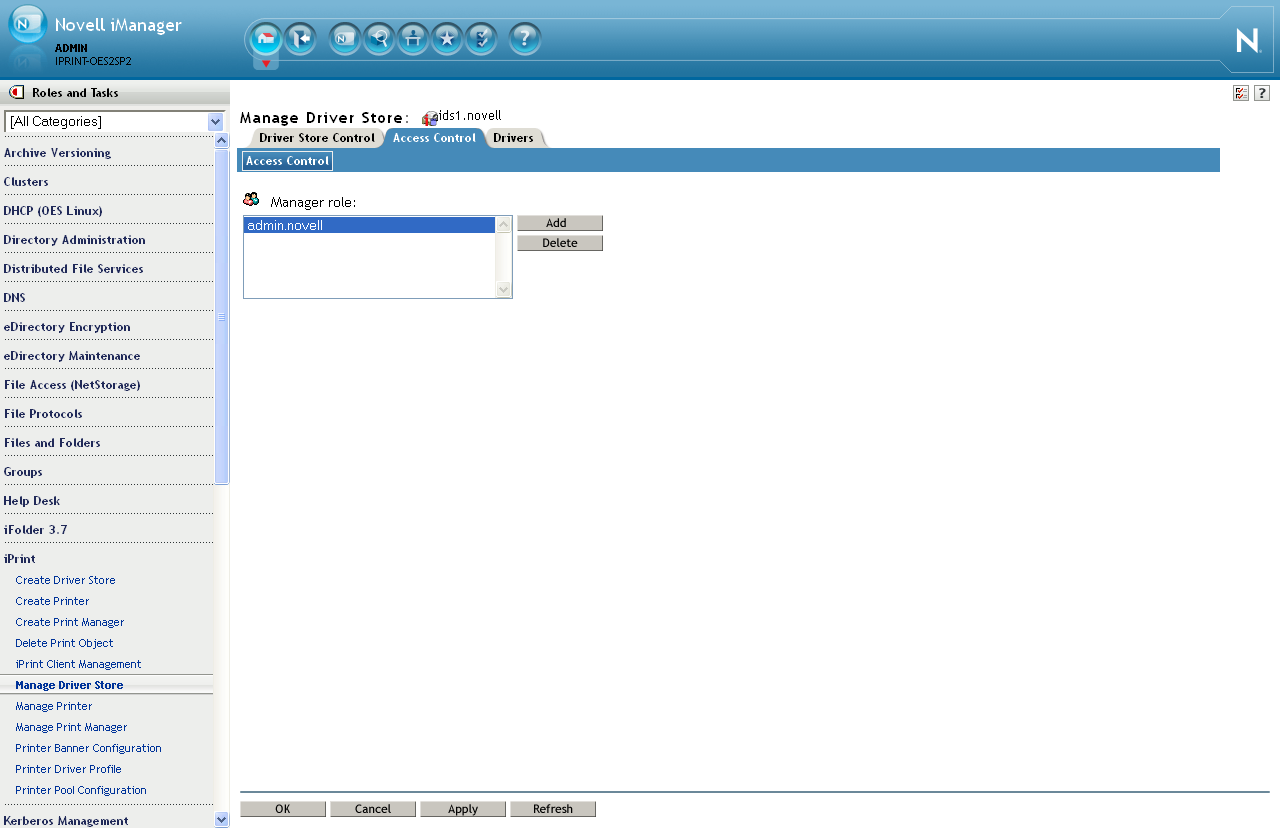
In iManager, click > .
-
Use the tab to make changes in the driver functionality as needed:
-
Use the panel to start up or shut down the driver store, copy the printer drivers in this driver store to another driver store, move the Driver Store configuration files and printer drivers to a different server, and view the status of the driver store (Active, Down, Initializing, or Shutting Down).
-
Use the panel to view and add information related to the Driver Store, such as the Driver Store name, version, the network address where the Driver Store is running on, the list of iPrint Manager Customers using your Driver Store, the physical location of the server that the Driver Store is loaded on, and any extra information that you might want to note about your driver store.
-
-
Use the tab to view and modify the list of resources that have been the assigned manager roles for your driver store:
-
View the list of the existing Driver Store Manager role objects in the panel.
-
Click to add a new Driver Store Manager object.
-
To delete a Driver Store Manager object, select an object from the panel, then click .
-
-
Use the tab to create and maintain Printer Drivers.
-
Click to save your changes.
or
Click to exit without saving your changes
-
Click to display the changes you just made.
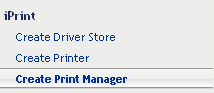
3.3.6 Creating a Print Manager
You need to create at least one Print Manager for your print system. Depending on your network setup, you can create additional Print Managers, such as, across a WAN link. The Print Manager must be running in order to create printers. For more information about placing print managers on your network, see Creating Additional Print Managers.
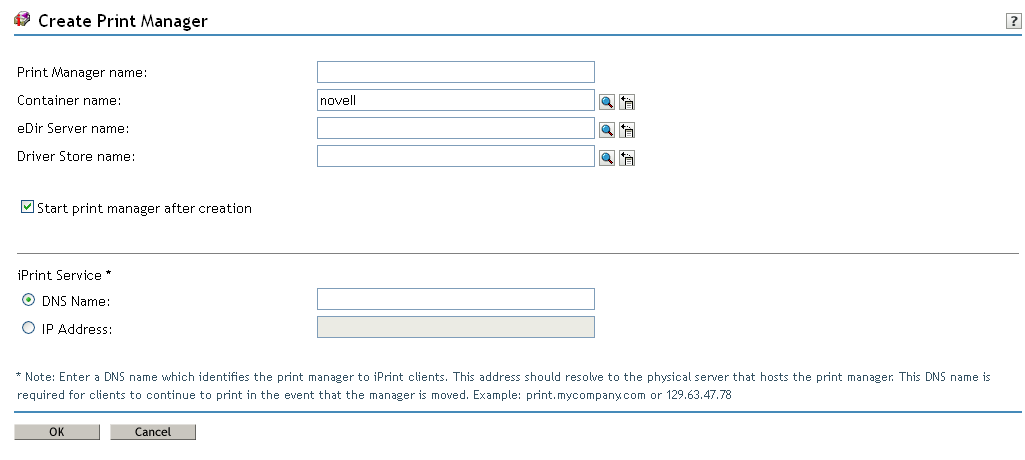
IMPORTANT:Based on the Print Manager configuration, the Print Manager creates a URL for each printer. When you create the Print Manager, you can specify a DNS name or an IP address for the iPrint Service of the same server where you are creating the Print Manager. You should use the DNS name because if the IP address changes, users must delete and reinstall the printers.
A Driver Store must exist before you can create a Print Manager. For more information, see Creating a Driver Store.
-
In iManager, click > .
When you create the Print Manager the first time, you might receive an error about trusting a certificate. You need to click the link and accept the certificate, then attempt to create the Print Manager again.
-
In the field, specify the name for your iPrint Manager object.
-
In the field, specify the name of the container where you want the Print Manager object to reside.
HINT:Use the Object Selector
to choose the container object from an object list. For more information on using the Object Selector, see Using the Object Selector
in the NetIQ® iManager Administration Guide. Use the History Browser to browse through the list of objects you used recently. -
In the field, specify an eDirectory server with which you want the Driver Store to communicate.
For fault tolerance, you can specify more than one eDirectory server from the same tree. For more information, see Changing the eDirectory Server Assignment.
-
In the field, specify the Driver Store you want this Print Manager to use to deliver printer drivers to iPrint clients.
-
Select the check box to automatically launch the Print Manager after creating it.
This option starts the iPrint Manager after the object is created and also starts the iPrint service after every server reboot.
If you do not select the check box, you should start the Print Manager manually after creating it. You do this by using > in iManager or by entering systemctl start novell-ipsmd.service at a command prompt.
IMPORTANT:In a cluster setup, do not select the check box.
-
Use the panel to specify a DNS name (such as print.mycompany.com) to identify the iPrint service on the network.
This address should resolve to the physical server that hosts the Print Manager. Additionally, this address is used to create the iPrint printer's URL, which is installed on users' workstations during a printer installation.
If this URL changes, users must delete and reinstall their printers. The DNS name should not be the server's DNS name (such as server1.mycompany.com).
An IP address can be used if DNS is not configured for your network or if you use a secondary IP address. Using a primary IP address or the server's DNS name limits your ability to move the Print Manager. You should use DNS names, whenever possible, to avoid client issues, especially if you need to change the IP address in the future.
-
Click or Click to exit without saving any of your changes.
A CNAME is a DNS name that is tied to a Service and not tied to a Server Name. Novell recommends that you bind the Print Manager to a CNAME and not to a server DNS name or a server IP address. If the Print Manager is bound to a CNAME, the iPrint printers installed to workstations automatically point to the new server when you migrate iPrint services. There are two methods to view which address or name the Print Manager is bound to:
-
Viewing the Installed Printer
-
Using ipsmd.conf
Viewing the Installed Printer
Look at the name of an iPrint printer installed to a workstation. The name looks similar to one of the following formats:
printer1 on ipp://servicename.company.com
or
printer1 on <Name>
or
printer1 on ipp://servername.company.com
or
printer1 on ipp://<ipaddress>
The first format is the recommended format.
Using ipsmd.conf
View the PSMHostAddress value within the /etc/opt/novell/iprint/conf/ipsmd.conf file. The only recommended value is a CNAME, such as servicename.company.com.
To conform to the Novell CNAME recommendation:
IMPORTANT:Do not proceed with these steps if the Print Manager is bound to an IP address or a server DNS name.
-
Create a DNS entry for a Print Manager service name (CNAME) within the network's DNS configuration.
The CNAME must resolve to the IP address of the server hosting the Print Manager. If the Print Manager is hosted on a cluster, the CNAME must resolve to the IP address of the cluster volume.
-
/etc/hosts/ -Add the CNAME and server IP address to the server's /etc/hosts file.
-
ipsmd.conf - Modify the PSMHostAddress value within the /etc/opt/novell/iprint/conf/ipsmd.conf file from the server DNS or IP address to the Print Manager's CNAME.
-
Restart the Print Manager by using the systemctl restart novell-ipsmd.service command.
The iPrint clients detect the name change within the ipsmd.conf file, uninstall the iPrint printer, and re-install the iPrint printer to reflect the new name.