28.22 Network Identification (Network Connections)
PlateSpin Migrate enables you to manage the network identity and domain registration of your migration target workload and specify related preferences as part of a migration job. By default, a job is configured to preserve a source workload’s network identity and domain registration. You can modify the default configuration to suit the objectives of your migration job.
Proper configuration of migration target’s network identity is especially important when you are migrating a workload to a different domain, planning to take it off a domain, or if you intend to change the host name of a workload while it is in the domain.
28.22.1 Network Identification Using Migrate Client
To configure a target workload’s network identity options:
-
In the Jobs view, select the required workload.
-
In the Network Configuration section of the Migration Job window, click
-
Specify the options and then click .
Configuration options vary depending on whether the target machine is Windows or Linux. For information about the configuration options, see the following sections:
Managing the Identity of Windows Workloads
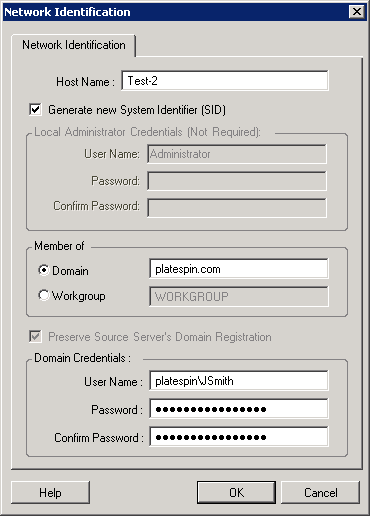
Use these settings to configure the network identity of your target Windows workload.
|
|
: Specify the desired host name for the target machine. : When this option is selected, the target workload is assigned a new System Identifier (SID). Credentials are required only for Windows 2008, and must be the credentials for the local (embedded) Administrator account. If this account has been locally renamed on the source, provide the new name. Select the required option and type the name of the domain or workgroup that you want the target machine to join. Preserves domain registration and ensures that the source server domain registration remains intact during migration. If you disable this option, the source machine’s domain account is transferred to the target machine. The source server still appears to be on the domain, but does not have a valid connection. : If the target machine is to be part of a domain, specify valid credentials for a user account with permission to add servers to the domain, such as a member of the Domain Admins group or Enterprise Admins group. |
Managing the Network Identity of Linux Workloads
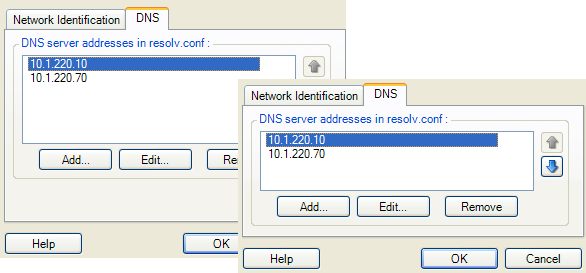
Use these settings to configure the network identity of your target Linux workload and DNS server addresses as required.
|
|
tab: Specify the desired host name for the target server. tab: Use the , , and buttons to manage DNS server entries for the new virtual machine. |