25.24 Storage Disks and Volumes
PlateSpin Migrate provides mechanisms for configuring your migration job to handle your workload volumes and their physical or virtual layout in the target infrastructure. For information about the supported storage, see Section 2.1.3, Supported Workload Storage.
Storage layout and volume configuration settings depend on the job configuration mode (Advanced or Wizard), migration type, target virtualization platform, and source operating system.
The following topics provide additional information:
25.24.1 Storage Disks and Volumes Using Migrate Client
To access drive configuration options:
-
In the of the Migration Job windows, click .
Settings vary depending on the target system.
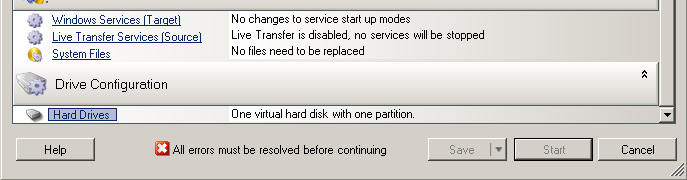
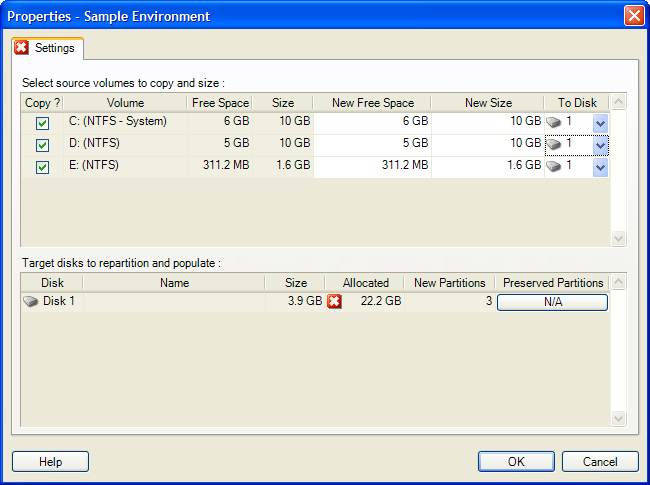
Windows Drive Configuration
Use these settings to select the volumes to copy during the migration:
|
|
Select the volumes to be copied during the migration. To resize the volume during the migration, specify the desired amount of free space. PlateSpin Migrate automatically adjusts . To resize the volume during the migration, specify the desired size. PlateSpin Migrate automatically adjusts . Select which hard drive the volume will be copied to on the physical target machine. Click this column to determine if an existing vendor partition should remain intact during the migration. If the partitions are not selected, PlateSpin Migrate permanently removes the partitions from the server. |
Linux Drive and LVM Volume Configuration
Use these settings to select the volumes and non-volume source spaces to copy and size during the migration. If LVM is installed on the source, a tab provides you with corresponding options.
Handling Linux Disks and Volume Groups
The PlateSpin Migrate Client provides you with Linux-specific user interface elements that provide you with options to properly handle your Linux storage.
Note the following sequence of steps that you must take for properly configuring and mapping newly-added disks and volume groups.
-
After adding a new disk, go to the tab and map the required volume group name by selecting the option.
See Linux Drive and LVM Volume Configuration (Volume Groups Tab).
-
Specify Size in Allocation for Volume Group Box.
-
For each added disk, specify the required size in the corresponding field.
After the system focus shifts away from the field, the size of the newly-added disk is updated dynamically.
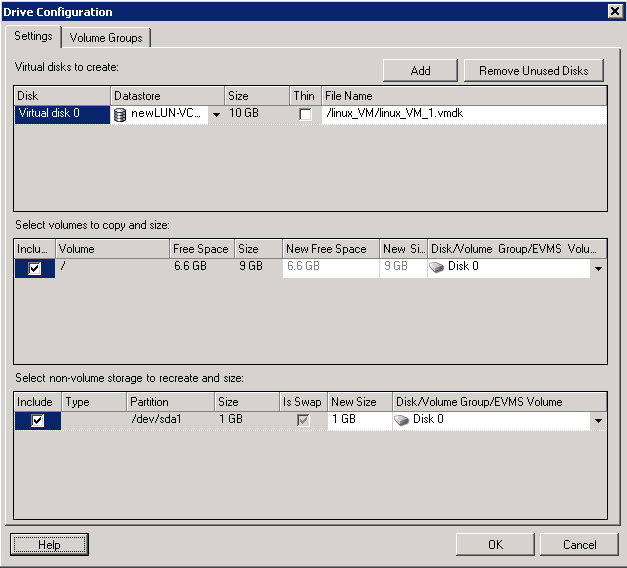
Linux Drive and LVM Volume Configuration (Settings Tab)
Use these settings to select source volumes to copy, non-volume source spaces to re-create and size, and target disks to repartition and populate.
|
|
Select the volumes or non-volume source spaces to be copied or re-created and sized during the migration. To resize the volume during the migration, enter the desired amount of free space. PlateSpin Migrate automatically adjusts . To resize the volume during the migration, enter the desired size. PlateSpin Migrate automatically adjusts . Select which hard drive or volume group the volume will be copied to on the physical target machine. For each disk, click the corresponding cell in this column to select existing vendor partitions to preserve during the migration. If the partitions are not selected, PlateSpin Migrate permanently removes them from the server. |
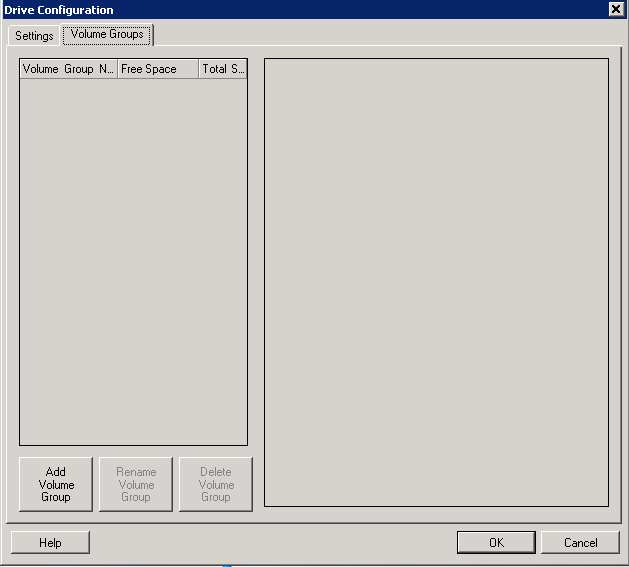
Linux Drive and LVM Volume Configuration (Volume Groups Tab)
Use these settings to manage volume groups.
|
|
Creates a volume group on the target machine that is not present on the source machine. Renames a volume group that is being copied from the source to the target. Deletes a volume group so that it is not created on the target machine. The volumes assigned to the volume group can be reassigned to other locations by using the tab (by default, they are assigned to disk). To allocate space on disks to a volume group, select the volume group, then select the disks to include in it. Specify the amount of space to be allocated to it on each included disk. |
Target VM-Specific P2V/V2V Drive Configuration
When you configure a peer-to-peer virtualization job, the job configuration window provides access to settings specific to the target virtualization platform.
PlateSpin Migrate displays target virtual machine drive configuration settings specific to the selected target:
Volume Mapping in Server Sync
When you are using Server Sync to synchronize two Windows or Linux workloads, PlateSpin Migrate Client provides you with the capability to specify the required mapping between source volumes and existing volumes on the target. See Section 34.4, Server Sync Volume Mapping.