5.5 Managing Post-Migration Actions
PlateSpin Migrate supports the use of scripts to automatically execute custom post-migration tasks on the target workload. You configure the post-migration action in a batch file, a shell script, or a program executable and then add the action along with its dependencies to the PlateSpin Server library of custom actions. For information about adding the action to the PlateSpin Server library, see Adding Post-Migration Actions to PlateSpin Server Custom Actions Library.
You can then associate this custom action with migration jobs you configure using the PlateSpin Migrate Client or the PlateSpin Migrate Web Interface. Towards the end of the migration process, PlateSpin Migrate uploads the specified action and its dependencies to the target and executes the action on the target.
5.5.1 Adding Post-Migration Actions to PlateSpin Server Custom Actions Library
PlateSpin Migrate enables you to execute a custom action on your target workload as a part of the migration job. You must define and save your custom actions and their dependencies in advance and add them to the PlateSpin Server library.
Create the action, test it on a sample workload, and save it together with its dependencies in a directory that the PlateSpin Server can access. The maximum size of the directory you upload must not exceed 64 MB. For information about increasing this limit, see Increasing the Upload Size Limit for Post-Migration Actions.
Take special care when developing post-migration actions for Linux workloads, which allow different characters in file names and support different ACL (Access Control List) permissions.
For Linux workloads, use tar (or a similar tool) to amalgamate the action’s directory structure into a single file. See KB Article 7970214.
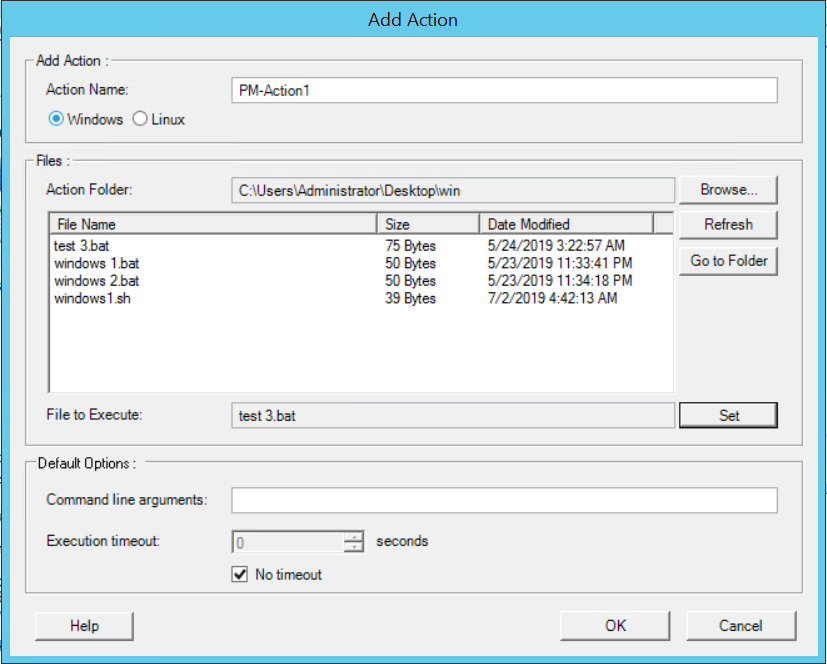
Adding Custom Actions Using the Migrate Client
-
In the PlateSpin Migrate Client, click .
-
Click .
-
In the Add Action window, type a name for your custom action, select the target operating system type, then browse to and select the directory that contains the required action with its dependencies.
PlateSpin Migrate populates the list with the contents of the selected folder.
-
In the column, select the required executable, then click .
-
(Optional) In the section, specify the following values for the action:
-
Specify any required command line arguments that you want to be associated with this action.
-
Deselect the option to specify the maximum time to wait before timing out this action.
The command line parameters and timeout value that you specify is displayed when you select this action during the configuration of a migration job.
-
-
Click .
PlateSpin Migrate packages the action and its dependencies and uploads it to the library.
The uploaded action is then available for selection in migration jobs. See Custom Post-Migration Actions.
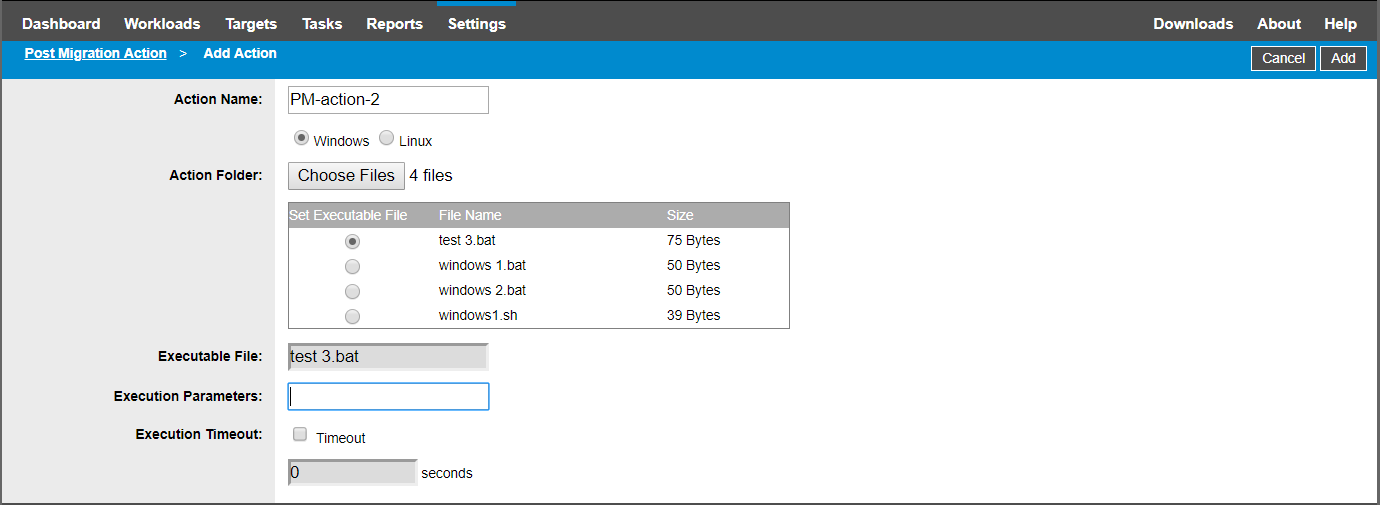
Adding Custom Actions Using the Migrate Web Interface
-
In the PlateSpin Migrate Web Interface, click .
-
Click .
-
In the Add Action window, type a name for your custom action, select the target operating system type, then browse to and select the directory that contains the required action with its dependencies.
PlateSpin Migrate populates the list with the contents of the selected folder.
-
In the column, select the action executable to display the name of the selected executable in the option.
-
(Optional) Specify the following values for the action:
-
Specify any required command line arguments that you want to be associated with this action.
NOTE:Ensure that you enclose any argument that contains special characters within double quotes for Windows targets and within single quotes for Linux targets.
-
Select the option to specify the maximum time to wait before timing out this action.
The command line parameters and timeout value that you specify is displayed when you select this action during the configuration of a migration job.
-
-
Click .
PlateSpin Migrate packages the action and its dependencies and uploads it to the library.
The uploaded action is then available for selection in migration jobs. See Custom Post-Migration Actions.