5.1 Configure Proxy Client Settings
If you have a proxy server in your network, you can optionally configure the PlateSpin Transformation Manager Appliance VM as a proxy client. You should also configure each PlateSpin Migrate Connector host in the network as a proxy client. As proxy clients, the appliance VM and Connector hosts will use your proxy server for HTTP and HTTPS communications over the Internet.
The Proxy client informs applications of the Proxy Server URL and credentials to use (if you specify them). It does not affect how the applications communicate with the server.
5.1.1 Configuring Proxy Client Settings for the PTM Appliance
You can enable the PlateSpin Transformation Manager Appliance to work with the Proxy Server in your environment. The PTM Server, PlateSpin Migrate Connector instance, PTM Web Interface, and Appliance Management Console running on the Appliance will use the proxy client settings you set for the Appliance VM.
To configure proxy client settings, log in to the Appliance VM through SSH, then use YaST to configure the Internet proxy client settings compatible with your proxy server.
To configure proxy client settings on the PTM Appliance VM:
-
Enable the SSH protocol on the Appliance VM.
SSH is disabled by default on the Appliance.
-
In a web browser, log in to the Appliance Management Console as the vaadmin user.
https://<ptm-ipaddr-or-dns-name>:9443
-
Click
 .
. -
Select the SSH service.
-
Select > .
-
Click to exit System Services.
-
Log out of the Appliance Management Console, then close your web browser.
-
-
Configure the Proxy client settings needed to access your Proxy Server:
-
From your computer, start an SSH session for ptm-ipaddr-or-dns-name on port 22, then log in as the root user to the Appliance.
You can use any SSH tool, such as Putty.
-
At the terminal prompt, enter
yast

-
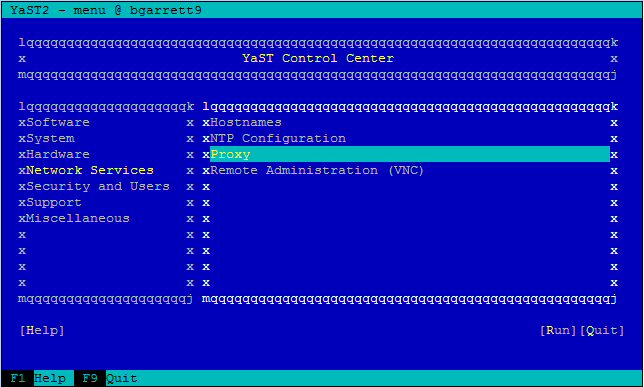
In YaST, navigate to select , then press Enter.
-
On the Proxy Configuration page, on , press the Space bar to select the check box.
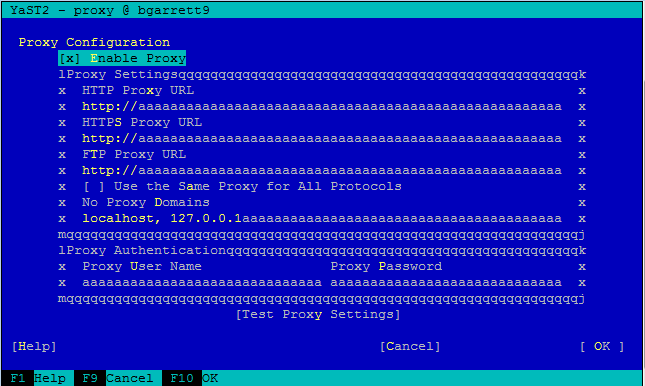
-
Tab to navigate to the fields and configure the Proxy settings by using the information for your Proxy Server. Provide the URL for the Proxy Server for HTTP or HTTPS (or both) communications, depending on what protocols you enabled for the Appliance.
HTTP Proxy URL: The URL (with host name and port number) of the Proxy Server used for non-secure access to the Internet. For example: http://proxy1.example.com:3126/
HTTPS Proxy URL: The URL (with host name and port number) of the Proxy Server used for secure access to the Internet. For example: https://proxy2.example.com:3128/
FTP Proxy URL: The URL (with host name and port number) of the Proxy Server used for access to the file transfer services (FTP). For example: https://ftp.proxy.example.com:2121/
Use the Same Proxy for All Protocols: Enable this option and provide a single URL in that will be used as the Proxy Server for HTTP, HTTPS, and FTP communications.
No Proxy Domains: Specify a comma-separated list of domains for which requests should be made directly without caching. The default is localhost.
Proxy User Name and Proxy Password: Provide the credentials for your Proxy Server if it requires authorization.
-
(Optional) Tab to , then press Enter.
-
Tab to , then press Enter to save and apply the settings.
-
Tab to , then press Enter to exit YaST.
-
At the terminal prompt, enter exit to close the SSH session.
-
-
(Optional) Disable the SSH protocol on the Appliance.
-
In a web browser, log in to the Appliance Management Console as the vaadmin user.
https://<ptm-ipaddr-or-dns-name>:9443
-
Click
. -
Select the SSH service.
-
Select > .
-
Click to exit System Services.
-
Log out of the Appliance Management Console, then close your web browser.
-