Creating a Table Instance
Use the following instructions to create the table instance, and then preview and manipulate its data.
- In the Catalog Explorer, double-click the
Table Definitions node.
The catalog's table definitions are displayed.
- Right-click the relevant table definition and select
New Table Instance.
Note: If you do not have privileges to create a table instance for that definition, the option is not displayed. You must get the catalog owner or another administrator with grant privileges on that table definition to grant the Create privilege.
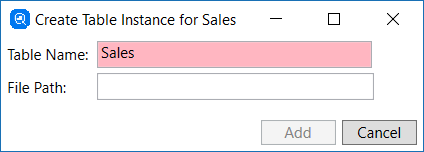
The Create Table Instance for <table-def> dialog box is displayed.

- In the Table Name field, type a unique name for the table instance. (The field background remains red until the name is unique.)
- In the File Path field, enter the full path and file name to the (first) COBOL data file to be used.
- Click
Add.
The table instance is created.
- To view the data, right-click the table instance and select
View Data.
The data is displayed.
- Use the following tools to further manipulate the display:
- Max Rows - the maximum number of rows shown in the table preview. (You can set this default in the menu.)
- Max Errors - the maximum number of errors encountered before the preview stops showing more rows (up to the Max Rows value).
- Filter on Column - show only records that contain a specific value in a particular column: select the column in the drop list, then in the Filter string field type the string on which to filter.
- Query Builder - a GUI tool used to define SQL queries for the preview; see Using the Query Builder for more information.
- To exit the preview, click
 on the
<table-name> data tab.