Configuring the Android Emulator for Silk Test Classic
Note: When using an
Android emulator, an additional adb server is running in addition to the one that is used by
Silk Test Classic. If the running adb servers have different versions, the connection between the Open Agent and the device might become unstable
or even break. To avoid version mismatch errors, specify the path to the
Android SDK directory by setting the environment variable
SILK_ANDROID_HOME, for example to
C:\Users\<user>\AppData\Local\Android\android-sdk. If the information service was running during this change, use the Windows Service Manager to restart the
Silk Test information service with the updated environment variable. If the environment variable is not set,
Silk Test Classic uses the adb version that is shipped with
Silk Test Classic.
When you want to test mobile applications on an
Android emulator with
Silk Test Classic, you have to configure the emulator for testing:
- Install the latest version of the Android SDK. For information on how to install and configure the Android SDK, see Get the Android SDK.
-
Install
Android Studio 2 or later.
Tip: You can skip installing Android Studio and use the emulator provided with the Android SDK. However, Micro Focus recommends installing Android Studio for improved emulator performance. The remaining steps in this topic require Android Studio to be installed.
- From Android Studio, start the AVD Manager.
- Click Create Virtual Device.
- Select a virtual device.
- Click Next.
- Download and select a system image of Android that includes Google APIs.
- Click Next.
- Configure the virtual device according to your requirements.
- Click Show Advanced Settings.
-
Adjust the RAM size and the heap space used by the emulator to an amount that is manageable by your machine.
Tip: Micro Focus recommends using at least 1 GB RAM and 256 MB heap space.
-
Select
Auto from the list in the
Emulated Performance area.
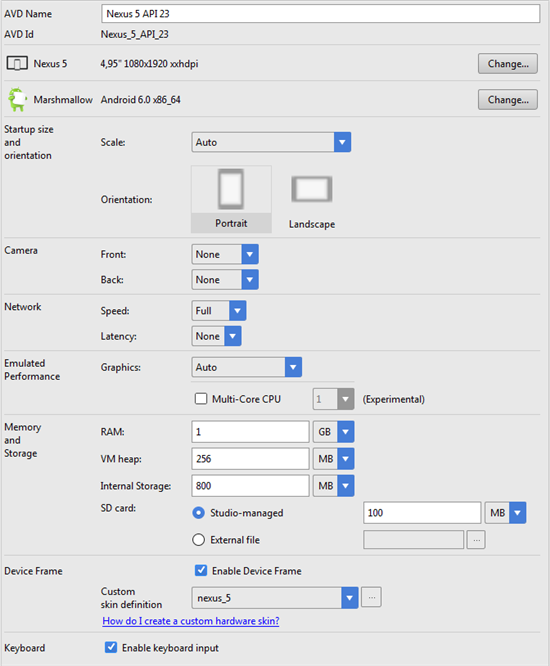
- Click Finish.