Creating a Sales Role
Use the following procedure to create a sales role for the Digital Airlines example. (For more information about Role policies, see Section 6.2, Role Policies.)
-
Click > then click > .
-
In the section, click
-
In the section, click then fill in the following fields:
Name: Specify .
Type: Select .
-
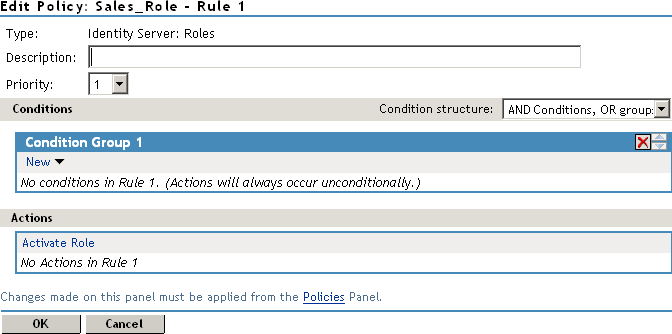
Click to open the policy editor.
-
In , click > , and assign the following values:
LDAP Attribute: Select . (If is not included in the list, you can add it from this page. For instructions, see Step 5.a through Step 5.c.)
Comparison: Select .
Mode: Select .
Value: Select (from the drop-down box); specify Sales as the value.
Result on Condition Error: Select
If the attribute is not listed in the drop-down menu, create it by following this procedure:
-
In , click > , scroll to the bottom of the list, then click .
-
In the field, specify , then click .
-
In the field, select from the drop-down menu.
-
-
In the section, click , then specify sales_role in the field. Your rule must look similar to the following:
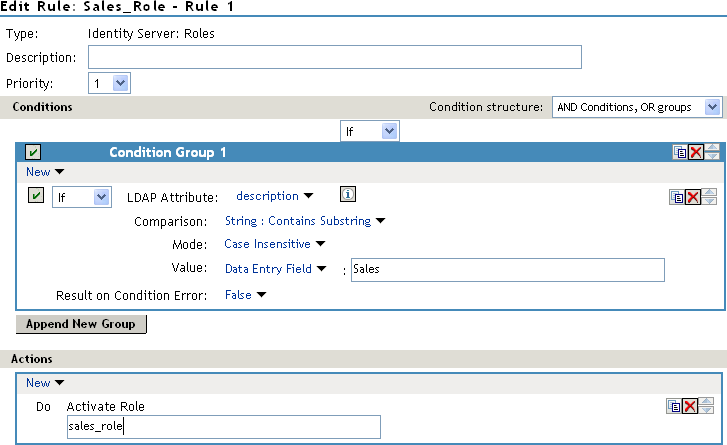
The value for might be case sensitive. If you are going to inject this role into a policy for a web server, and the page on the web server is configured so that it evaluates case, make sure the value entered here matches what is expected on the web server. The field on the Digital Airlines site requires that this value be in lowercase: sales_role.
-
Click to close the Rule editor, then click to close the .
-
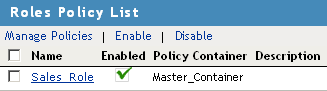
To save the Role policy, click , then click to return to the .
-
In the , select then click .
-
Click .
-
Update Identity Server.
Wait for the to return to .
-
Continue with Creating a New User with a Sales Role.