Step 3: Create Workflow Stages and Transitions
Now that you have created the workflow and specified conditions for it, you can create workflow stages and transitions. You
can create stages and transitions manually, but we will use the
Stage Generator to automatically generate these workflow objects for us.
-
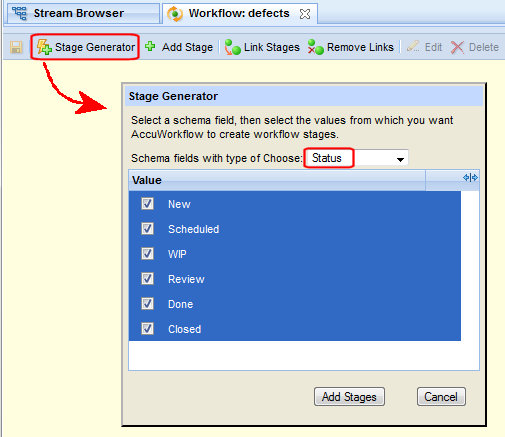
In the
Workflow Editor toolbar, click the
Stage Generator
 button.
The
Stage Generator dialog box appears. You use the
Schema fields with type of Choose field to specify the field in the
AccuWork schema whose values represent your workflow stages. You use the
Value field to indicate the values for which you want to create workflow stages.
button.
The
Stage Generator dialog box appears. You use the
Schema fields with type of Choose field to specify the field in the
AccuWork schema whose values represent your workflow stages. You use the
Value field to indicate the values for which you want to create workflow stages.
-
Select the desired field and values for your workflow stages (here we have chosen the
Status field and selected all of the values defined for that field in the
AccuWork schema), and click the
Add Stages button.
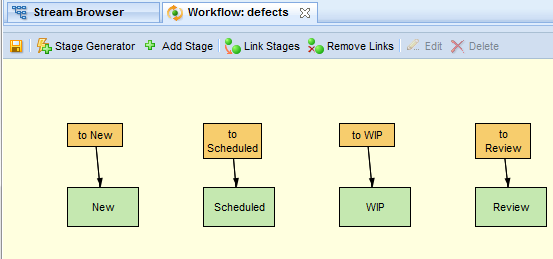
AccuRev populates the workflow with one stage for every value selected in the
Stage Generator (New,
Scheduled, and so on), and one transition for each stage (to New,
to Scheduled, and so on):
- The next step is to use these transitions to link one stage to another to create the workflow.
-
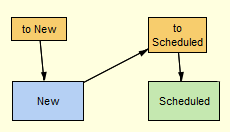
To link the
New stage to the
Scheduled stage, for example: right-click the
Scheduled stage and choose
.
When finished, the workflow diagram for the
New and
Scheduled stages looks like this:
- Repeat this procedure to link the remaining stages in the workflow in the same way: link Scheduled to WIP, WIP to Done, and so on.
-
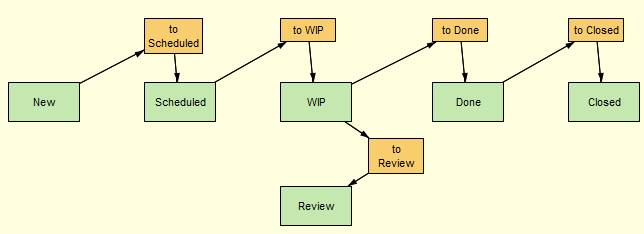
Next, make a few small changes to the workflow diagram so that it more closely reflects the workflow process:
- Delete the to New transition (new issues are created with a Status of New, and thus are placed in the New stage by default. This means that they do not come from another stage in the workflow).
- Link the WIP and Review stages to reflect the process by which an issue is returned to the submitter for more information.
- Use the Workflow Editor drag-drop feature to rearrange the workflow layout as desired.
When finished, the resulting defects workflow should look something like this:
- Click Save.