Creating Multiple Eclipse Projects in a New AccuRev Workspace
-
Click the
New button
 on the
Eclipse toolbar.
Tip: Or, you can select from the Eclipse main menu or select from the Eclipse main menu.The New Project dialog box appears.
on the
Eclipse toolbar.
Tip: Or, you can select from the Eclipse main menu or select from the Eclipse main menu.The New Project dialog box appears.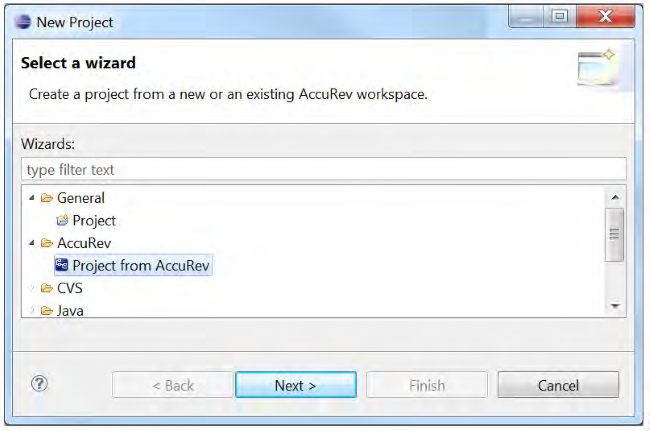
- In the Wizards field, navigate to . (If you have many wizards, simply type A in the Wizards field to go directly to AccuRev in the list.)
-
Click
Next.
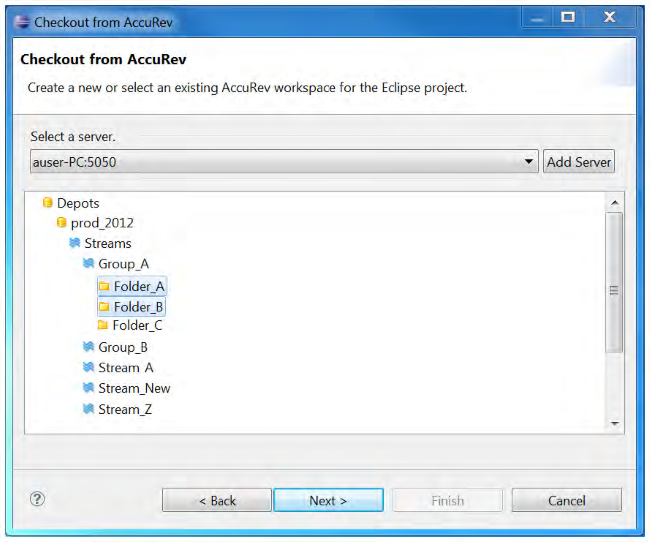
Note: If you are not already logged in to AccuRev, you are prompted to do so. See Logging In to AccuRev.The Checkout from AccuRev page appears.
- Select a server where your AccuRev files are stored if the correct server is not already displayed in the Select a server field. If you need to add a server, see Adding an AccuRev Server.
-
Expand the
Streams folder.
 Tip: Click tree view and then click F5 to refresh.
 - Expand the stream where you want the new AccuRev workspaces to be created.
- Select one or more folders within the stream. To select multiple folders, hold down the Ctrl key or Shift key and then click the relevant folders.
-
Click
Next.
The
Create New Workspace page appears.
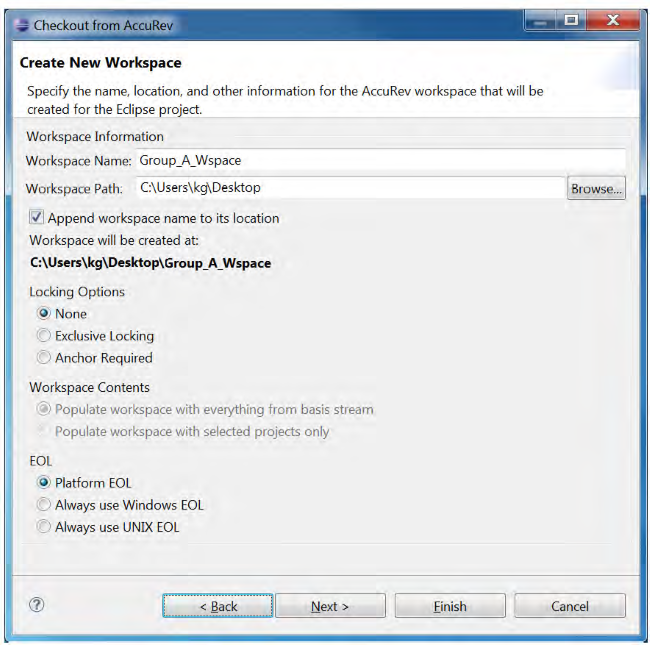
- In the Workspace Path field, click the Browse button and select an existing directory. A new directory is created based on the Workspace Name and Workspace Path you enter. For example, if you specify c:\workspaces as the workspace path, W1 as the workspace name, and your username is jsmith, AccuRev creates the directory c:\workspaces\W1 and this directory contains the workspace named W1_jsmith.
-
Optionally change the default values for settings for the new workspace:
Locking Options,
Workspace Contents, and
EOL convention.
Note: If you choose either Exclusive Locking or Anchor Required locking options, you will need to perform an Anchor command on a file before editing it.
-
Select the
Workspace Contents option based on which files from the stream are to be included in the workspace. The following options are available:
- Populate workspace with everything from basis stream
- This option places all the files from the basis stream in the workspace and does not provide any AccuRev include rules. Use this option if you want to include all files from the stream in the project. (This option may take a while if you have a very large stream.)
- Populate workspace with selected projects only
- This choice updates the workspace with only the files from the folders you selected. AccuRev include rules are used to find the files belonging to those folders only. The other files in the basis stream will be excluded. This is the default choice. Use this option if you only want to include only the files of the selected folders in your project.
- Click Next. The Check Out As page appears. This page allows you to name the new Eclipse projects you are creating based on the names of the folders you selected. This page appears only if you selected more than one folder.
-
Optionally enter a prefix and a suffix to attach to the name of each folder. For example, if the prefix is
AA and the suffix is
BB, a folder named
Folder_1 will result in an Eclipse project named
AAFolder_1BB.
Note: You can also leave the prefix and/or suffix fields empty.
- Click Next.
-
The
Checkout Projects page appears. A new project is listed for each folder you selected.
The new projects in the list have project names and project types as follows:
- If no .project file is detected in the folder, the project name is based on the prefix and suffix you provided. The new project has the project type of Eclipse Project.
- If a .project file is detected in the folder, the project name is taken from the <name> tag within the .project file and the Project Type is Defined Type. See How New Eclipse Project Names are Taken from Existing .project Files.

- De-select any project that you do not want to create.
- Click Finish. An Eclipse project is created for each Eclipse project you selected.