Scripted field Synchronization
To synchronize the scripted fields perform the following steps:
- Select a JIRA-supported template and searcher.
-
Create the appropriate scripted field according to requirement.

The table below lists the Scripted Fields supported in the current version of AccuSync.
AccuWork Field Type JIRA Field Type Synchronization Type ScriptedFields Text ScriptedField1 Scripted field(Text Field multilne)) One Way (JIRA Master) ScriptedFields Text ScriptedField2 Scripted field(Date Time Picker)) One Way (JIRA Master) ScriptedFields Text ScriptedField3 Scripted field(Number multilne)) One Way (JIRA Master) ScriptedFields Text ScriptedField4 Scripted field(Single User Picker)) One Way (JIRA Master) ScriptedFields Text ScriptedField5 Scripted field(Multi User Picker)) One Way (JIRA Master) -
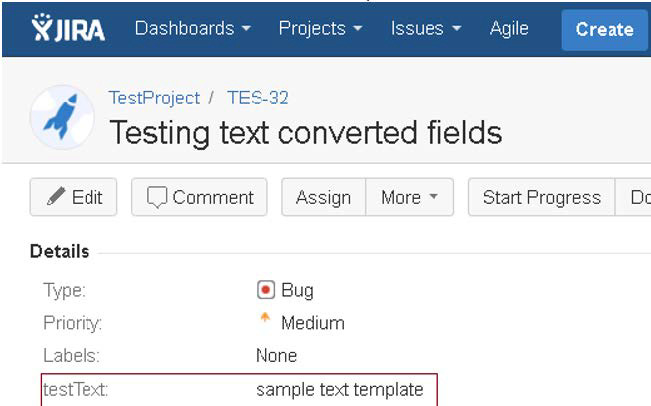
Navigate to
Create button on the
JIRA window to check if the scripted field is displayed. For example,
testText sample texttemplate is displayed under the section
Details.
- Navigate to AccuSync Management Console.
-
Click the
Edit Configuration button
 , the
Configuration: Default
JIRA Configuration window is displayed.
, the
Configuration: Default
JIRA Configuration window is displayed.
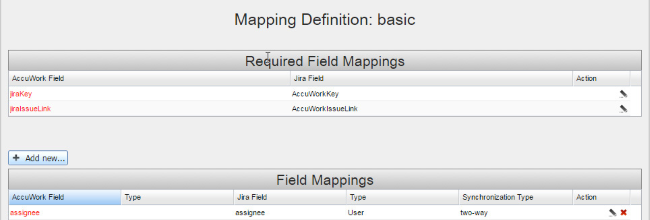
-
Navigate to
Mapping Definitions section, click
in the appropriate row.
The
Mapping Definition: basic widow is displayed.
-
Click
+ Add new... button.
The
New Field Mapping dialog box is displayed.
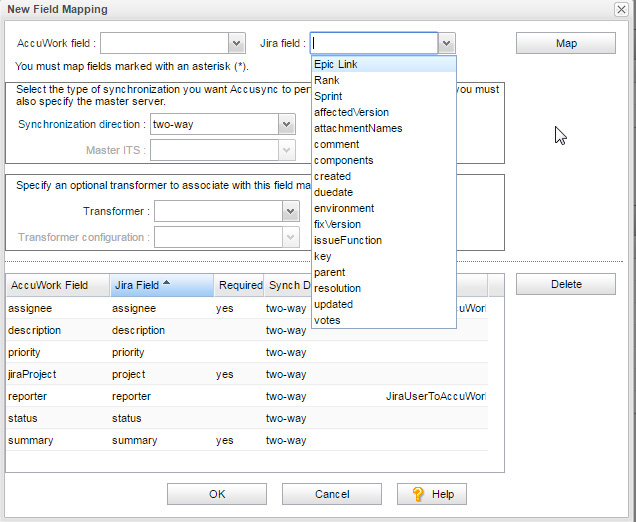
-
Enter the following values:
- AccuWork Field
- Select existing AccuWork field from the list or enter a new field name, which is to be mapped to the JIRA field.
- JIRA Field
- Select the JIRA field from the list to which the AccuWork field is to be mapped.
- Synchronization Direction
- Select one way or synchronization from the list.
- Master ITS
- Select the appropriate Issue Tracking System, for example: JIRA.
- Transformer
- Leave this field blank.
- Transformer Configuration
- Leave this field blank.
- Click the Map button. The mapped fields are displayed below, under the headings AccuWork Field, JIRA Field, Required Synchronization and Transformer.
- To delete a row, select a row and click the Delete button.
- To confirm the mapping, click OK. The mapped fields are displayed in the Field Mappings section of Mapping Definition: basic window.
-
Navigate to AccuSync Management Console, click the play button
 to run the synchronization.