To Define a New Region With an Existing Region Startup File
- In the Tree pane of the Enterprise Server for .NET Administration UI, select Regions. See 1 in the diagram below.
- In the Actions pane, click Define Region. See 2 in the diagram below. The first page of the Define Region wizard is displayed.
-
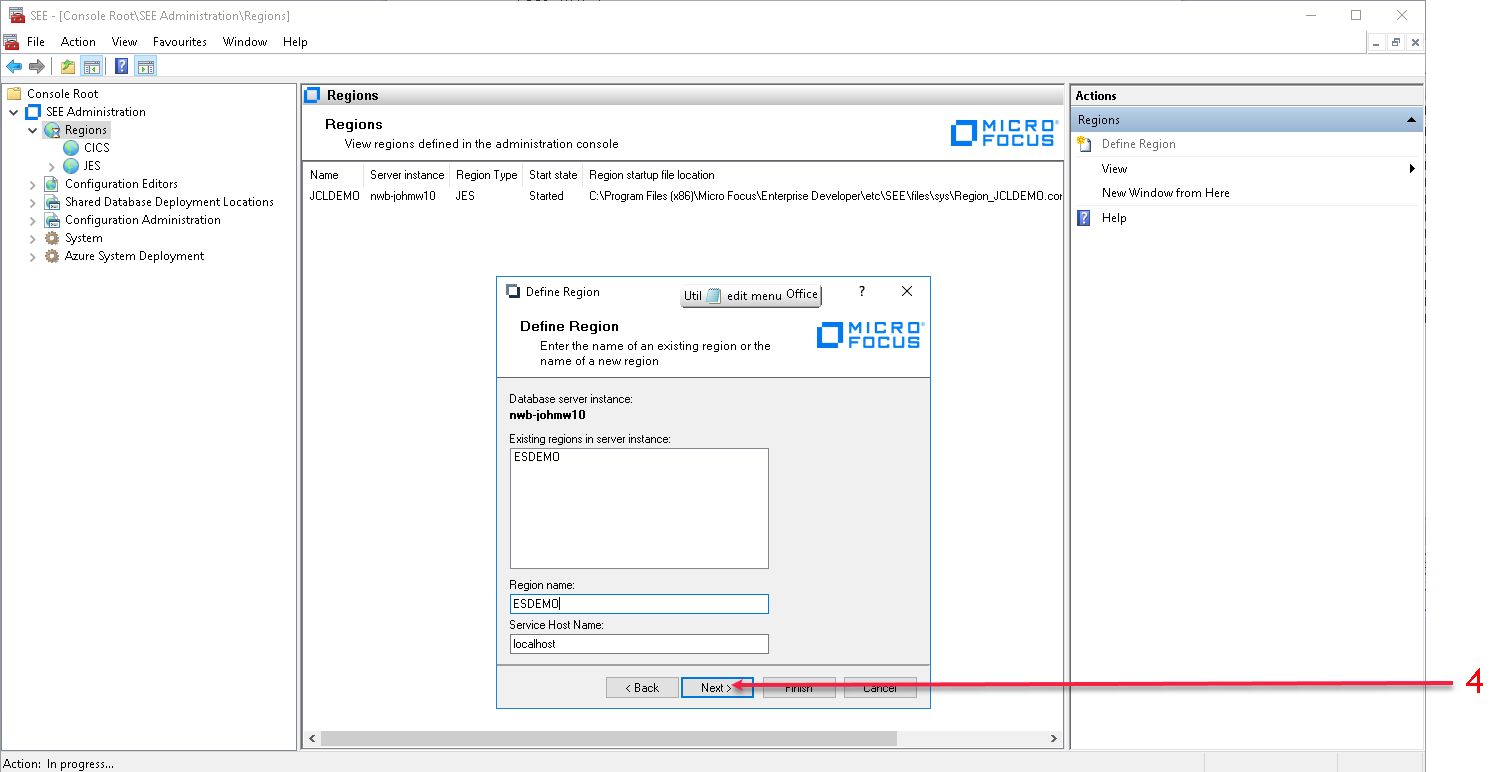
Enter the name of the database server instance where you want your region database to be created, or where your region database
already exists, in the
Database server instance entry field. For example, for a SQL Server Express instance on the local machine, type:
(local)\SQLEXPRESS. Click
Next. See
3 in the diagram below.
- The syntax for the database server instance follows the standard SQL connection rules.
- (local) connects to the main database in the local machine using named pipe.
- localhost connects to the main database in the local machine using TCPIP.
- localhost\sqlexpress connects to the sqlexpress database instance on the local machine using TCPIP.
- machineName\MSSQLSERVER connects to the MSSQLSERVER database running on machine "MachineName" using TCPIP.
- For further information on this syntax, please refer to the SQL server documentation.

Enterprise Server for .NET Administration UI now connects to the selected database server, and the next page of the Define Region wizard is displayed. This page lists all existing region databases on the selected database server that are not currently defined to the UI.
- The syntax for the database server instance follows the standard SQL connection rules.
-
Either select one of the regions listed in the
Existing regions in server instance list, or enter the name of a new region in the
Region name entry field. Click
Next. See
4 in the diagram below.
Enter the default service host name where the region will be run, for example localhost.
 The next page of the
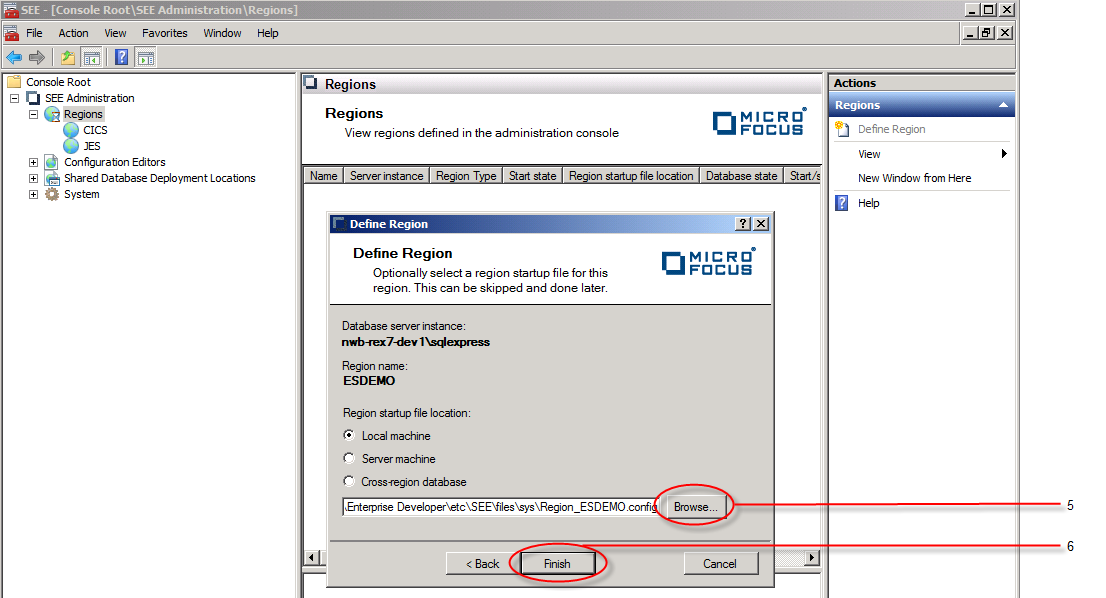
Define Region wizard is displayed. This page prompts you to select a region startup file to be associated with the region.
The next page of the
Define Region wizard is displayed. This page prompts you to select a region startup file to be associated with the region.
-
Select the region startup file to be associated with the region. Valid locations for the region startup file are:
- Local machine
- Select when the startup file is located on a drive on the local machine.
- Server machine
- Select when the startup file is located on another network machine. You would use this option when, from your local machine, you want to create and manage regions on a remote machine.
- Cross-region database
- Select when the startup file is in the cross-region database of the database server instance that you specified earlier. This is the preferred option for a production or a scale-out environment.
Use the Browse button to browse for the region startup file in the selected location. See 5 in the diagram below.
Note: The default Region_ESDEMO.config and Region_JCLDEMO.configfiles are installed to %ProgramData%\Micro Focus\Enterprise Developer\5.0\SEE\config.Click Finish to create the region definition. See 6 in the diagram below.
 The region now appears in the
Tree pane of the user interface under the
Regions->CICS node (because we selected the CICS ESDEMO region startup file in the previous step), with the
The region now appears in the
Tree pane of the user interface under the
Regions->CICS node (because we selected the CICS ESDEMO region startup file in the previous step), with the
 icon to show that the region database has not yet been created. See
7 in the diagram below.
icon to show that the region database has not yet been created. See
7 in the diagram below.
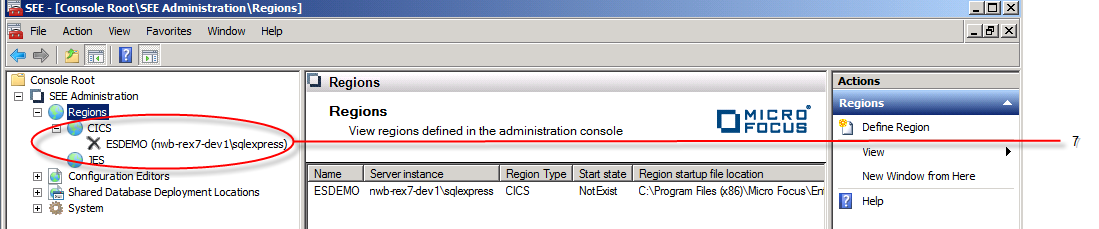
When the region is started for the first time, the region database will be created, and in the user interface the region entry
will appear with the
 icon.
icon.