Editing COBOL, JCL, BMS, and Data Files
Editing COBOL Files
You are going to explore some of the COBOL editing features using the ZBNKPRT1.cbl program which produces a report from a sequential data file.
- In Solution Explorer, double-click
ZBNKPRT1.cbl.
This opens the file in the COBOL editor in Visual Studio.
- Expanded Copybook View
-
- Scroll down the file to line 005000 and see some COPY statements.
- Right-click the line for
COPY CDATED and click
Show "CDATED.CPY".
This expands the copybook directly in the code of ZBNKPRT1.cbl.

- You can edit the code of the copybook in the expanded view so introduce an error in the code now.
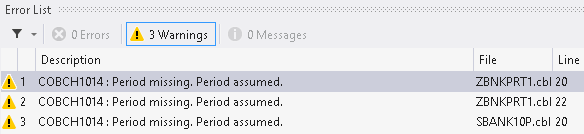
This automatically outputs messages in the Error List window about problems that occurred in the code. You can sort the list by file name. Double-clicking the line for an error in the Error List window positions you on the line in the copybook in the expanded view which causes the error.
- Close the file.
The changes you made to the expanded view were applied to the source of the copybook so now you are prompted to save the file - click No.
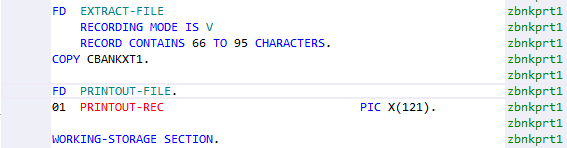
- Unused data
- Notice that some data items in the Data Division are greyed out. This is because they are not referenced in the Procedure Division.
- Class View
- You can view the objects and the members defined in your projects in the standard Class View located in the tabbed window
at the top right of the IDE:
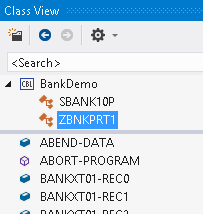
If this window is closed, you can open it from .
- Navigation in the code
- Apart from scrolling down the code in the editor, you can use the following features of the IDE:
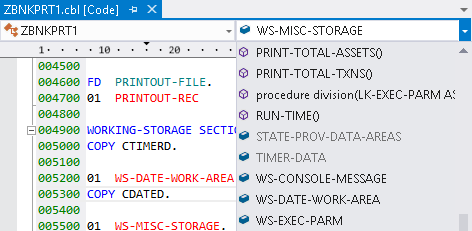
- Use the drop-down menus at the top of the editor:
- In Solution Explorer double-click on
DBANK52P.cbl to open the file, and then click on
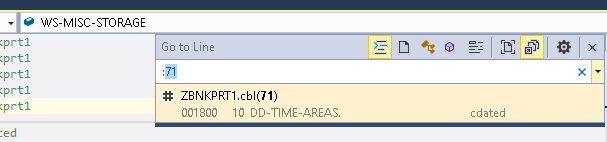
to specify a line in the code to navigate to.
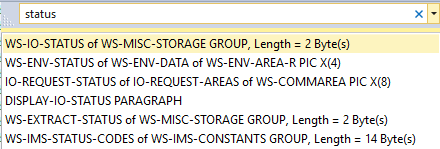
- Click
 ,
Locate Definition, in the COBOL toolbar and start typing a search term:
,
Locate Definition, in the COBOL toolbar and start typing a search term:
- Use the drop-down menus at the top of the editor:
- Exploring data in editing mode
-
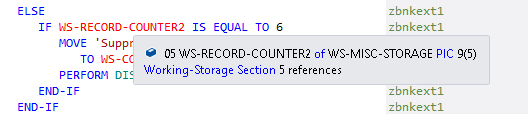
- Open the ZBNKEXT1.cbl file, and scroll down the code to line 024700.
- Hover over the
WS-RECORD-COUNTER2 data item.
This provides you with details of the location, the size, the format, and the number of times the field is used in the program.
- Data definitions
-
- Right-click a data item in the Procedure Division and click
Go To Definition.
This positions the cursor on the line of code where the data item is defined.
- Right-click a data item in the Procedure Division and click
Go To Definition.
- Peek definitions
-
- Scroll down to line number 033200.
- Right-click
WS-CONSOLE-MESSAGE and click
Peek Definition.
This opens a small window embedded in the editor with the definition of the data item.
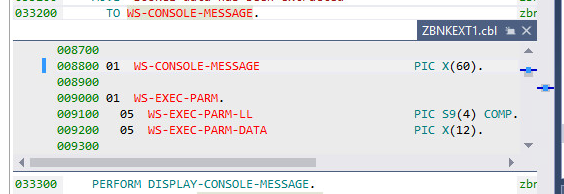
You can type in the window, or peek the definition of another data item in it.
- Finding all lines where a data item is used
-
- Right-click a data item in the code, and click
Find All References.
This opens the Find Symbol Results window with a list of all occurrences of the data item in the code.

- Right-click a data item in the code, and click
Find All References.
- Searching in copybooks
- You can search for strings in the copybooks as follows:
- Click Edit > Find and Replace > Find in Files.
- Set the Look in to COBOL Project Copybook Paths.
- Type
BTX- in the
Find what field.
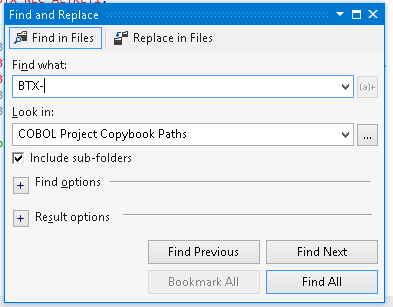
- Click
Find All.
The results are displayed in the Find Results 1 window.
- Marking text and block mode
- You can use the mouse to mark the text. To make a block selection of the code:
- Press Alt and drag the selection with the mouse.
- Rename items in the code
- Try and see how rename factoring works in the IDE:
- Click
 ,
Go To Procedure Division, in the COBOL toolbar to go to the Procedure Division in the
ZVBNKPRT1.cbl file.
,
Go To Procedure Division, in the COBOL toolbar to go to the Procedure Division in the
ZVBNKPRT1.cbl file.
- Scroll down to line 022000.
- Right-click
WS-EXEC-PARM-LL and click
Rename.
This highlights all occurrences of the variable in the editor and opens the Rename widget. Note that any changes you make are applied the current project. Set Scope to Current COBOL Program.
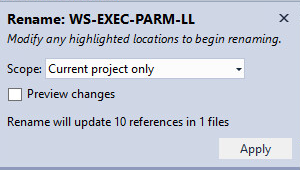
Check Preview changes.
- Start typing over the highlighted variable. For example, type WS-EXEC-PARM.
- Click
Apply.
This opens the Preview Changes - Rename dialog box showing which files and instances of the variable will be renamed.
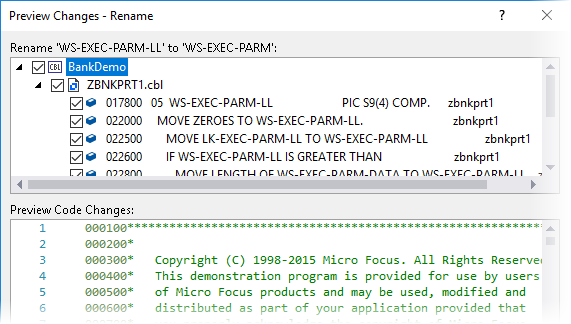
- Click
Apply again.
All instances of the data item are renamed in the current program.
- You can now click Edit > Undo to revert the changes.
- Click
- Smart editing
- Let's look at how Smart Editing works with background COBOL parsing:
- Scroll down to line 25000 in the
ZBNKPRT1.cbl file and start typing the following, starting in area A of the code, one character at a time:
MOVE W TO
Notice how the words you type change in the editor. Once a word is recognized as a reserved word or a data item, its color changes. If a line of code contains invalid COBOL syntax, the word that is not recognized is underlined with a wavy red line. You can check the Error List window to see what errors are reported.
- Change the line to:
MOVE 34 TO WS-
- If you have changed this COBOL program, copy the backup version back in again.
- Scroll down to line 25000 in the
ZBNKPRT1.cbl file and start typing the following, starting in area A of the code, one character at a time:
- Renumbering the COBOL sources
- You can choose from a number of
Renumber and
Unnumber options available from the COBOL toolbar (use
 in the toolbar) to insert and remove line numbers from your code. Your sources include some comments beyond column 73, so
you might want to only change the numbers in the COBOL sequence area.
in the toolbar) to insert and remove line numbers from your code. Your sources include some comments beyond column 73, so
you might want to only change the numbers in the COBOL sequence area.
You can now remove the line numbers from your code - note that the Renumber and Unnumber commands are not available in the expanded copybook view.
- Ensure
ZBNKPRT1.cbl is opened in the editor, click the downward arrow next to
in the COBOL toolbar and click
Unnumber Left.
This removes the line numbers from the COBOL sequence area.
To reinsert the line numbers in your code:
- Click the downward arrow next to
in the COBOL toolbar and click
Renumber Left.
To insert line numbers beyond the end of area B:
- Click the downward arrow next to
in the COBOL toolbar and click
Renumber Both.
You should now see line numbers running down both sides of the source code:

- Ensure
ZBNKPRT1.cbl is opened in the editor, click the downward arrow next to
JCL editing
- Double-click the JCL file in Solution Explorer to open it in the JCL editor.
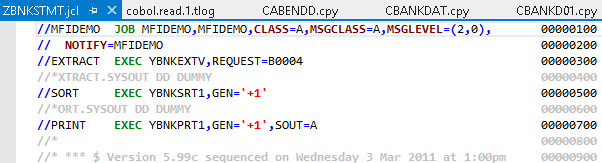
The editor lets you edit JCL files in text view and offers a basic level of colorization for items such as reserved words and comments. The JCL editor does not support background parsing or syntax checking.
BMS editing
There are two ways to edit BMS files. The first one is to use the basic BMS text editor available in the IDE. The other is to use a WYSIWYG version, the Micro Focus BMS Painter, which is available as a separate utility installed with this product.
To open the BMS file in the IDE text view:
- In Solution Explorer, double-click
MBANK10.bms to open it in the basic BMS editor.
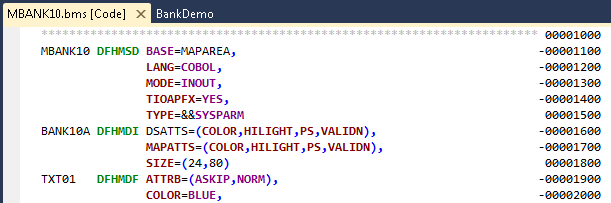
Although you can use this basic text editor to make small changes, it is quite difficult to edit BMS files in text view.
A much more suitable and less error-prone way to edit BMS files is to use the BMS Painter.
- Close the BMS text editor.
- In Solution Explorer, right-click
MBANK10.bms in the
bms folder and click
Open BMS Painter.
This starts the external Micro Focus BMS Painter.
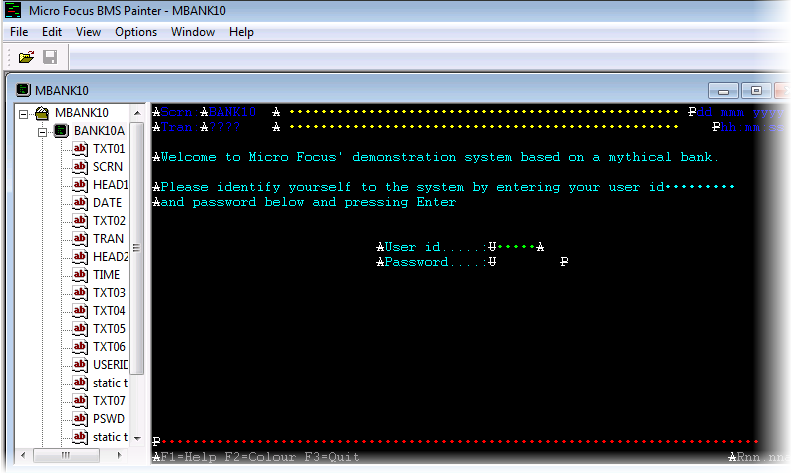
- In BMS Painter, you can click fields and move them by dragging.
For example, double-click the data field immediately following the text “User Id” and move it to a different position on the map.
- To add a field, click in the desired place in the window and start typing.
- To change a field's properties, right-click it and select Properties.
- To change the properties of the map or mapset, right-click the item and select
Properties.
For example, do this for the MBANK10 mapset and the BANK10A map.
- Click to close the utility and do not save the file.
Editing data files
You can edit data files using one of two available Micro Focus Data File Editor tools.
By default, Visual Studio is configured to use the new Data File Tools utility. To check where this is enabled:
- Click Tools > Options > Micro Focus Tools > Data File Tools.
- Ensure Use New Data File Tools for supported options is selected, and click OK.
To edit the .dat file:
- In Solution Explorer, right-click the .dat file and click
Open with Data File Tools.
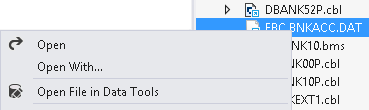
This starts the Data File Editor and loads the .dat file in the Open Data File dialog box.
- Click Open Exclusive to load the file.
- Data File Editor loads the data file and shows two views:
- The left-hand pane shows the raw form of the file. Because many of the field are COMP-3 fields, the data in these fields is presented in an ASCII view.
- The right-hand pane shows the record layout for the file in its detailed field view and the COMP-3 fields are shown in a much better, editable form.
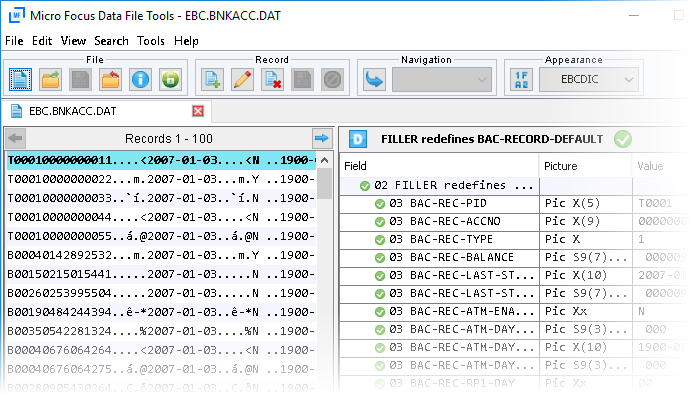
- Change the value of BAC-REC-BALANCE from 91.14 to 132.76 as follows:
- Click the line for BAC-REC-BALANCE in the right pane and then click
 ,
Edit Record.
,
Edit Record.
This highlights the record.
- Double-click in the Value field for BAC-REC-BALANCE.
- Type 132.76 then click
 ,
Save Record.
,
Save Record.
- Confirm you want to save the changes to this record.
- Using the same method, restore the previous value of BAC-REC-BALANCE.
- Click the line for BAC-REC-BALANCE in the right pane and then click
- Close the Data File Tools utility.