Creating a Testing Cycle
The first step is to create a testing cycle. A testing cycle is a defined period in time consisting of a start date, an end
date, and a list of manual testers. We will name our testing cycle
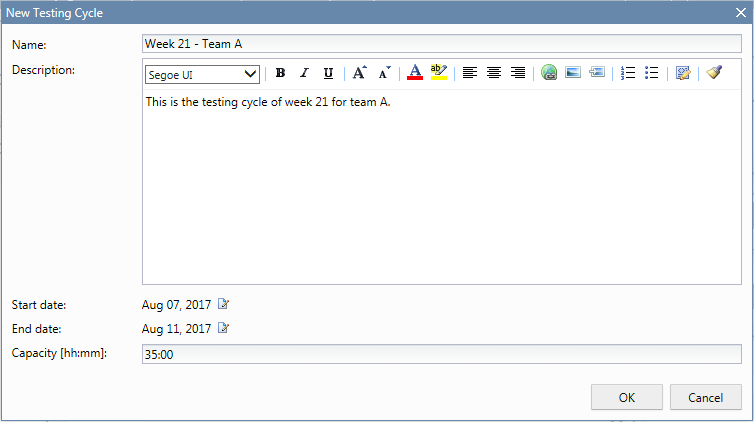
Week 21 - Team A.
- In the menu, click Execution Planning > Manual Execution Planning.
- In the Testing Cycles area on the right side, click New Testing Cycle. The New Testing Cycle box appears.
- Enter a name for the testing cycle, in our case Week 21 - Team A.
- Optionally enter a description.
-
Click
 next to
Start date to set the start date of the testing cycle.
-
Click
 next to
End date to set the end date of the testing cycle.
- In hh:mm format, enter the amount of time that you want to provide for this testing cycle (Capacity), in our case, we entered 35:00.
- Click OK.
Our testing cycle now appears in the
Testing Cycles area. It shows that currently no testers are assigned. The next step is to assign testers.

