Managing Host Integrator
The Verastream Host Integrator management server and Administrative Console provides directory services, authorization, and server management and monitoring for Host Integrator deployments. The Administrative Console tracks servers and domains in your installation and the management server provides authorization, authentication, and directory services.
By installing more than one management server you can establish replication and failover support.
How do things fit together?
- When a session server starts, it registers with the management server.
- When a connector connects to the session server with security enabled, the session server authenticates with the management server on behalf of the client.
- When a non-connector connection is made to the session server with security enabled (such as a connection from the Administrative Console, or activatemodel command), it authenticates directly with the management server.
- If a connector performs a connection via domain, the connector uses the management server for directory services. The management server provides the connector with the address of the session server that is functioning as the domain server.
Host Integrator components
| This component | Does this... |
|---|---|
| Session server | Use the VHI session server to access data on a variety of host systems, including IBM mainframes and AS/400s, VAX/Open VMS and other ASCII hosts using the VT-420 terminal protocol (including VT-52 and VT-100), and HP 3000 hosts. |
| Web server | The Web server runs Java or HTML5 Web application projects deployed from within Web Builder, as well as the Zero-footprint terminal session Web applications. |
| Administrative Console | Use to remotely view and configure server information. The console contains both the Host Emulator and logging functions. |
| Management server | Use to provide security and directory services, and track servers and domains for Host Integrator installations. |
| Host Emulator | Use to test an application without a host connection. This tool is accessed through the Administrative Console. |
| Logging | Use to perform detailed queries against the Host Integrator. Logging is accessed through the Admininstrative Console. |
More information
Introduction to the Host Integrator Administrative Console
The Host Integrator Administrative Console is an Eclipse-based management hub that puts monitoring and management tasks at your fingertips. The Administrative Console uses perspectives, views, and overviews to provide a configurable and totally customizable user experience.
Using Host Integrator Perspectives
Using Host Integrator perspectives, you can configure and monitor your session servers, handle logging, and configure the Host Emulator. These perspectives include:
-
Session Servers The Administrative Console provides a central hub where you can manage and monitor your session servers. You can add, remove, and configure directories, load distribution domains, security, and logging for session servers.
-
Logging Host Integrator can log server errors and can issue warnings and informational messages as it runs.
-
Host Emulator The Host Emulator runs 3270 and 5250 models without having a live connection to a mainframe.
More information
How to Use Host Integrator
The diagram below shows a Host Integrator installation in which users can access legacy application data using a Web browser. Although each component is represented as running on separate machines, more than one component can run on the same machine. It is important to note, however, that although it is possible to run all Host Integrator components on the same machine, this is usually only done for development and testing.
Accessing Legacy Host Data from a Web Application
Although Web applications are the most common way to access Host Integrator server, you can also create client/server applications. You can have an installation in which users access host data by running client applications that communicate directly with Host Integrator Server over WCP.
In this type of deployment, the client application on the computer must contain all the logic for accessing the host data, which includes connecting to the Host Integrator Server, requesting the model, providing the user interface between the model and the client, managing the session, and trapping and resolving errors.
Sessions
In this documentation, the term "session" is a general term that describes a single session between a client or Web application and the host. The term "host session" refers to the connection between a Host Integrator Server and the host; host sessions run over Telnet.
More information
Working Securely
By default, Host Integrator access control is disabled. When access control is enabled for a session server, an administrative login, while always required for the Administrative Console, will also be required for deploying models, generating Web applications, and executing connectors. Encryption is always enabled.
Host Integrator access control includes authentication and authorization.
Note
You can also use SSL to ensure security between the Host Integrator server and an IBM 3270 or AS/400 host. To use SSL, configure your model to use Telnet SSL or Extended Telnet SSL as a transport when you set your connection properties. If you are connecting to a VT host, you can use SSH to ensure a secure connection. To use SSH, configure your model to use SSH when you set your connection properties.
Authentication and Authorization
The management server provides authorization and authentication for both the Administrative Console and Host Integrator. When you first install Host Integrator, you provide a password for the "admin" user. The "admin" user is a built-in user that has access to all the features of the Administrative Console, including Host Integrator configurations. You use the "admin" credentials to log onto the Administrative Console and then assign additional users and groups from configured external LDAP capable directories to authorization profiles. If a management server needs to be manually reset, then the default password of ‘=secretpassword ’ is restored.
How do I configure Access Control?
Using the Administrative Console:
-
Add sources for security users and groups by either configuring directories or by enabling OS Groups in the Directory perspective.
-
Assign users and groups to the authorization profiles, Administrator, Developer, and User, available in the Authorization perspective.
-
Check the security option for each selected session server on the server property page. Since the Administrative Console is the only way to configure Host Integrator servers, enabling security controls access to servers for configuration purposes and establishes access control for data objects and client programs.
-
The management server always is running in secure mode (requires a username/password to connect) and is independent of session server security.
The built-in "admin" user is automatically part of all authorization profiles and has access to all areas of the system. To enable security follow the steps above to provide system access to additional users.
Security Profiles
The Host Integrator provides three different security profiles; user, developer, and administrator. The type of access allowed on the server is determined by the security profile the user ID belongs to. This access control is separate from and in addition to the access control provided by the host. There are scenarios in which host user ID's and passwords are sufficient for controlling access; in these cases you may decide not to enable authentication on your servers.
Configuring Server Authentication
Although the management server always runs in secure mode and a user name and password is required to access the Administrative Console and configure session server properties, this security does not control access to servers by data objects and client programs. You can establish this access control by enabling security on individual servers.
Encryption
The channel between the server and the clients that connect to it is always encrypted. A server forces encryption over SSL with every client that connects to it.
In previous versions, the RequireSecureConnection API in the connectors would be used to enable encryption between the client and the Session Server without also enabling authentication and authorization. In the current version, encryption is always enforced by the Session Server, and the value of the RequireSecureConnection flag in the connectors no longer has any effect.
Federal Information Processing Standards (FIPS) are guidelines established by the United States government to standardize computer systems. To use FIPS 140-2 validated TLS version 1 encryption for SSL support, in a Windows environment, you must first define an environment variable, VHI_FIPS = 1. After this variable is set all SSL support will use the FIPS 140-2 Crypto Libraries.
Using Profiles
The Host Integrator provides three different security profiles.
| This security profile | Can do this.... |
|---|---|
| User | Users can load Host Integrator models, create and attach to sessions, and interact with the host system. Client application user IDs are typically assigned this profile. Members of the User profile cannot log on to the Administrative Console to view or configure Host Integrator servers and cannot deploy models. |
| Developer | Developers can do everything users can do, as well as log on to the Administrative Console. Developers can see server configurations and status information, but cannot make configuration changes. Developers of client applications are typically assigned to this profile. |
| Administrator | Administrators (those logging on with an Administrator profile) can create and attach to sessions, interact with the host system, and access the console. An administrator can view and configure servers, domains, and security. |
In the Administrative Console, open the Management prospective, and then the Authorization Explorer to add members to the security profiles.
More information
Deploying a Model
Deployment is the process of transferring a model and its associated files and settings to the production server or servers where it's going to run. You deploy a model from the Design Tool or you can use command-driven deployment.
After a models is deployed, it is visible in the Models view of the Administrative Console. To open the Models view, from the View menu, select Models.
You can use the Design Tool to deploy a model with one configuration to one server, in this case a development server, running on the same computer as the Design Tool,for test purposes. In a command-driven deployment, you use Verastream Host Integrator's deployment commands from a command line or in a batch or shell file to deploy a model with one or more configurations to one or more production servers.
Note
If your integration solution includes a Web application created with Verastream's Web Builder, you must also separately deploy the Web application files. See Deploy Web Applications in the Web Builder help for information.
Using the Design Tool to deploy
If you are deploying a model with one configuration to the development server for test purposes, it's easiest to use the Design Tool.
With this approach, you use the Design Tool's Deployment Options command on the File menu to designate any session pool and model variable list settings. Next, you use the File menu's Deploy to Local Server or Deploy to Remote Server command to deploy the model. If Verastream security is enabled on the server, you are prompted for credentials. Unlike the command-driven method described below, you can only deploy the model to one server, using one model configuration. See Using the Design Tool to Deploy a Model in the Design Tool help for more information.
Using commands to deploy
If you are deploying a model with one or more configurations to one or more production servers, you should use Verastream Host Integrator's deployment commands from a command line or in a shell or batch or shell file.
With this approach, you create a model package and then use commands or a batch or shell file to deploy that model package. Your batch file can automate the deployment to multiple Host Integrator Servers. In the model package, the model file can be combined with event handler .JAR files and descriptors that tell the servers how to provide access to the model -- such as via a session pool of a certain size, or by using specific requests for a new session. See About Model Packages and Using Commands to Deploy a Model Package for more information about this deployment method.
More information
There are topics on deploying model packages and working with descriptor files and commands in the Design Tool help. See Deploying Model Packages.
Updating models deployed with earlier versions of Host Integrator
If you're upgrading from an earlier version of Host Integrator, you may have a lot of model or session pool configuration information in the Administrative Console. If you want to update a model without affecting existing configuration information, do not include descriptor files in your model package.
Once you deactivate a model that has configuration information in the console, that configuration information is lost. So if you're creating new models, you should put such information in a configuration descriptor file and then build it into your model package.
More information
Working with Load Distribution Domains
Host Integrator load distribution domains provide load balancing and failover support for installations that contain multiple Host Integrator session servers.
The Domain Session Server view displays session servers that are associated with a load distribution domain, called domain session servers, as opposed to the Session Server view which displays all session servers in an installation, regardless if they are associated with a domain. A session server can be associated with multiple load distribution domains, or none at all. In the Domain Session Server view you can monitor all of your domain session servers, their properties, and the number of sessions that are currently active.
To open the view, on the Host Integrator perspective, from the View menu, choose Domain Session Servers.
How does it work?
When you configure a load distribution domain client, applications can connect to a domain instead of connecting to individual session servers. The management server will apply logic based on the domain configuration to distribute load among the session servers in the domain, and if a session server in a domain becames inactive for whatever reason, client applications will still be able to connect to their active session servers in the domain.
To achieve session server load distribution and failover at runtime, your client should connect "via domain":
- If you write your own client application code, use the
ConnectToModelViaDomain()orConnectToSessionViaDomain()connector API method calls. - If you generate a client in Web Builder, select Connect to model via domain or Connect to session pool via domain as the connect method in your project properties.
- If you use the embedded Web service, configure the domainName property.
Management Server Domain Handling Logic or What Happens at Runtime
The basic process that occurs at runtime to achieve session server load distribution and failover is:
-
The management server runs a domain server for each configured domain. The management server also monitors the online status of session servers by receiving status updates and proactively checking at regular intervals.
-
The client application calls the connector with
ConnectToModelViaDomain()orConnectToSessionViaDomain()API method. The arguments specify the management server address, domain name, and model or pool name. If security is enabled in the session server, then the Host Integrator user ID and password credentials are also specified. -
The connector (data object) sends a request to the management server for a session from the specified domain.
-
The management server first determines which servers in the domain contain the specified model or pool and thus are eligible to fulfill the request.
-
The management server then takes all eligible servers with the lowest priority value and adds up their weight values. A random number is generated between 1 and the weight total. This number is used to determine which server will be asked to fulfill the request. For example, if there is Server A with a weight of 80, and Server B with a weight of 20, then a random number is generated between 1 and 100. If the number is between 1 and 80, then Server A is asked, and if the number is between 81 and 100, then Server B is asked.
-
If the server is unable to fulfill the request because it has reached the server session limit or, in the case of session pools, it has reached the pool limit, then the server is considered not eligible to fulfill the request and the process repeats with the remaining servers in the priority group. If the server is unable to fulfill the request because it is offline, then it will not be considered eligible for future requests until it becomes online again. Online status is automatically monitored by the management server.
-
If all servers in the priority group are unable to fulfill the request then the whole process is repeated for server in the next higher priority group.
-
When a server is able to fulfill the request, it allocates a session for the client to connect to, and responds to the management server with its address and session ID.
-
The management server returns the connection information to the connector client, which connects to the session server that has the allocated session. If security is enabled for the session server, the channel is encrypted and credentials are provided to the session server. The session server also contacts the management server for authentication and authorization.
-
The session server replies to the connector with the status of the initialization.
More information
Adding, Removing and Configuring Load Distribution Domains
You add load distribution domains and session servers to a domain in the Session Server Explorer of the Administrative Console.
Session servers and management servers have different failover mechanisms.
Note
After installing Host Integrator on the first system, install subsequent servers using the Join an existing installation option. Use the management server name and password set in the first installation.
To add and edit a domain
- In the Administrative Console, connect to the management server cluster with the user name admin and the password set during installation or other administrative credentials set in the Administrative Console. From the Host Integrator perspective, choose Session Servers.
-
In the Session Server Explorer tree, right-click Load Distribution Domains, and choose Add domain. The Add Domain dialog box displays.
-
Type a name for the new session server load distribution domain, and click OK. The new domain is listed under Load Distribution Domains in the Session Server Explorer.
-
In the Session Server Explorer, select the new domain, right-click and choose Properties. The properties page for this domain displays.
-
Click Add to identify the session servers that will be used by this domain. In the Add Domain Session Server dialog box, select the session server you want to add to the domain and then enter a weight and priority.
-
The session server has two properties associated with it; weight and priority.
-
Weight— This property controls the amount of load that the session server will handle within a given domain and a given priority. The value is relative to the weight values for other servers in the same domain with the same priority. Weight values are used for load distribution.
-
Priority— This property controls when a session server is considered eligible to handle a request for a session. A session server with a higher priority value will only be asked to fulfill a session request if ALL the servers with a lower priority value are unable to handle the request. The value ‘0’ is the highest priority for this property. The higher the number, the lower the priority. Priority values are used for failover.
For each set of servers with the same priority, make their weight vlaues total to 100. This makes it easier to identify each server's load as a percent of the total.
For example:
With this domain setup Server A handles approximately 80% of the session requests and Server B handles approximately 20%. If Server A is unavailable, then Server B will handle 100% of the session requests. Server C will only be asked to handle a session request if both Server A and Server B are unavailable. As soon as Server A or Server B becomes available then Server C will no longer be asked to handle a session request.
| Server | Weight | Priority |
|---|---|---|
| Server A | 80 | 0 |
| Server B | 20 | 0 |
| Server C | 100 | 1 |
Editing and Removing Session Servers and Domains
| To.... | In the Session Server Explorer, do this.... |
|---|---|
| Edit domain session server properties | Select the domain whose server properties you want to edit, right-click and choose Properties. On the Properties page, select the session server, and then click Edit. |
| Remove a domain | Select the domain you want to remove, right-click, and choose Remove. |
| Remove session servers from a domain | Select the domain whose server properties you want to remove, right-click and choose Properties. On the Properties page, select the session server, and then click Remove. |
More information
Working with Host Integrator Session Servers
The Host Integrator Session Server provides seamless integration of host application data and business logic into client/server and Web applications. The session server supports multi-tier client/server and Web application architecture and is designed to provide concurrent access by thousands of Web application users to host information systems and applications. Using the Host Integrator Session Server, a single Web or client/server application can concurrently access data on a variety of host systems, such as:
- IBM mainframes and compatibles, using the Telnet and TN3270E (Telnet Extended) protocols.
- IBM AS/400 systems, using the 5250 terminal protocol via Telnet.
- VAX/OpenVMS and other ASCII hosts using the VT-420 terminal protocol, which includes VT-52 and VT-100 via Telnet.
- HP 3000 hosts, using the 700/92 terminal protocol via Telnet or NS/VT.
The Host Integrator Session Server works in conjunction with the Host Integrator Design Tool and the Host Integrator Software Connectors to integrate host application data and business logic into client/server and Web applications.
Using the Design Tool, a developer builds a model of a host application, accessing fields that contain information needed by the client application. The model is then loaded into Host Integrator Session Server. The model contains all the information about the host application, including its traversal logic, application screen signatures, and data attributes, and can be accessed from a variety of software development environments using an Application Programming Interface (API) included in the Host Integrator Development Kit. When the Host Integrator Session Server receives a request from a client application, it instantiates a host session using the logic stored in the model specified in the request. Host Integrator Session Server navigates through the host application, fetches the requested data, and returns it to the client application.
For more information about creating and working with models and working with Host Integrator connectors, see the Design Tool online help, which is included in the Host Integrator Development Kit.
Managing the Session Server
The Administrative Console provides a central hub where you can manage and monitor your session servers. You can add, remove, and configure directories, load distribution domains, security, and logging for session servers.
To have complete administrative control over the session server you must be logged in with an administrator profile.
To start managing your session servers, from the Host Integrator perspective, choose Session Servers, and open the Session Server Explorer. From here you can view and configure logging, notification, and various session server properties. Additionally, you can view and configure models that are deployed to the session server, model variable lists associated with the session server, and session pools.
More information
Adding a Session Server
In the Administrative Console you add session servers that you want to manage. When you install the session server it is either registered with an existing management server or with the management server that is also being installed. You can only register a session server with one management cluster at a time.
To add a session server
-
From the Session Server Explorer Servers node, click to add a session server. The Add Session Server dialog box displays.
-
Type the name of the session server you want to manage, and then click OK. The server displays in the Session Server Explorer tree. You can now configure the properties associated with the server.
Adding additional session servers
To add a session server post-install you must supply the address of the session server, either the machine name or IP address. A session server that can be contacted and is not already a part of another management cluster is added and the name will default to the address you supplied.
If the session server can be contacted, but is already part of a management cluster, an error message displays since a session server can only be a part of one management cluster.
If the session server cannot be contacted you can add it anyway. If you do so, it will not be added to a cluster until the server is online. When the server comes online and is part of another management cluster, error messages will display in the log, and the server will be offline to the second management server.
Load balancing and failover
In order to configure session servers in a Host Integrator load distribution domain:
- All session servers in a load distribution domain must share the same management server cluster.
- Each session server can be registered with only one management server cluster.
- Session servers can be members of multiple load distribution domains.
See Adding,Removing and Configuring Load Distribution Domains for instructions on setting up load distribution.
More information
- Working with Host Integator Session Servers
- Adding, Removing and Configuring Load Distribution Domains
- Working with Session Pools
Removing a Session Server from a Cluster
A session server can only be registered with one management server cluster. If you want to register a session server with a different management server cluster, you must first remove it from the existing cluster.
If you uninstall a session server while it is registered with a management cluster that is not uninstalled, you must remove the session server from the management server cluster before reinstalling the session server on the same machine. If this is not done, the management cluster thinks the session server is registered, but may not be able to communicate with it. If this occurs just remove the session server and re-add it.
Removing a session server from a management cluster does not affect its configuration.
To remove a session server from a management server cluster
| If the session server is... | Then this... |
|---|---|
| Online | Select the session server you want to remove, right-click and choose Remove. |
| Offline | Depending on your operating system, run either the HostIntegrator/bin/resetsessionserver.bat or resetsessionserver.sh script before you add the session server to a different management cluster. |
| - You can run the script while the session server is online, but the session server must be restarted for the script actions to take effect. | |
| - If you run the resetsessionserver.bat script on a system with UAC enabled, then you must run the script with administrator privileges. |
More information
Configuring the Session Server to Run as a System Daemon
To have installed services start automatically when your system boots up
| Command line options | Description |
|---|---|
| atstart -d | -d before other options logs debugging info |
atstart -install <component> |
install component as a daemon process |
atstart -uninstall <component> |
uninstall the daemon process |
atstart -start <component> |
start the daemon process |
atstart -stop <component> |
stop the daemon process |
atstart -status <component> |
display current status of component |
Start and stop "all" starts or stops all five services and -status displays the status of all five components. For example:
    alpjanw03:/opt/microfocus/verastream/hostintegrator/bin # ./atstart -status
    LogMgr      Started
    Server      Started
    HostEmul    Started
    MgmtServer  Started
    WebServer   Started
-
Create a file called
vhicontaining the following and entering your installation directory: These instructions will start all services, including the management server if it is installed. To start a particular service, replace the parameters (<component>) with one of the following: -
server—VHI session server mgmtserver—VHI management serverlogmgmr—VHI log managerhostemul—VHI host emulatorwebserver—VHI web serverall—all installed services (start and stop only)
    ### BEGIN INIT INFO
    # Provides: VHI
    # Required-Start: $network
    # Should-Start: $network
    # Required-Stop: $network
    # Should-Stop: $network
    # Default-Start: 3 5
    # Default-Stop: 0 1 2 4 6
    # Description: Micro Focus Verastream Host Integrator Services
    ### END INIT INFO
    INSTALL_DIR=<enter installation directory>
    BIN_DIR=$INSTALL_DIR/hostintegrator/bin
    case "$1" in
    start)
    echo "Starting Verastream"
    $BIN_DIR/atstart -start all
    RETVAL=0
    ;;
    stop)
    echo "Stopping Verastream"
    $BIN_DIR/atstart -stop all
    RETVAL=0
    ;;
    status) echo "Current Verastream status"
    $BIN_DIR/atstart -status
    RETVAL=0
    ;;
    restart) echo "Restart Verastream"
    echo "-- stopping all components --"
    $BIN_DIR/atstart -stop all
    echo "-- starting all components --"
    $BIN_DIR/atstart -start all
    RETVAL=0
    ;;
    *)
    echo "Usage: $0 {start|stop|status|restart}"
    RETVAL=1
    ;;
    esac

    exit $RETVAL
-
On Linux platforms, follow these steps:
-
Copy the file to the
/etc/init.ddirectory` -
Set the file permission. Run
chmodusing the value 755. For example,chmod 755 vhi - Run
chkconfigto add the initialization script. For example,chkconfig --add vhi
Note
- Status information and error messages are written in the system log, which you can find in the MicroFocus\Verastream\ManagementServer\logs directory.
- Optional debug information is written in the vhi/etc directory
- For all command line options a return code of 0 indicates success and a non-zero return means that the command was unsuccessful.
More information
- Removing a Session Server from a Cluster
- Adding a Session Server
- Working with Host Integrator Session Servers
Using Session Server Properties
Each session server that you have added to the Session Server Explorer has a set of properties associated with it.
To view session server properties
- In the Session Server Explorer tree, choose the server whose properties you want to view, right-click and choose Properties. Alternatively, you can click the Properties icon on the toolbar.
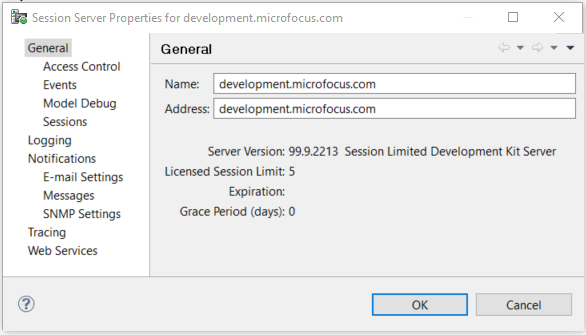
- On the Properties dialog box, from the left pane, select the type of properties you want to view. Properties are separated into four categories; General, Logging, Notifications, Tracing, and Web Services.

| Property categories | Available properties |
|---|---|
| General | The server name is case-sensitive. Be aware of this when using this information elsewhere in Host Integrator. |
| - Events | |
| - Model Debug | |
| - Access Control | |
| - Sessions | |
| Logging | Set system logging options, including deletion, storage location, and logging levels. |
| Notifications | -E-mail Settings |
| - Messages | |
| - SNMP Settings | |
| Tracing | Set tracing options, including the trace engine settings, maximum trace file size, and available trace nodes. |
| Web Services | Set options for the Web service configurations, including enabling HTTP or HTTPS connections and other WSDL elements. You can also decide whether to make Web services available for models and pools and link to the list of all available Web services. |
More information
- General Server Properties
- Logging Server Properties
- Notifications Server Properties
- Tracing Server Properties
- Web Services Server Properties
General Server Properties
These properties are specific to the selected session server.
Events
Set event handler options:
-
Disable event handler timeouts controls the use of event handler timeouts on the server. If event timeout is enabled, the event timeout specified in the model is used. If event timeout is disabled, no timeouts are enforced when an event handler is processing an event.
-
Enable script manager debug port allows you to enable or disable the debug port on the server. This port is used by the script manager for communicating with a Java debugger. You must restart the session server for this option to take effect.
-
Requested event handler debug port is the port number from which the Host Integrator Session Server will start searching for an available remote debugging port. The session server looks first at port 5005.
-
Assigned event handler debug port is the JVM remote debug port that is currently in use. If the requested debug port is unavailable, then a higher number will be requested until an available port is found.
Model Debug
When developing models in the Design Tool, model debug message recording is always on. When deploying models to the server, you can specify the model debug messages recording level as a deployment descriptor, or you can change Model Debug Message Recording in the Administrative Console's properties page. By default, the model debug messages recording level for a deployed model is to record nothing. When debugging, the recommended setting is to record errors only.
The settings below handle the size and location of the runtime model debug message recording files.
-
Model Debug Messages Directory By default, this is in the \etc\reports directory for the Host Integrator installation. You can change the directory location on the local machine.
Model debug message files (with a .vmr extension) are saved in a structure based on the time a server started. The time-stamped directory contains model debug message files named by model name and session ID, for example, CICSAccts.8.vmr. Since older .vmr files are automatically removed from the server (by default, after 7 days), you should copy the files (or increase or disable the cleanup thresholds) if ongoing analysis is necessary.
Note
Changing the setting for the directory will not take effect until the server is restarted.
-
Model Debug Messages Cache Size The size of the in-memory buffer for model debug messages. The cache size is the amount of memory per session on the server. (For example, 500 concurrent sessions x 2 MB cache size = 1000 MB of system memory required.) When this limit is reached, the model debug message contents are written to the model debug messages file. The model debug message recording process continues, and additional messages are added to the file when appropriate.
If you find that model debug message recording is slowing down the server, you may want to increase this value.
-
Model Debug Message Time Threshold The amount of time that a model debug message file remains on the server. If Model Debug Message Space Threshold is set to 0, then daily maintenance is performed and any model debug message files older than the setting specified will be removed. The default is 7 days.
If Model Debug Message Space Threshold is set to a number greater than 0, then hourly maintenance of model debug messages is performed and any model debug message older than the setting specified will be removed, regardless of disk space availability.
-
Model Debug Message Space Threshold The amount of disk space, in MB, that is maintained for the most recent model debug message files. The model debug message directory is reduced to this size on an hourly basis, keeping the newest files that fit within this threshold. The reduction process removes oldest files when necessary. A good value for this setting is half of the maximum space for model that you want to allocate for model debug message files.
If you want to enforce a maximum for model debug message space, it is recommended that you specify a dedicated virtual drive on the local machine.
Access Control
Enable access control Select this option to have all communication between the session server and the management server handled by means of SSL. When access control is enabled for a session server, an administrative login, while always required for the Administrative Console, will also be required for deploying models, generating Web applications, and executing connectors. See Working Securely for information on access control options.
FIPS Status Federal Information Processing Standards (FIPS) are guidelines established by the United States government to standardize computer systems. To use FIPS 140-2 validated encryption, in a Windows environment, you must define an environment variable, VHI_FIPS = 1.
Sessions
Set session options.
-
Max Concurrent Sessions Max Concurrent Sessions is the maximum number of concurrent sessions that can run on this server. The range of values is 1 - 5000, and the default is 10.
Max Concurrent Sessions must match the number of licenses purchased by your organization. If you are running multiple servers, the combined total of Max Concurrent Sessions on all servers must match the number of licenses purchased. For example, if you have three servers and you purchased 75 licenses, you can set Max Concurrent Sessions on your servers to 20, 25, and 30 respectively. You can divide the numbers any way you want, as long as the total on all servers does not exceed your number of licenses.
Note
On the server included with the Development Kit , the range of values is 1 - 5, and the default is 5.
- Inactivity Timeout (minutes) The Inactivity Timeout is the number of minutes a data object-to-host session connection can be idle before the host session disconnects from the data object and either terminates or returns to its session pool. The range of values is 0 - 2147483647 and the default value is 30 minutes. Setting the Inactivity Timeout to 0 means the session will never time out.
Note
The inactivity timeout used for a session is the timeout that is in effect when the session connects. If you change the timeout, the new value will be used for sessions that connect after the change is saved to the server; it will not affect sessions that were connected when the change was made
-
Max Pending Sessions The maximum number of sessions trying to connect to the host simultaneously. The actual number may be much less if the sessions start and login rapidly. The pools might not be able to keep up. This setting is intended to protect the host from a denial of service attack, not to guarantee performance.
Set this option to at least 1 to ensure that pools are created concurrently. Higher values are recommended for optimal performance.
-
Enable Rogue Session Management Rogue sessions within a session pool exhibit a circular behavior when attempting to log in and reconnect under conditions such as the following:
- There is an expired password within the model variable list
- A session fails to reach the defined starting point of a pooled session
- After logging in, a session fails to reach the home entity
You can configure the server to handle these rogue sessions so that they are "quarantined" until you have addressed the underlying problem. Select this option to enable rogue session management. When enabled, any session that has been suspended for any of the conditions described above is marked in the Sessions view list. This may helpful during development. However, during production this option should only be used to help diagnose problems.
Click on the Sessions view toolbar to only show rogue sessions.
More information
- Using Session Server Properties
- Logging Server Properties
- Notifications Server Properties
- Tracing Server Properties
Setting Log Properties
These properties are specific to the selected session server.
Logging
Host Integrator can log server errors and can issue warnings and informational messages as it runs.
Set logging options:
-
Default logging level Specifies which events are inserted into the log files by default. These messages are also sent to the operating system log if system logging is enabled (see below). This is a server wide setting. Client applications also have the ability to increase the logging level for their own private sessions. To record all server activity, select Log All Messages. This will include in the log all informational messages, warnings, and errors. Because this setting requires the server to track all activity, expect additional resource consumption on the server.
You may optionally select a reduced logging level for improved performance on heavily loaded servers.
-
Log storage directory Specifies the directory in which log messages stored, which by default is
<installation directory>\VHI\etc\logs\server (Windows)or<installation directory>/vhi/etc/logs/server (Linux). An administrator can specify a different local directory where new messages are stored. The directory you specify must already exist. Any existing messages are transferred to the newly specified location. -
System logging With this option enabled Host Integrator sends logging messages to both the Host Integrator log files and the operating system log, which is the Event Log on Windows systems and the syslog daemon on Linux systems. Host Integrator also sends a message to the System Log when it detects a logging system failure, regardless of this setting.
Note
Host Integrator does not manage the size of the operating system log. When System Logging is enabled, you must take steps to limit the size of your system log.
-
Failed request information logging This option helps you troubleshoot client application problems. When Failed Request Information Logging is enabled and the server encounters an error, the server writes all activity for the failed request to the log file. This information appears immediately before the error message in the log file. Because Failed Request Information Logging requires the server to track additional activity, enabling it consumes additional resources on the server.
Failed Request Information Logging does not have to be enabled for request failures to be recorded; enabling this setting simply appends all activity associated with the failure in addition to the failure itself. When Failed Request Information Logging is disabled, the error itself is still logged.
Note
If Logging Level is set to Log All Messages, all activity is written to the log file even when no errors are encountered and regardless of the Failed Request Information Logging setting.
-
Delete logs when disk space exceeds threshold When the Delete logs when disk space exceeds threshold check box is selected, the oldest log entries are deleted when the amount of disk space used by the log records exceeds the threshold. The oldest messages are deleted until space utilization is decreased to 80% of the configured maximum limit.
-
Log space threshold (in MB) The total amount of disk space in MB that can be used to store log records. The default is 100 MB and the range of values is 1 - 100000 MB.
In addition to the space required to store messages, the logging system requires administrative storage space. For proper function of the logging system, ensure that the actual free disk space in the configured logging directory is at least twice the value of the Log Space Threshold setting.
Note
The space and time thresholds can be enabled at the same time. In this case, the most restrictive setting is used.
-
Delete logs older than threshold When selected, messages older than the specified threshold are purged.
-
Log time threshold (in days) The expiration date for all log records. The default is 30 days, and the range of values is 1 - 100000 days.
Note
The space and time thresholds can be enabled at the same time. In this case, the most restrictive setting is used.
More information