Creating Macros
A macro is a series of keyboard actions that you record and then run. You can use these JavaScript macro programs to automate user interactions with the terminal. You can access and run macros from all supported devices.
Host Access for the Cloud records and saves advanced macros as JavaScript, making it easy to edit and enhance your recorded macros. You can record macros to playback later, run macros at startup or when the session connects or disconnects from the host. You can also write macros from scratch to perform complex tasks that the recorder cannot capture.
Macros are made available to users in two ways; created by an administrator or recorded by users for their own private use. All advanced macros are associated with a session and they all accomplish the same goal, automating host interaction. The only difference between the two flavors is simply who can access them and who manages their creation and availability:
-
Macros created by administrators
Administrators create macros when they create the session. They are specific to a session and are available to all users who have access to the session from the Macro icon on the toolbar. Administrators can designate macros to run at startup or when the session connects or disconnects from the host.
-
Macros created by users
End-user macros are created by individuals for sessions they are authorized to access. The administrator grants permission to create macros by setting a User Preference Rule. Users can access the session under their own credentials or in a Guest role. Macros that Guest users create are available to all Guest users. Users who are logged in using their own credentials can only see macros that they have created.
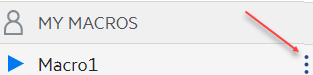
Advanced macros are listed in alphabetical order in the drop down list available from the toolbar. Macros created by the end-user are listed first and followed by an indicator of three vertical grey dots, which when selected, displays the Edit and Delete options. Macros created by the administrator are listed without the indicator as those macros cannot be modified by the end-user.
Working with Macros
Follow these steps to record, edit, and run macros.
Record
-
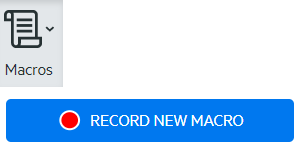
Click the Macro icon on the toolbar, and then click Record New Macro.
-
Navigate the host application to record the series of steps you want included in the macro.
-
Click
 on the toolbar to stop recording. The red dot pulses to indicate the recording is in process.
 -
When prompted, type a name for the macro.
Edit
-
From the Macro drop-down list, select the macro you want to edit.
-
Click the three vertical dots to expand the field.
-
Click
 to open the Macro Editor (in the left panel).
 -
Use JavaScript to make whatever changes are necessary. You can run and save the modified macro using the toolbar icons in the upper panel of the editor.
Run
To run a macro, choose the macro from the drop-down list and click ![]() .
.
You can also map keys that will automatically trigger an already recorded macro. In the Key Map settings dialog box, choose Run Macro from the Action drop down list. Choose a macro to associate with the key mapping from the Value list.
Stop
You can stop a macro before it completes from either the Macro Editor or the toolbar. Click ![]() to stop the macro. To rerun the macro, navigate back to the macro starting screen.
to stop the macro. To rerun the macro, navigate back to the macro starting screen.
Delete
-
From the Macro drop down list, select the macro you want to delete.
-
Expand the field, by clicking the three vertical dot icon.

-
Click Delete.
View
The Macro drop down list is available from the toolbar to all users who have permission to record macros or are accessing a session where macros have been pre-recorded by the administrator for use with that session.
Macros are listed under either MY MACROS or MACROS depending on how they were recorded.
All users, whether they are logged in using their credentials or as Guest, can see the macros associated with the session. Macros listed under the MY MACROS heading are listed in alphabetical order by name and are visible to those users that recorded them. Macros recorded by the administrator and attached to a session are listed alphabetically under MACROS.
Debugging Macros
Since macros are written in JavaScript and executed in the browser, the best way to debug and troubleshoot them is by using your web browser’s built-in tools. Modern browsers come with a very capable set of tools for debugging JavaScript code. You can place breakpoints, step through code, and output debug information.
hint
JavaScript is case sensitive. Keep that in mind when editing JavaScript code.
To debug a macro:
-
Open the macro for editing. See Working with macros for instructions.
-
Open your browser’s development tools.
Browser Open debugger Mozilla Firefox 40.0.3 - From the toolbar, open the Menu, and choose Developer.
- From the Web Developer menu, choose Debugger. The debugger opens in a lower panel.
Google Chrome 45.0 - From the toolbar, open the Menu, and choose More tools.
- Choose Developer Tools to open the Debugger.
Microsoft Internet Explorer 11 - From the toolbar, open Settings, and choose F12 Developer Tools.
- Open the Debugger tab.
-
Use one of the these tools in your macro code, and run the code.
-
debugger
The most thorough approach to debugging is to use the
‘debugger;’statement. When you insert these statements into your macro code then run it, with the browser’s development tools open, the execution will stop on those lines. You can step through your macro, view the value of local variables and whatever else you need to check.You are encouraged to place multiple debugger; statements in your code to help get to the correct line. The asynchronous nature of JavaScript can make stepping through code challenging. This can be offset by using multiple, carefully placed debugger; statements.
Example 1:
debuggervar hostCommand = menuSelection + ‘[enter]'; debugger; // <— Browser's debugger will stop here ps.sendKeys(hostCommand); -
console.log(), alert()
These two functions are commonly used for debugging JavaScript. While not as flexible as the debugger statement they provide a quick way to output debug information. These functions output the information to the JavaScript “Console” tab in the browser’s developer tools.
Example 2:
console.log(), alert()var hostCommand = menuSelection + ‘[enter]'; console.log('Command:' + hostCommand); // <— Will output the string to "Console" tab alert('Command:' + hostCommand); // Will pop up a small window containing the data ps.sendKeys(hostCommand); -
ui.message()
The Host Access for the Cloud Macro API provides an ui.message() function that is very similar to JavaScript’s alert() function. You can also use ui.message() to output debug information.
Example 3:
ui.message()var hostCommand = menuSelection + ‘[enter]'; ui.message('Command:' + hostCommand); // <— Will pop up a message window ps.sendKeys(hostCommand);
-
Keep in mind:
-
Stepping and “yields”
While the yield statements in macros make them easier to understand, they can make the code more challenging to step through with the debugger. Consider either using multiple debugger statements or carefully placed debugger statements of
console.log()calls to output the right debug information. -
Internet Explorer
Debugging in Internet Explorer involves transformed code and may be more difficult than on other browsers.
Using the Macro API
In Host Access for the Cloud, macros are recorded and written using JavaScript.
The Macro API consists of a set of objects which you can use to interact with the host, wait for screen states, and interact with the user.
About promises and yields
Because JavaScript is single-threaded and uses 'callback functions’ and ‘promises’ to help manage the flow of execution through code, often code can be difficult to follow. Host Access for the Cloud combines the concept of ‘promises' with the ‘yield' keyword so macro code can be organized in a more linear fashion.
-
Promises
Promises are patterns to help simplify functions that return their result asynchronously, at some point in the future. All ‘wait’ and ‘ui’ functions in the Macro API return promise objects.
-
Yield
Macros use the yield keyword to block the execution of the macro until a promise is resolved, or done. So putting yield in front of any ‘wait’ or ‘ui’ function makes the macro execution pause until that function has finished executing. You can place the yield keyword in front of any function that returns a promise, even your own custom functions.
note
The ability to make macro execution block by combining yield with promises is enabled by the createMacro() function.
Errors
Errors are handled in macros using a try / catch statement. Some API functions may throw errors if, for example, conditions can’t be met or a timeout occurs. The thrown error is ‘caught’ in the catch statement. You can wrap smaller blocks of code in a try / catch statement to handle errors at a more granular level.
Macro developers can also throw errors by using 'throw new Error('Helpful error message');
More information