Enabling Access to the Database
To access a database on a remote or local server, a DSN that points to the database is required. In a client-server configuration, the DSN enables database access from the client to the remote server. Whereas in a local configuration, the DSN enables access to the server component located on the same machine as the database.
If you are using a client-server configuration, you must install the XDBC Client software before proceding.
To create a DSN for enabling access to the database:
- From the
Start menu, open the
ODBC DATA Source Administrator. The
ODBC Data Source Administrator dialog box appears with the
User DSN tab selected.
Note: On 64-bit operating systems such as Vista and Windows 7, access the ODBC Data Source Administrator from the Micro Focus XDBC Start menu, as opposed from the Windows Control Panel. The Control Panel points to the 64-bit version of the Administrator, which will not work with Micro Focus XDBC, as that is a 32-bit application.
- Click the
User DSN or
System DSN tab, depending on your preferences, and click
Add.
Note: The File DSN is not supported by Micro Focus XDBC.
The Create New Data Source dialog box appears.
- For XDBC Client, select Micro Focus MFXDBC Client Driver 2.0. For XDBC Local, select Micro Focus MFXDBC Driver 2.0.
- Click
Finish. The
Micro Focus XDBC Setup screen appears:
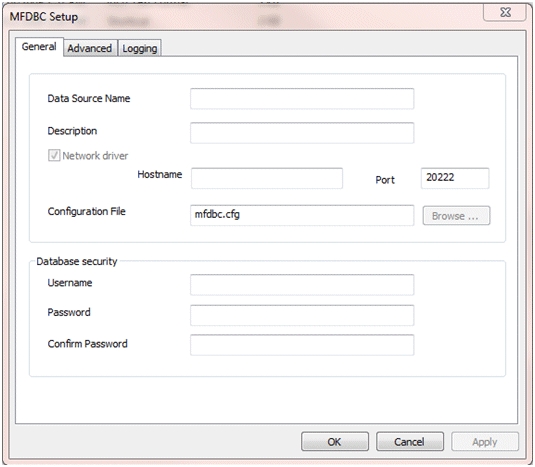
- On the General tab, enter a DSN name.
- If you are using XDBC Server in a client-server configuration, enter the Hostname (or IP Address) of the remote server. Specifying a Hostname value is not necessary in a local configuration.
- Enter the Port that the server is listening on. The default is 20222. (This should be the same port that was tested in the section Using a Silent Install using the xdbcping utility.
- Enter the name of the Configuration File for the database. Note that different drivers can be configured to use different remote configuration files.