Editing a Table Definition
- In the Catalog Explorer, double-click the
File Definitions node.
The catalog's file definitions are displayed.
- Expand the relevant file definition, then expand the Table Definitions node.
- Double-click the relevant table definition.
Note: The Catalog Explorer also contains a Table Definitions node, where all tables (regardless of which file definition they are derived) are listed; you can also expand this node and double-click the relevant table definition.
The <table-def-name> Table pane is displayed.
- Perform one or more of the following edits:
- Create a new table instance:
- In the Catalog Explorer, right-click the table definition and select
New Table Instance.
The Create Table Instance for <table-def-name> dialog box is displayed.
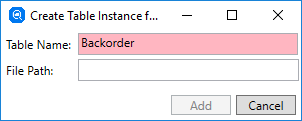
- In the Table Name field, enter a unique name for the table instance.
- In the File Path field, enter the path and file name for the data file that is to supply the data for the table instance.
- Click Add.
- In the Catalog Explorer, right-click the table definition and select
New Table Instance.
- Change the data file used for a table instance:
- In the Catalog Explorer, expand the table definition and the required table instance.
The data file entry is displayed.
- Right-click the data file name and select
Edit File.
The Edit File dialog box is displayed.
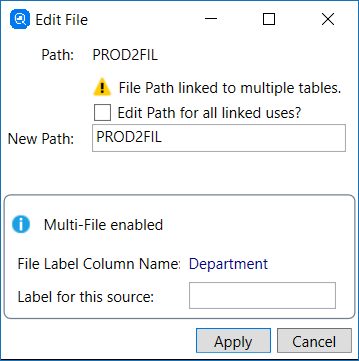
- If the data file is used in multiple table instances, and you want to change all instances, click Edit Path for all linked uses?.
- In the New Path field, enter the path and file name for the data file that is to supply the data for the table.
- Click
Apply.
The appropriate table instances are updated.
- In the Catalog Explorer, expand the table definition and the required table instance.
- Rename the column names:
- Double-click the required cell in the Column Name column and amend the text, as appropriate, then press Enter.
- Change the order of the columns:
- Select a row in the grid, then use
 (Move Column Down) and
 (Move Column Up) to change the order of the column in the finished table.
- Select a row in the grid, then use
- Add columns:
- To add a column, click
Add Column, then select one or more columns from the
Add Columns to Table Definition grid and click
Add Selected Columns.

- To add a column, click
Add Column, then select one or more columns from the
Add Columns to Table Definition grid and click
Add Selected Columns.
- Remove columns:
- To remove a column, select the appropriate row in the grid, then click
 (Remove Selected Column).
- To remove a column, select the appropriate row in the grid, then click
- Set update and insert permissions:
- To allow SQL UPDATE statements to be performed on the table, click Allow Updates.
- To allow SQL INSERT or DELETE statements to be performed on the table, click Allow Inserts.
These settings are in addition to the privileges you are required to set for a user. Both must be set before the statements can be successfully executed.
Note: If you select either of these options on a table that is not writable, a warning is displayed, and the reason that the table is not writable is displayed in the Status pane; see Building Writable Tables for more information. - Create a table filter based on a conditional variable:
- See Defining Table Filters.
- Apply a column filter:
- To limit the columns displayed in the grid, in the text box to the left of
 (Column Filter), enter text that is common to the desired column name and click
or press
Enter.
(Column Filter), enter text that is common to the desired column name and click
or press
Enter.
- To limit the columns displayed in the grid, in the text box to the left of
- Rename the table definition:
- In the Catalog Explorer, right-click the table definition and select
Rename Table Def.
The Edit Table Definition Name dialog box is displayed.
- Enter a new name for the table definition, then click
OK.
The table definition is renamed.
- In the Catalog Explorer, right-click the table definition and select
Rename Table Def.
- Create a new table instance:
- Some of the above edits require you to save to the catalog; if the
Save to Catalog option is available, click it.
The table definition changes are saved to the catalog.