Accessing Host Access for the Cloud using the IIS Reverse Proxy
This note describes how to use the IIS Reverse Proxy with Host Access for the Cloud. In order to comply with Common Criteria security requirements, it is necessary to place the Host Access for the Cloud server behind a proxy in this manner.
Prerequisites
-
Internet Information Services (IIS) 8.0 or later is required.
-
The IIS WebSockets protocol must be enabled. See IIS 8.0 WebSocket Protocol Support for information on how to enable this protocol.
-
IIS Application Request Routing (ARR) 3.0 or later is required.
-
The IIS URL Rewrite module must be installed.
Configure the IIS Reverse Proxy for HACloud
This example illustrates configuring an IIS server with the IP address of 192.168.1.1 to proxy connections to the Host Access for the Cloud session server at http://10.10.10.1:7070.
Configuring IIS
-
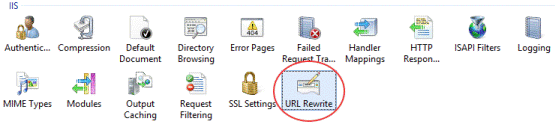
Launch the Internet Information Services (IIS) Manager, navigate to the web site you want to use, and open the URL Rewrite feature.
-
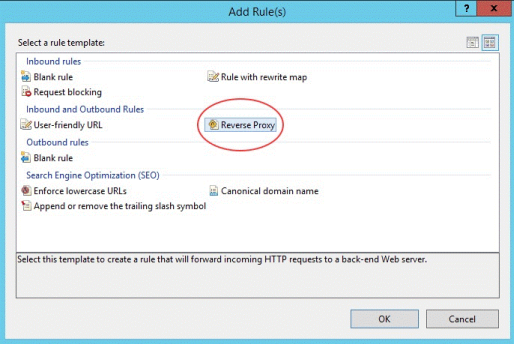
Choose the Add Rule(s) action and add the Reverse Proxy rule.
-
For the inbound rule, enter the Host Access for the Cloud server’s IP address or host name and port. For example, if the session server is on the same machine as IIS and is using its default port, enter
localhost:7443. -
Check the outbound rule Rewrite the domain names... and enter the host name or IP address of the IIS server in the To: box.
-
Click OK to create the new Reverse Proxy Rule.
Configuring HACloud
In order to proxy connections, the IIS URL Rewrite module must inspect and rewrite the web pages and WebSocket connections that pass through the proxy. For rewriting to succeed, these items must be sent in an uncompressed form. Note that, if configured, compression will still occur from the IIS server to the client’s browser. The session server must also be configured to allow WebSocket connections to originate from the proxy.
-
Open container.properties in a text editor. The default location for this file is:
/sessionserver/conf. -
Add the following lines to
container.properties:java websocket.compression.enable=false server.compression.enabled=false websocket.allowed.origins=http://<IIS server name or IP address>. For example: 192.168.1.1.Save changes to the file. The Allowed Origins property is a comma-delimited list of URLs. If web clients will be connecting to your website using an HTTPS connection, adjust the URL accordingly. If both secure and non-secure connections will be used, use both URLs as the value:
websocket.allowed.origins=http://192.168.1.1,https://192.168.1.1. To avoid errors, make sure that all possible address formats are included in the Allowed Origins list. -
Restart the web site and restart the session server and test the proxy by connecting to:
http(s)://192.168.1.1.
Troubleshooting
If you receive web server errors, enabling detailed errors may help diagnose the problem. In the IIS Manager, open the Error Pages feature and check Detailed errors:
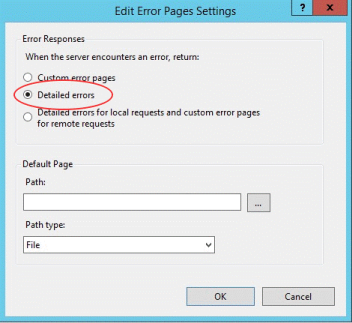
Typically errors in the 5XX range are caused by issues with compression being enabled or mistakes in the Allowed Origins value.
If the IIS proxy will be connecting to the session server with HTTPS, then the certificate used with the session server must be trusted by the IIS server. If the session server is using a self-signed certificate, this certificate must be added to the Windows trust store. If the session server is using a signed certificate, then the signer must be a trusted CA.