Notifications Server Properties
These properties are specific to the selected session server.
You can configure session servers to send e-mail notifications of server events to designated recipients.
There are three different property pages:
-
E-mail This is where you setup and configure notifications and generate a test message.
-
SNMP Configure the session server to use Simple Network Management Protocol (SNMP) to distribute status information.
-
Messages Specify which messages will generate e-mail notifications and which will interact with the SNMP subsystem.
To enable Notifications
Select this option on the E-mail Settings property page.
More information
Configuring SNMP
You can use these options to configure the Host Integrator's SNMP system to suit the requirements of an individual organization.
-
Enable SNMP Check this box to have the Host Integrator Server maintain use statistics and generate SNMP traps for selected events. If you want to deactivate SNMP, while maintaining other aspects of its configuration, clear this item.
-
SNMP Port Enter the UDP port number you wish the Host Integrator SNMP agent to use to service SNMP GETs for statistical data. The default port number is 161.
-
SNMP Trap Destinations If you plan to use SNMP traps, enter their destinations in this box. Enter one fully-qualified domain name or IP address per line for each Network Management Station (NMS) that you wish to receive traps. Traps are sent to UDP port 162 of each address listed in this item.
-
Seconds between duplicate traps When identical, duplicate, trap-generating events occur rapidly within the Host Integrator Server, a buffering mechanism is used to prevent network saturation. The first occurrence of an event is reported immediately, while future occurrences, as well as the occurrence count, are not reported until the configured time has elapsed. Enter a duration of time, in seconds, that the Host Integrator Server should wait before sending duplicate event traps to configured trap recipients. By default, this option is set to 5 seconds. Enter an amount between 0 and 65535 seconds.
Specifying the Events that Generate SNMP Traps
To specify the Host Integrator events that generate SNMP traps, click Messages under Notifications in the Session Server Property page.
More information
Configuring E-mail Options
You can configure Host Integrator servers to send e-mail notification of server events to a list of recipients. Use E-mail Settings to enable and configure e-mail notification and generate a test message.
To enable and configure e-mail notification:
Some fields are optional, while others are required. Required fields are denoted by an asterisk on the dialog box.
- In the Session Server Explorer, choose the server you want to configure, and open the Properties page. Under Notifications, choose E-mail Settings.
- Specify the E-mail settings you want to use.
- Click Apply, and then click Test Message to verify that your configuration is correct. The Administrative Console does not report whether the test message was successful; the receipt of the message is your indication that the settings you entered are correct.
- Click Messages in the left pane of the Properties page to specify which events you want to generate e-mail notifications for.
Settings
-
Enable E-mail notification
This configures the currently selected server to generate e-mail messages whenever an event specified in the E-mail Messages panel occurs.
-
E-mail address from which messages are sent
In this field, enter a single, valid e-mail address. This option specifies the e-mail address from which event notification messages are sent.
-
E-mail address to which messages are sent
In this field, enter a valid e-mail address, and then click Add after each address you enter. This puts each address on its own line. This is a required field.
-
E-mail server name or IP address
Specify the name or IP address of the mail server to which event notification messages should be sent. Enter a valid IP address or a valid network name. This is a required field. If you have enabled SMTP authentication, the server name and address must be set to that of the SMTP server.
-
E-mail server port
Specify the port used by the mail server you specified. Most mail servers use port 25. This is a required field. If you have enabled SMTP authentication, the port must be set to that used by the SMTP server.
-
Subject field of the notification message
Specify the subject line for event notification messages. By default, this option is set to Host Integrator Notification. This is a required field.
-
Text added to the error text in the body of the notification message
Specify a message to be sent along with event notification messages. This option is not required, and is blank by default. It can contain up to 255 characters, and will be the first line of all messages that are sent.
-
Enable SMTP authentication
Select this option to turn on Simple Mail Transfer Protocol (SMTP) authentication. SMTP is an Internet standard for transmitting e-mail. This option is not enabled by default. SMTP authentication requires that you supply username and password values for the SMTP server.
Advanced SMTP settings
There are three advanced settings for SMTP. These settings are used to add customized functionality at the socket level. For more information on sockets, see the Java tutorial, All About Sockets.
These settings are configured in the logmgr.conf file, located in the HostIntegrator/etc/ directory of your installation. If you make any changes to this file, you must restart the server before the changes take effect.
-
mail.smtp.socketFactory.port
Specifies the port to connect to when using the specified socket factory. If not set, the default port is used.
-
mail.smtp.socketFactory.class
If set, specifies the name of a class that implements the javax.net.SocketFactory interface. This class will be used to create SMTP sockets.
-
mail.smtp.socketFactory.fallback
If set to true, failure to create a socket using the specified socket factory class will cause the socket to be created using the java.net.Socket class. Defaults to true.
For example:
        java.additional.4=Dmail.smtp.socketFactory.port=465
        java.additional.5=Dmail.smtp.socketFactory.class=javax.net.ssl.SSLSocketFactory
        java.additional.6=Dmail.smtp.socketFactory.fallback=true
More information
Configuring Messages
These properties are specific to the selected session server. To enable and configure message options, click Messages in the left pane of the Properties page for the selected server.
Messages
In the Messages property page you can specify the messages that will generate e-mail notifications.
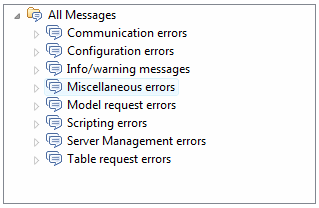
- Find message You can search for a specific message. Enter either the number of the message or a text string. As you enter the number of the message or a text string, the matching messages display in the All Messages tree.
Click ![]() to erase any text in the Find text field.
to erase any text in the Find text field.
-
Message filters You can filter the messages based on these options.
- Email enabled
- Monitor in SNMP MIB enabled
- SMNP Trap/Monitor in SNMP MIB enabled
- Show modified configuration— This option finds messages that no longer have a default configuration.
List of messages
You can select the error and information messages, or groups of messages, that will generate e-mail notification messages. To do this, select the message or message group you want in the All Messages tree. For example, if you select Communication errors, all the errors in that group will generate a message. You can, however, select just one message by expanding the Communication errors node and selecting the specific message.
After you've selected the error messages you want to use, click Apply.
Right information pane
-
Group The node under which the message selected is located.
-
Description The description of the selected message.
-
ID The ID number of the selected message.
-
Type The type of message; error, info or warnings.
-
Notification settings Select Send e-mail notification to send an e-mail notification to the list of recipients designated on the E-mail Settings page.
-
SNMP property You can choose which SNMP property you want to use.
- Don't monitor with SNMP— select this option if you do not want the SNMP subsystem to track occurrences of this message.
- Monitor in SNMP MIB— select this option if you want the SNMP subsystem to track occurrences of this message. When a Network Management Station performs an SNMP GET for monitored events, the Host Integrator Server will include occurrences of this message in the response.
- Send SNMP trap and monitor in SNMP MIB— When this message occurs, send an SNMP trap to all configured Network Management Stations in addition to tracking occurrences in the MIB.
See Configuring SNMP for more information on these properties.
More information
Setting Tracing Properties
These properties are specific to the selected session server.
Host Integrator session server tracing is a diagnostic tool which is available for you to use in conjunction with technical support to troubleshoot various session server problems such as transport difficulties or session problems. Since only development staff and technical support can read traces generated by Host Integrator, the only reason to configure these properties is if you have been instructed to do so by technical support.
Tracing
To start the trace engine you must first provide a trace file name. Once you've finished configuring the tracing properties, to start the trace, right-click on the session server in the Session Server Explorer, and choose Start Trace.
To stop the trace engine, right-click on a session server and select Stop Tracing.
Set trace engine options:
-
Trace file name Type the name of the trace file. For example, a path name such as
C:\Program Files\VHI\Trace.trc (Windows)or/usr/local/vhi/trace.trc(UNIX) means that the trace file is on the same machine as the Host Integrator server. If you want the trace to be generated on a machine other than the machine running the server, you must enter the fully qualified network path name. The directory location you specify for the trace file must exist and the file name must be valid for the trace engine to start. -
Max trace file size Enter the maximum amount of disk space that the server can use to create trace files. Enter a value between 0 and 1024 MB.
Note
Setting the maximum trace size to 0 means that the trace size is unlimited and the server will continue to send data to the trace file until the problem occurs or there is no more available disk space. When tracing is active, the server writes trace data to the trace file until the file is half the maximum trace file size. The server then creates a second file, appending a 2 to the trace file name, and sends trace data to the second file until it is the same size as the first. It then starts overwriting the data in the first trace file.
-
Trace new sessions Select this option if you want new sessions to have tracing activated when they are allocated. In some cases, selecting this option may slow server activity to the point where the problem is masked.
-
Trace server startup Select this option to have Tracing start as soon as the server is started.
Enable trace nodes Select the events that you want collected in the trace. To do this, select the appropriate categories in the navigation tree. Technical support will tell you which nodes to select.
Trace configuration files
In some cases technical support may provide a trace configuration file that you will load instead of enabling tracing nodes.
To load a trace configuration file:
- Right-click anywhere on the Trace Nodes tree and select Load Trace Configuration File.
- From the dialog box, select the file you want to load.
After the file is loaded, the trace node tree indicates what trace nodes were enabled in the file.
More information
Setting Web Services Session Server Properties
The session server Web services property page displays information and options for the Web service associated with the selected session server. Click OK for the changes you make to take effect; it is not necessary to restart the session server.
After you make changes to Web service configurations, you may have to reconfigure your clients (by importing the new WSDL) to continue using them.
-
Enable HTTP Web services — Select this option to provide an HTTP connection to the Web service. Click the link to open your default browser to the list of available Web services. If the link is not visible, you may have a port conflict. The default port is 9680.
From the right-click context menu, click Copy URL to copy the Web services URL address to the clipboard.
-
Enable HTTPS Web services — Select this option to provide an HTTPS secure connection to the Web service. Click the link to open your default browser to the list of available Web services. If the link is not visible, you may have a port conflict. The default port is 9681.
From the right-click context menu, click Copy URL to copy the Web services URL address to the clipboard.
-
Publish Web services for models (non-pooled sessions) — Select this option to make Web services available for all non-pooled sessions.
-
Publish Web services for pooled sessions — Select this option to make Web services available for all pooled sessions.
-
Enable WS-Addressing and WS-Resource — This setting is specific to SOAP Web services and does not affect REST services. If you are using SOAP services, select this option to have WS-Addressing and WS-Resource elements listed in the WSDL file. If you disable this option, the Web service still executes requests using these elements, but the WSDL will not contain these elements. This can make the WSDL easier for some clients to consume. Stateful Web services are still available with inbound support.
-
Enable executeSQLStatement Web method — Select this option to use the executeSQLStatement method. If you disable this option, the WSDL element and schema datatypes are removed from the WSDL and a client will not be able to execute this Web method.
-
Enable processString Web method — Select this option to use the processString event handler method. If you disable this option, the WSDL element and schema datatypes are removed from the WSDL and a client will not be able to execute this Web method.
-
Method timeout — The number of milliseconds to wait for a procedure to complete. If the timeout expires clients will receive a SOAP fault indicating the timeout condition.
-
Suspend timeout — The time, in minutes, that a session remains suspended. This timeout takes effect when you are using stateful Web services. If the timeout period is exceeded, the session is reclaimed, and clients will receive a SOAP fault stating that the session is no longer available when a stateful Web service attempts to execute against the session.
-
Specify a custom namespace for the pool — Specify a custom namespace for the session server to use during deployment.
-
Restore Defaults — Click Restore Defaults to restore the default settings for this property page.
More information
- Changing Host Integrator Port TCP Numbers
- Deploying a Model
- Setting Model Level Web Service Properties
- Using Session Pool Properties
- Using Session Server Properties
Using Model Properties
The Models property page displays information and options for a selected model that is deployed to the session server.
-
Host name — The host the model connects to from this server. The name specified here overrides the name stored in the model.
-
Host port — The port ID for the host connection. The port ID specified here overrides the port ID stored in the model.
-
Model debug messages recording — The model debug message reporting level for the model. Options include Disabled, Record Errors, Record Error Sessions, and Record Everything. Use the Design Tool Model Debug Messages tool to troubleshootand debug your model.
-
Version — The timestamp of the last time the model was saved.
-
Startup entity — The name of the entity that host session connections made with this model will navigate to after the connection is made.
-
Variables — A list of all the variable names defined for this model.
More information
Setting Model Level Web Services Properties
The model level Web services property page displays information and options for the Web service associated with the selected model that is deployed to the session server. If you choose to override the session server values for a particular model, those settings are displayed in boldface. To see the configured session server Web service properties, click Open Session Server Properties.
-
Override session server settings — Select this option to customize the session server properties on a model-level basis. When you select this option you can set the following options for the selected model.
-
Publish Web services for this model (non-pooled sessions) — Select this option to make the Web service available for non-pooled sessions associated with a particular model.
-
Enable WS-Addressing and WS-Resource — This setting is specific to SOAP Web services and does not affect REST services. If you are using SOAP services, select this option to have WS-Addressing and WS-Resource elements listed in the WSDL file for this selected model. If you disable this option, the Web service will still execute requests using these elements, but the WSDL will not contain these elements. This can make the WSDL easier for some clients to consume.
-
Enable executeSQLStatement Web method — Select this option to use the executeSQLStatement method on the selected model. If you disable this option, the WSDL element and schema datatypes are removed from the WSDL and a client will not be able to execute this Web method.
-
Enable processString Web method — Select this option to use the processString event handler method with the selected model. If you disable this option, the WSDL element and schema datatypes are removed from the WSDL and a client will not be able to execute this Web method.
-
Method timeout — The number of milliseconds to wait for a procedure to complete. If the timeout expires, clients will receive a SOAP fault indicating the timeout condition.
-
Suspend timeout — The time, in minutes, that a session remains suspended. This timeout takes effect when you are using stateful Web services. If the timeout period is exceeded, the session is reclaimed, and clients will receive a SOAP fault stating that the session is no longer available when a stateful Web service attempts to execute against the session.
-
Specify a custom namespace for the model — Choose a custom namespace for the model to use during deployment.
-
Show WSDL — Click either HTTP or HTTPS (secure connection) to open the WSDL in the default browser. From the right-click menu, select Copy URL to copy the URL to the WSDL to the clipboard.
The links will be disabled if you have not enabled the HTTP or HTTPS Web services options in the session server Web services property page or have not published the Web services.
More information
Working with SNMP
Host Integrator Servers can be configured to use Simple Network Management Protocol (SNMP) to distribute status information. The SNMP system uses a Network Management Station (NMS) of your choice to gather information about agents on your network. Host Integrator acts as an SNMP agent.
SNMP uses two communication methods:
- SNMP GET, which services Network Management Station requests to UDP port 161, by default.
Note
Some UNIX systems use port 161 as the default for SNMP. If the Verastream configuration uses the same port, no data will be returned. You may not notice the port conflict until you request statistics. Change the Host Integrator SNMP port number to something other than 161 to address the problem.
- SNMP TRAP, which asynchronously sends an event to configured Network Management Stations listening on UDP port 162.
Host Integrator supports both of these methods.
Using SNMP GETs
A GET is initiated when the NMS asks a Host Integrator Server (the agent), for information about its status. The NMS gathers information from agents using a Management Information Base (MIB), which specifies the structure and format of the information that is passed between the NMS and an agent. The NMS can use this information to track the general health of a Host Integrator Server and chart performance trends over time.
Using SNMP TRAPs
When the Host Integrator Server is configured to use traps, it sends a message (trap) to all configured management stations whenever certain events or error conditions occur. The trap contains little information (the event ID). Its purpose is to trigger the NMS so that it can perform an SNMP GET for more information, if desired, from the originating server.
Working with the Host Integrator MIB
The host integrator MIB file, vhi.mib, describes the types of information the Host Integrator makes available via SNMP to a Network Management Station. It is installed by default to the HostIntegrator\lib\java\ folder when you install the server. In most cases, you should copy the MIB on to an NMS workstation and load it into your NMS application of choice. The format of vhi.mib follows a standard defined by the IETF RFC 1155, which can be viewed on the IETF Web site.
The information provided in the Host Integrator MIB can be divided into three broad categories:
- Statistics on the usage of configured models and the performance of their respective host application.
- Statistics on the usage and load of configured session pools.
- Statistics on the occurrences of errors and other events within the Host Integrator Server.
For a list of specific data items provided within the above categories that are available via SNMP, see the contents of the vhi.mib file installed with the product.
Configuring Host Integrator SNMP Features
To configure SNMP, click SNMP Settings in the left pane of the Session Server Properties page.
To select the messages that are monitored by SNMP, click Messages in the left pane of the Session Server Properties page, and then click a category of messages. By default, all messages at error severity generate traps and are monitored in the SNMP MIB.
More information
Using the Session Monitor
You can use the session monitor within the Administrative Console to view and navigate between real-time screens of host session that are running on a given session server.
Viewing Sessions
After you connect to a session server, you can view active sessions on that server.
To view a session or session pool
- Connect to the session server that contains the session you want to view.
- In the Sessions view, select the session associated with the pool on the session server, right-click and choose View.
A session view window opens, displaying the session you selected. The current state of the session is represented, including the cursor position. The session window displays a real time view of the state of the session. All entity navigations and attribute updates are visible.
Session states visible in session monitor
There are 5 session states that are represented within the session monitor. They are:
- Idle - released from client, reset and ready to use. When idle sessions are created, they may briefly display Not Connected before connecting to the host.
- Active - in use by a client, or being told to disconnect from the host.
- Rogue - released from client, not reset, and not ready to use.
- Suspended - a persistent session waiting for a reconnect to occur.
- Terminated - normally a transient state signalling the end of the session.
Troubleshooting using the session monitor
You can use the session monitor view to collect the session's screens. This makes finding errors easier, especially for sessions in which the host interaction is rapid. Any change to the host screen causes the Session Monitor to record the current screen as a record.
More information