Using Commands to Deploy a Model Package
Host Integrator provides deployment commands that you can use from the command line or in a script to deploy a model to multiple servers. With this capability you can combine model files with any event handler files they use, and also with configuration information that tells a Host Integrator Server how to provide access to the model (for example, using a session pool of a certain size, or by using specific requests for a new session).
About Model Packages
A model package is a .zip archive that you create using the packagemodel command. A model package can contain the following items:
- Modelx file— The model package must include a modelx file, together with entityx files located in the entities directory. Tablex files, located in the tables directory, are needed if appropriate. The files can be located anywhere. You specify its location when you run the command to create a model package file (packagemodel).
- Model file—A model file is the only file that must be in the model package. It can be located anywhere. You specify its location when you run the command to create a model package file (packagemodel).
- Optional: Event handler files (*.JAR)—If your deployment includes event handlers, the event handler folders must be located in a folder named scripts beneath the folder that contains the model file.
- Optional: A configuration descriptor(deploy_desc.xml)—If your deployment includes a configuration descriptor, it must be located in a folder named deploy beneath the folder that contains the model file.
- Optional: A model variable list descriptor (mvl_desc.xml)—If your deployment includes a model variable list descriptor, it must be located in a folder named deploy beneath the folder that contains the model file.(See the documentation for the packagemodel command for exceptions.)
After you run the packagemodel command, the .zip file is created in your current working directory (unless you've specified a different name and location for the model package using the -package switch).
While a model package can only include one model, that model can, in turn, be deployed to multiple servers, optionally with different configuration information for each server.
How to Create and Deploy a Model Package
To create a model package for deployment, the only item you must have is a model file, unless your model uses event handlers, then the event handler .JAR files must also be present. If you're using session pools, or if your model uses model variable lists, you will also need to create configuration descriptor .xml files.
For each model that you intend to deploy using the new deployment commands, do the following:
- Create a model.
- (Optional) Create event handler .JAR files.
- (Optional) Write descriptors: either just a configuration descriptor or a configuration descriptor and a model variable list descriptor. A configuration descriptor is required if you want to use session pools, or if you have multiple configuration targets. A variable list descriptor is required if your model uses one or more model variable lists. Because model variable lists contain model variable values for all sessions in a session pool, you cannot have a model variable list descriptor file unless you also have a configuration descriptor file.
- Use the packagemodel command to create a model package. The packagemodel command can be executed from any folder, as long as
<VHI install folder>\binis in your PATH. - Deploy the model using the activatemodel command. To deactivate an activated model, use the deactivatemodel command. You can open a command window set to the appropriate path by running
/hostintegrator/bin/deployCommandWindow.bat.
Writing the Descriptors
Descriptors are .xml files that describe a model's configuration and how it should be deployed. For each model package that you create you can supply a configuration descriptor and a model variable list descriptor.
A configuration descriptor file specifies how a model should be deployed to a server. A configuration descriptor is an efficient means to deploy to multiple targets using a command line.
A variable list descriptor is required if your model uses one or more model variable lists. Because model variable lists contain model variable values for all sessions in a session pool, you cannot have a model variable list descriptor file unless you also have a configuration descriptor file.
A sample configuration descriptor file (deploy-ex3.xml) is in your <VHI install folder>\Help\plugins\com.attachmate.vhi.help\html\ reference folder.
There are two ways that you can create a descriptor:
- Using an XML schema: An XML schema for both descriptor files, named
vhi_deploy.xsd, is located in thelib\schemafolder of your Verastream installation. With an XML editor you can use this schema to help create descriptors files. - By hand: You can create the descriptors by hand using a text editor such as Notepad.
Configuration descriptor files have four main sections:
-
The configuration descriptor header provides standard XML root tag information, such as XML namespace and schema information, and also provides the name of the model you are deploying.
-
The Deployment Targets section is where you specify a unique name to identify one or more configuration targets. This is a required attribute for any configuration descriptor file. The name you provide is used when you execute the activatemodel command.
Note
If there is only one deployment target, you can use the name "default". You can then omit the target parameter when issuing the activatemodel command.
You can also specify one or more model configurations and session pool configurations, which you define later in the file. All of these names -- deployment target name, model configuration name, and session pool configuration name -- are unique names that you create in this file. They do not necessarily relate to names you provided while creating a model file.
-
The Model Configurations section is where you provide the name or IP address of the host on which the modeled application is running, as well as the port number. This collection of information is called the model configuration. You can specify one model configuration or several, if the modeled application is running on several hosts. Model Configurations are referenced in Session Pool Configurations (required if using session pools) or in the Deployment Targets (optional, to override the host configured in the model). If you have no model configuration defined, the model deploys to the default host configured within the model (Design Tool > Connection Menu > Session Setup> Host name or IP address).
The Model Configurations section of the descriptor is where you also specify the Web service settings you want to use for the non-pooled model session. Model Web service settings are not inherited by the pool; you should configure each pool separately. These settings are described in detail in the Administrative Console help.
-
Session Pools are sets of host sessions preconfigured for access by data objects. These host sessions can be configured with model variables and a starting entity, which allows faster host session allocation and access to the host system because the host session can be logged on and waiting at the host application's main entry screen (entity) when a data object is ready to use it. You can create and monitor pools in the Administrative Console.
If your model uses session pools, you can use the Session Pool Configurations section to define which session pools are configured. Each session pool configuration name, such as
pool-one-cfg, is also referenced in the Deployment Targets section by any target where you want to create the session pool on activation.You can also configure Web service information for the pooled session. Each pool must be configured separately or session server defaults are used. The Web service elements are optional, but if they are included, they must be shown in the order below. If an element is not used, the session server default is used
Note
If you're upgrading from an earlier version of Host Integrator, you may have a significant amount of model or session pool configuration information. If you want to update a model without affecting existing configuration information, do not include descriptor files in your model package.
You should also not create descriptor files if you use an external service to handle your host passwords. In such a situation, a model variable list descriptor, which provides host user IDs and passwords, would be difficult to keep up-to-date.
Example descriptor files
XML header example:
<model-configuration-descriptor
   xmlns:xsi="http://www.w3.org/2001/XMLSchema-instance"
   xsi:schemaLocation="http://www.wrq.com/vhi schema/vhi_deploy.xsd"
   xmlns="http://www.wrq.com/vhi"
   model-name="AccountingSystem"
   version="1.0">
</model-configuration-descriptor>
Deployment targets example
In this example, executing the activatemodel command on deployment target two-pools specifies activation of the AccountingSystem model (defined under XML Root Tag) using 1) accounting-host, a model configuration you define in the Model Configurations section, and 2) pool-one-cfg and pool-two-cfg, session pool configurations you define in the Session Pool Configurations section.
<deployment-target name= "two-pools">
    <pool-config-ref>pool-one-cfg</pool-config-ref>
    <pool-config-ref>pool-two-cfg</pool-config-ref>
</deployment-target>
For a given named model and session server combination, only one deployment target at a time can be active. You can configure multiple session pools in the same target, and you can run activatemodel multiple times to use the same target with multiple servers. However, you cannot run activatemodel multiple times with different targets on the same server -- only the last target specified is in effect.
Model configurations example
In this example, the user has defined host pincher and port 21 on pincher as the accounting-host model configuration. Using this example with the example under Deployment Targets, the model called AccountingSystem connects to port 21 of host pincher. The default model debug messages recording mode is record-nothing. The other options are record-errors, record-errorsessions, and record-everything. To start debugging on a production server, try record-errors first.
The Web service configuration is defined in the ws-config section. The ws-config section and the elements contained within the section are optional. Any elements you include must be listed in the order shown in this example. If a setting is not included, session server default values are used.
<model-configuration name= "accounting-host">
  <host-name>pincher</host-name>
  <host-port>21</host-port>
  <recording-mode>record-nothing</recording-mode>
  <ws-config>
    <publish-service-enabled>true</publish-service-enabled>
    <ws-resource-enabled>true</ws-resource-enabled>
    <execute-sql-statement-enabled>false</execute-sql-statement-enabled>
    <process-string-enabled>false</process-string-enabled>
    <method-timeout-msec>60000</method-timeout-msec>
    <suspend-timeout-minutes>60</suspend-timeout-minutes>
    <ws-namespace>urn:xmlns:model-namespace</ws-namespace>
  </ws-config>
</model-configuration>
More information
-
Model configuration properties, including Web service settings, can be set in the Administrative Console.
-
You can use the
ws-namespacevalue to provide a custom namespace for a model or pool during deployment. -
To revert to the original default session server settings for a particular model or pool, you can:
-
Clear all values:
<ws-config xsi:nil="true"/>or - Clear a specific value:
<publish-service-enabled xsi-nil= "true">
Session pool configurations example
<!-- A pool that uses an MVL from the MVL descriptor, model variable override, session pool, and Web service information -->

<pool-configuration name="pool-one-cfg">
    <pool-name>PrimaryAccounting</pool-name>
    <model-config-ref>accounting-host</model-config-ref>
    <min-sessions>5</min-sessions>
    <max-sessions>200</max-sessions>
    <max-free-sessions>150</max-free-sessions>
    <initial-free-sessions>20</initial-free-sessions>
    <max-pending-sessions>30</max-pending-sessions>
    <connect-delay>30</connect-delay>
    <max-retries>4</max-retries>
    <pool-started>true</pool-started>
    <startup-entity>Main</startup-entity>
    <model-variable-list>user-list-one</model-variable-list>
    <variable-override name="department" value="sales" hidden="true"/>
    <ws-config>
        <publish-service-enabled>true</publish-service-enabled>
        <ws-resource-enabled>true</ws-resource-enabled>
        <execute-sql-statement-enabled>false</execute-sql-statement-enabled>
        <process-string-enabled>false</process-string-enabled>
        <method-timeout-msec>60000</method-timeout-msec>
        <suspend-timeout-minutes>60</suspend-timeout-minutes>
        <ws-namespace>urn:xmlns:pool-namespace</ws-namespace>
    </ws-config>
</pool-configuration>

<!-- A pool that uses an MVL from the MVL descriptor -->

<pool-configuration name="pool-two-cfg">
    <pool-name>SecondaryAccounting</pool-name>
    <model-config-ref>accounting-host</model-config-ref>
    <min-sessions>10</min-sessions>
    <max-sessions>40</max-sessions>
    <startup-entity>Main</startup-entity>
    <model-variable-list>user-list-one</model-variable-list>
</pool-configuration>
For each session pool configuration, the sub-nodes <pool-name>, <model-config-ref>, <min-sessions>, <max-sessions>, and <startup-entity> are required. If the session pool uses a model variable list, <model-variable-list> is also required. Use one or more variable override names to set a variable's value for all sessions in the pool to the same value.
Note
When you enter values in this section of the file each entry must occur in the order laid out below.
Setting pool properties and scheduling is more easily accomplished using the user interface in the Administrative Console since it is handled by the management server. However, you can use this section to enter values.
Use the following table as a guide for filling out this section:
| Item | Required | Details |
|---|---|---|
<pool-configuration name> |
X | The name of the pool configuration, referenced in the Deployment Targets section. |
<pool-name> |
X | How the pool is referenced when it's on the server. |
<model-config-ref> |
X | A reference to the model configuration name. The Deployment Targets section and one or more pools will refer to this name. |
<min-sessions> |
X | The minimum number of sessions that the pool should contain. |
<max-sessions> |
X | The maximum number of sessions that the pool should contain. |
<max-free-sessions> |
Optional | Maximum idle sessions. Maximum idle sessions cannot exceed the Maximum concurrent sessions defined for the pool, or your licensed session limit, which is displayed as the maximum value for this option. |
<initial-free-sessions> |
Optional | Initial idle sessions. Specifies the number of sessions that are preloaded by the server. This is the number of sessions that a server should preconnect. |
<max-pending-sessions> |
Optional | Maximum pending sessions. The maximum number of sessions trying to connect to the host simultaneously. The actual number may be much less if the sessions start and login rapidly. |
<connect-delay> |
Optional | Connection throttle delay (seconds). The amount of time to wait since the last host connection before attempting another. |
<max-retries> |
Optional | Maximum retry backoff (n=0 is 1 second, n=1 is 2 seconds, n=2 is 4 seconds, n=3 is 8 seconds, and so forth). Each time there is an error starting host sessions in a pool, the pool waits for an increasing amount time before trying again (it backs off). This option limits the retry backoff so the delay doesn't become too long. |
<pool-started> |
Optional | Indicates if the pool should start automatically when deployed, true or false. |
<startup-entity> |
X | The entity in the model that will serve as the session pool's startup entity. |
<model-variable-list> |
Optional | If the pool has a model variable list, this is where you provide its name. This is the name of the model variable list, as the server knows it. Its contents are defined in the model variable list descriptor file. |
<variable-override-name> |
Optional | If the pool has one or more model variable overrides, list them here. |
Model Variable List Descriptor
A model variable list descriptor file defines the contents of one or more model variable lists. These lists are referenced by name from the configuration descriptor file's Session Pool Configurations section.
A sample model variable list descriptor (mvl-example.xml) is in your <VHI install folder>\help\plugins\com.attachmate.vhi.help\html\ reference folder.
Model variable list descriptor files have two main sections:
XML Root Tag
The model variable list descriptor header provides standard XML root tag information, such as XML namespace and schema information, as well as the name of the model you are deploying. Here's a sample of the XML header for a model variable list descriptor:
<mvl-descriptor
   xmlns:xsi="http://www.w3.org/2001/XMLSchema-instance"
   xsi:schemaLocation="http://www.wrq.com/vhi schema/vhi_deploy.xsd"
   xmlns="http://www.wrq.com/vhi"
   version="1.0">
</mvl-descriptor>
Model Variable List
The Model Variable List section is where you provide the contents of one or more variable lists for your model:
<model-variable-list name= "user-list-one">
  <model-variable name= "userID" hidden= "false" unique= "true"/>
  <model-variable name= "password" hidden= "true" unique= "false"/>
    <value-row>
      <value>fred</value>
      <value>pass</value>
    </value-row>
    <value-row>
      <value>jimbo</value>
      <value>pass</value>
    </value-row>
</model-variable-list>
For each model variable list, the sub-nodes <model-variable-list name>, <model-variable name>, <value-row>, and <value> are required. The first <value> in each <value-row> corresponds to the value of the first <model-variable>, the second corresponds to the value of the second <model-variable>, and so forth.
Use the following table as a guide for filling out this section:
| Item | Required | Details |
|---|---|---|
<model-variable-list name> |
X | The name of the model variable list. |
<model-variable name> |
X | How a model variable is referenced when it's on the server. Model variables can be hidden or visible (hidden=true or hidden=false) and unique or non-unique (unique=true or unique=false). A variable marked as hidden can be optionally encrypted in the model package file. A variable marked as unique must have entirely unique values. |
<value-row> |
X | A group of variable values, usually a user name and password for a host application. |
<value> |
X | An individual value in a value row - usually a user name or password for a host application. |
Using the activatemodel Command
Use the activatemodel command to deploy or redeploy a model, its event handlers, and its configuration information to a running Host Integrator Server
About the activatemodel Command
The activatemodel command references data in a model package file in determining how to deploy or redeploy a model. Any deployment target defined within the package can be activated on the specified server.
If a model that is being activated already exists on a server, a redeploy will occur automatically. Any configuration related to the existing model is deleted in favor of the configuration specified in the configuration target. New configuration information is not merged with previous configuration information. The only exception is for a model package that contains no configuration descriptors (as opposed to empty configuration descriptors) that is activated. In that case, the activatemodel command will simply update the model and (if provided) its event handlers, leaving any session pools or model variable list configurations that are specific to this model untouched in the Verastream Administrative Console.
Note
Before you use the activatemodel command, you must first create the model package using the packagemodel command.
Command Syntax
activatemodel -package input_package_file
[ -target configuration_target]
[ -server vhi_server]
[ -user username with -password password]
[ -passphrase encryption_passphrase]
[ -mgmtserver management_server]
| Option | Short version | Description |
|---|---|---|
| package | -p | The file name of the model package to activate. The file name specified can either be fully qualified or relative to the current working directory. Required. |
| target | -t | The configuration target defined within the model package you wish to activate. This switch is optional. If it is not supplied, the target default is implied. |
| server | -s | The network name of the Host Integrator Server where the model is to be activated. This switch is optional. |
| user and password | -u and -v | The user credentials of the Host Integrator administrator. Optional. |
| passphrase | -e | A pass phrase used to generate a decryption key for sensitive data contained within the model package. It must match the phrase used when the model package was created. This switch is optional. |
Users deploying a model in a Kubernetes environment can use the -mgmtserver or -m option to deploy a model to the Management Server. New Host Integrator Session Servers that register with the management server will deploy the model upon startup.
Command Examples
The first command activates the model contained within MyModel.zip using the default configuration target. The model is activated on the same machine from which the command was executed:
activatemodel -package MyModel.zip
The next command activates the model contained within MyModel.zip in the current working directory, using the Zephyr configuration target, on the machine whose network name is VHI_Server. As demonstrated by the first command, above, if no -server switch is supplied, the model is activated on the VHI server where the command is executed. To activate a model on multiple machines you would execute the command multiple times, with different -server values.
activatemodel -package MyModel.zip -target Zephyr -server VHI_Server
The next command uses the short versions of the switches instead of the long versions (for example, -s instead of -server). Also, this command assumes that security is activated on the Host Integrator installation and provides the Host Integrator administrator user name and password. Finally, assuming that the pass phrase "In sequent toil all forwards do contend" was provided when the model package was created, it is provided here so that a decryption key for sensitive data can be generated.
activatemodel -p MyModel.zip -t Zephyr -s VHI_Server -u VHIadmin -w VHIPassWord
-e "In sequent toil all forwards do contend"
Using the packagemodel Command
Use the packagemodel command to combine a model file, its event handler files, and its configuration information into a single distributable file, the model package. Sensitive information included with the model package, such as password lists, can be encrypted.
About the packagemodel Command
While everything contained within a model package relates to a single model, that model can be deployed to several servers, each with a different configuration, such as different session pool parameters and model variables. The packagemodel command is what you use to create the model package. To activate the model package, use the activatemodel command.
Requirements
Before you use the packagemodel command, all necessary files should be present:
- The model files
- Optional. Event handler .JAR files. If your model uses event handlers, these files should be in a folder named "scripts", beneath the folder that contains your model file.
- Optional. Descriptor files. A configuration descriptor file is required if you want to use session pools, or if you have multiple configuration targets. If your model uses one or more model variable lists, a model variable list descriptor file is also required, in addition to a configuration descriptor file. Because model variable lists contain model variable values for all sessions in a session pool, you can't have a model variable list descriptor file without also having a configuration descriptor file. Descriptor files should be in a folder named "deploy", beneath the folder that contains your model file.
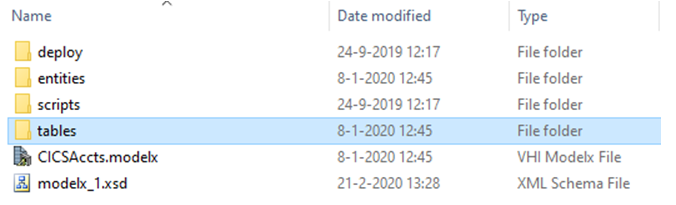
Sample directory structure
The packagemodel command can be executed from any folder, as long as <VHI install folder>\bin is in your PATH.
packagemodel Command Syntax
packagemodel -model model_directory\model_file
[ -package output_package file]
[ -mvl mvl_descriptor -model model_directory\model_file]
[ -passphrase encryption_passphrase]
| Option | Short version | Description |
|---|---|---|
| model | -m | The model you want to package for deployment. The value for this option can either be a model file modelname.modelx or the older specification modelname.model, or a model directory name modeldir containing a model file of the same name modeldir.modelx or modeldir.model. See below for more information. |
| mvl | -l | Specifies the location of a variable list descriptor file. While any model variable list descriptor named mvl_desc.xml, located in the deploy directory, is automatically included in the model package, there may be circumstances where a model variable list is shared between multiple models. The use of this switch allows the administrator to override the default behavior and explicitly specify a model variable list descriptor file to package with the model. The path specified can either be fully qualified or relative to the current working directory. This switch is optional. |
| package | -p | This switch specifies the file name of the created model package. The file name specified can either be fully qualified or relative to the current working directory. This switch is optional. By default, the model package is named "modelname.zip" and placed in the current working directory. |
| passphrase | -e | This switch specifies a pass phrase used to generate an encryption key for encrypting sensitive data contained within the model package. Specifically, the values of any variables marked as "hidden" within the configuration descriptors are encrypted. This switch is optional. By default, encryption is not used. The phrase specified should either be a combination of eight or more random characters or a word phrase of five or more words. Spaces are significant; if they are used, the phrase should be placed in quotes. |
More about the model option (-m)
If directory modeldir contains both a .modelx and a .model file, you must specify the file you want to use: modeldir\modeldir.modelx or modeldir\model. The path specified can either be fully qualified or relative to the current working directory. This switch is required.
If a subdirectory named deploy exists in the model directory, it is automatically searched for configuration descriptors. Specifically, if a file named deploy_desc.xml exists, it is assumed to be a configuration descriptor and included in the package. If a configuration descriptor was found, and a file named mvl_desc.xml exists, it is assumed to be a model variable list descriptor and included in the package.
If a subdirectory named scripts exists in the model directory, the model is assumed to use event handling. All JAR files (Java) or assembly files (.NET) are found in the scripts/lib folder and are included in the package.
Examples
The first command creates a package file for MyModel called MyPackage.zip and places it in the current working directory, which is the model directory. If a subdirectory named deploy exists in the model directory, it is searched for the descriptor files deploy_desc.xml and mvl_desc.xml. If these files exist, they are assumed to be the configuration and model variable list descriptor files and they are included in MyPackage.zip. You can also identify the model you want to package by using the -m or -model switch to specify the model directory instead of the actual model file.
It is possible to have both a model and modelx file in a model directory. This can happen when you use Save As and write a modelx file into the original model directory or vice versa. In this situation you will receive an error when running the package command and be prompted to supply the name of the file you want to use.
To specify what file you want to use, type:
packagemodel -model MyModel/MyModel.modelx -package MyPackage.zip
or
packagemodel -model MyModel/MyModel.model -package MyPackage.zip
The next command is equivalent, except it uses the model variable list descriptor file MyModelMVL.xml instead of deploy\mvl_desc.xml:
packagemodel -model MyModel -package MyPackage.zip -mvl MyModelMVL.xml
The final command uses short versions of the switches (for example, -m instead of -model) and uses the password phrase "In sequent toil all forwards do contend" to generate an encryption key for sensitive data contained within the model package. This means that variable values in the descriptor files that are marked "hidden" are encrypted:
packagemodel -m MyModel -p MyPackage.zip -l MyModelMVL.xml
-e "In sequent toil all forwards do contend"
Using the deactivatemodel Command
The deactivatemodel command allows you to remove a previously activated(deployed) model and its related configuration from a running Host Integrator Server.
Note
Before you use the deactivatemodel command, you must have an activated model running on a Host Integrator Server. Only the model name is needed. You do not need to provide the path to the model.
Syntax
deactivatemodel -model model_name
[ -server vhi_server]
[ -mgmtserver management_server]
[ -user username -password password]
| Option | Short version | Description |
|---|---|---|
| model | -m | This switch specifies the name of the model to deactivate. Required. |
| server | -s | The network name of the Host Integrator Server on which to deactivate the model. This switch is optional. If it is not supplied, the network name localhost is implied. |
| user | -u | The user credentials of the Host Integrator administrator. Required. |
| password | -w | The credentials of the Host Integrator administrator. Required. |
Users deactivating a model in a Kubernetes environment can use the -mgmtserver or -g option to deactivate a model to the Management Server. New Host Integrator Session Servers that register with the management server will not deploy the model upon startup.
deactivatecommand Examples
The first command removes the model Mymodel from the Verastream server running on the local computer. It also deletes any session pools and model variable lists used solely by this model:
deactivatemodel -model MyModel
The following command removes the model Mymodel from the server VHI_Server. It also deletes any session pools and model variable lists used solely by this model:
deactivatemodel -model MyModel -server VHI_Server
The final command uses the short versions of the switches. Since security is enabled by default on the Host Integrator Server, the Host Integrator administrator's user name and password must be provided to deactivate the model.
deactivatemodel -m MyModel -s VHI_Server -u VHIadmin -w VHIPassword