Configuring Project Properties
You can customize how Web Builder generates a project by setting project properties. Set default properties for each type of project, or set properties for specific, individual projects.
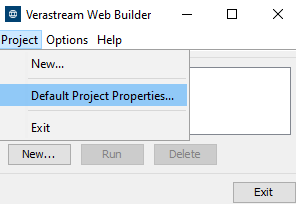
Default project properties
Web Builder generates a project based on the default settings for that project type. You can modify the default project properties using the Default Project Properties dialog box. Any new project you generate uses the new settings.
Project Properties for Specific Projects
To configure properties for a specific project prior to building that project, click Properties on the New Project dialog box and enter information into the Project Properties dialog box.
To configure properties for a specific project after the project has been created, right-click the project and select Properties, or click Properties on the Web Builder menu. The project will automatically rebuild to incorporate the property changes.
Common Property Settings
These options affect how Web Builder generates all projects:
| Property | Description |
|---|---|
| Launch browser when build succeeds | Select this option to automatically open projects in a browser after the build successfully generates them. |
| Logging | Select Use verbose logging to expand the information in the log file. This option provides information that can be helpful in debugging problems with the build process. |
| Store projects in this directory | You can specify the directory in which Web Builder finds and builds projects. The default is <Documents>\Micro Focus\Verastream\HostIntegrator\projects. Click Browse to specify another directory. The directory you specify applies to all projects you open and save in the Web Builder. Any changes to the default folder will not affect the location of previous Web Builder projects. |
| Defaults button | To return the common settings to default values, click the Defaults button at the bottom of the Web Builder Settings dialog box. |
Microsoft Tools Settings
Set the following options for Microsoft tools and utilities:
-
From the Options menu, click Web Builder Settings. Select Microsoft Tools in the right pane. The fields are initially populated with the default Microsoft install locations.
-
To adjust the settings, modify the following:
- .NET Framework directory
Enter the location of the .NET Framework directory (C:\Windows\Microsoft.NET\Framework64\v4.0.30319 by default), or click Browse to find the directory. Web Builder uses this information to compile and open .NET projects in Visual Studio .NET.
Web Builder supports new .NET projects. Previously created .NET 2.0 projects can still be modified. Use this setting to change to the appropriate location for your project if it is not already selected as the default.
The first time it runs, Web Builder searches for the latest version of .NET Framework. If you install a new or more recent Framework, you may have to change this setting.
- Root directory for IIS
Enter the location of the Internet Information Services (IIS) root directory, or click Browse to find the directory. Web Builder creates project files that need to be copied into the IIS folder structure. The default is C:\Inetpub.
-
You can click Default at anytime to return to the original Microsoft default install paths.
-
Click OK.
For more details on configuring Web Builder project settings, see: